LINE LIFF Custom Feature
The integration of LINE LIFF with SimplyBook.me presents a powerful opportunity for businesses to elevate their appointment booking process and customer engagement. By offering a seamless and efficient experience directly within the Line messaging app, businesses can attract and retain customers, streamline their operations, and stay ahead in the competitive market.
Please note! Client Fields custom feature is not compatible with LINE LIFF feature.
- How to use
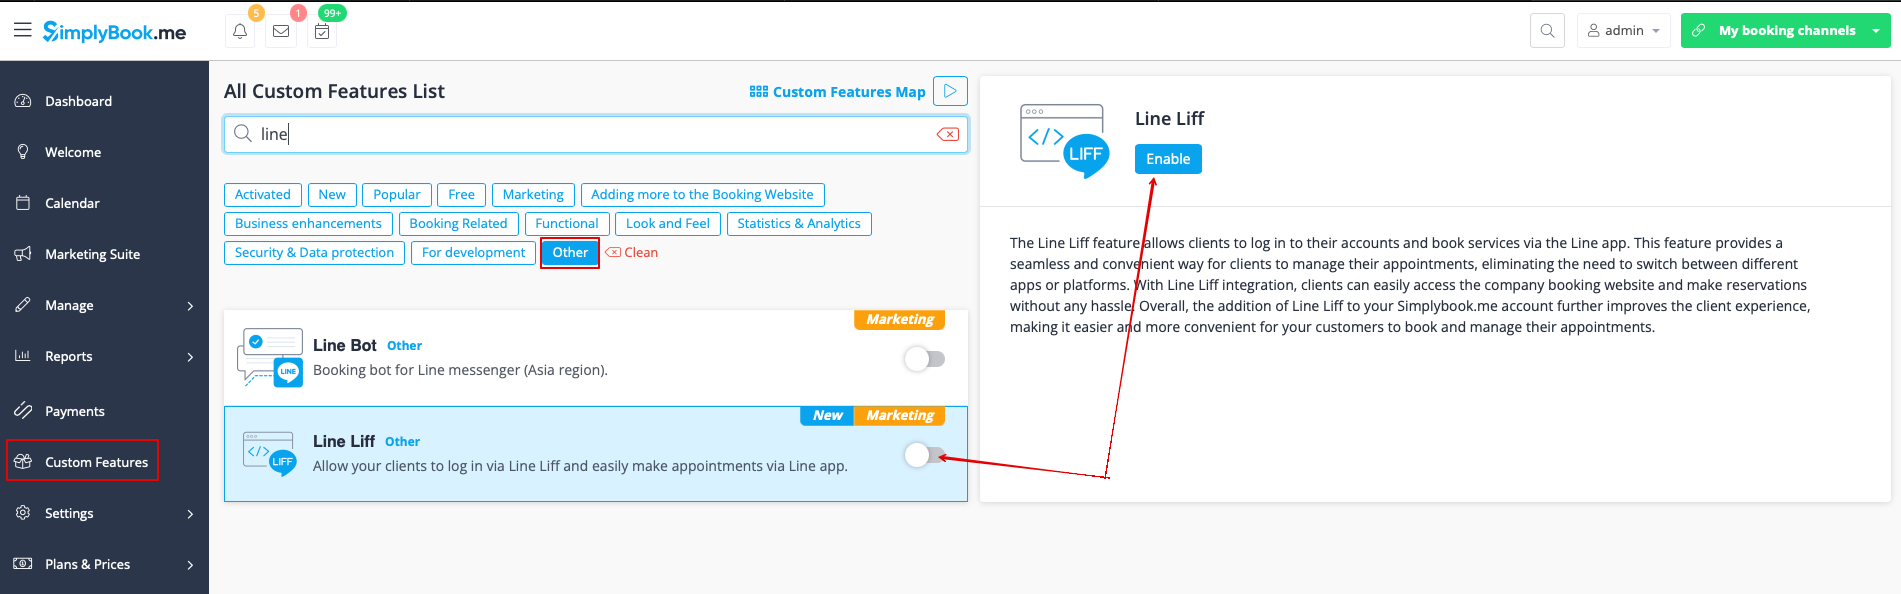
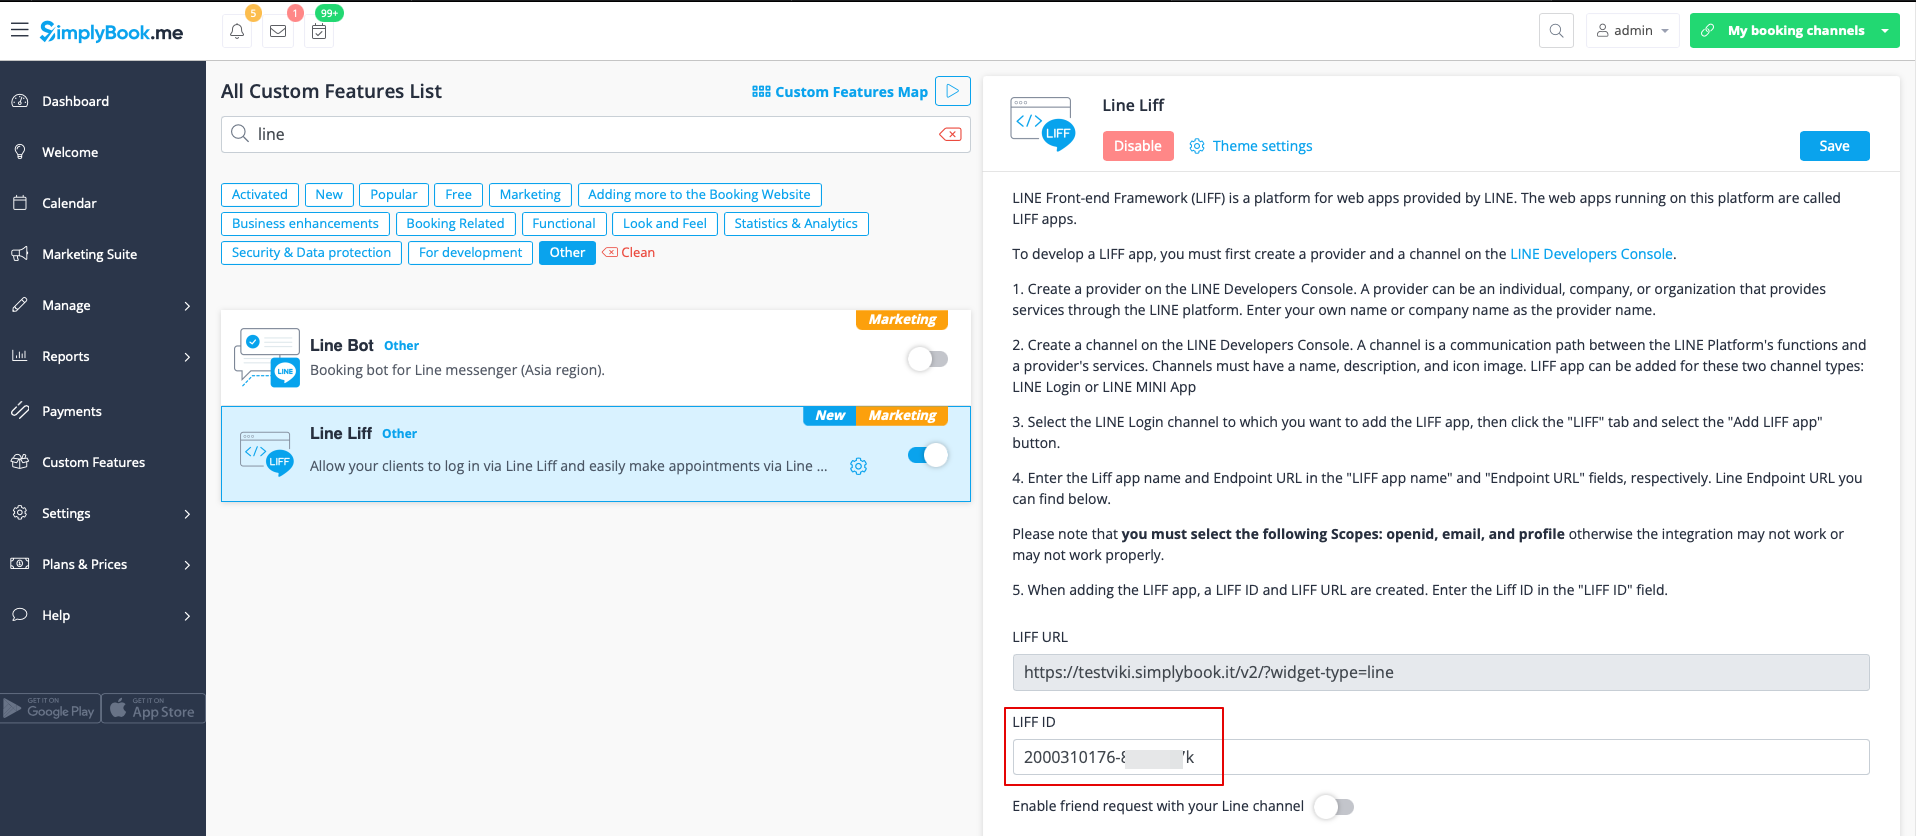
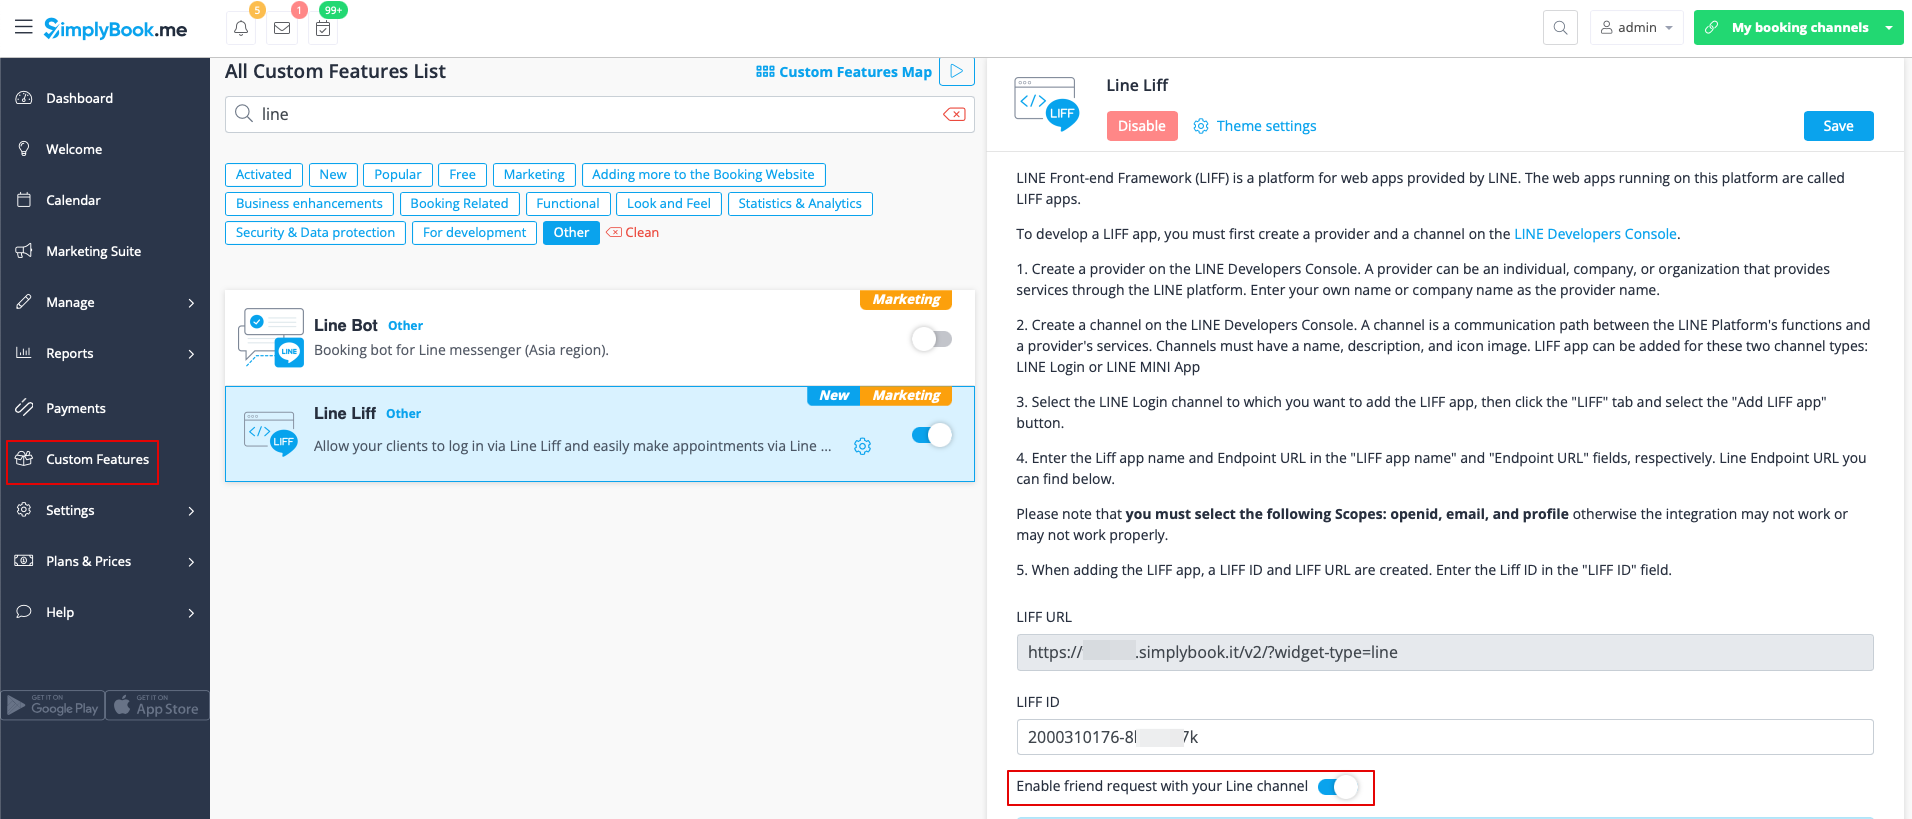
- 1. To enable this feature, go to the Custom Features section using the left-side menu of your admin interface, find LINE LIFF, and click on Enable button or use the switcher.
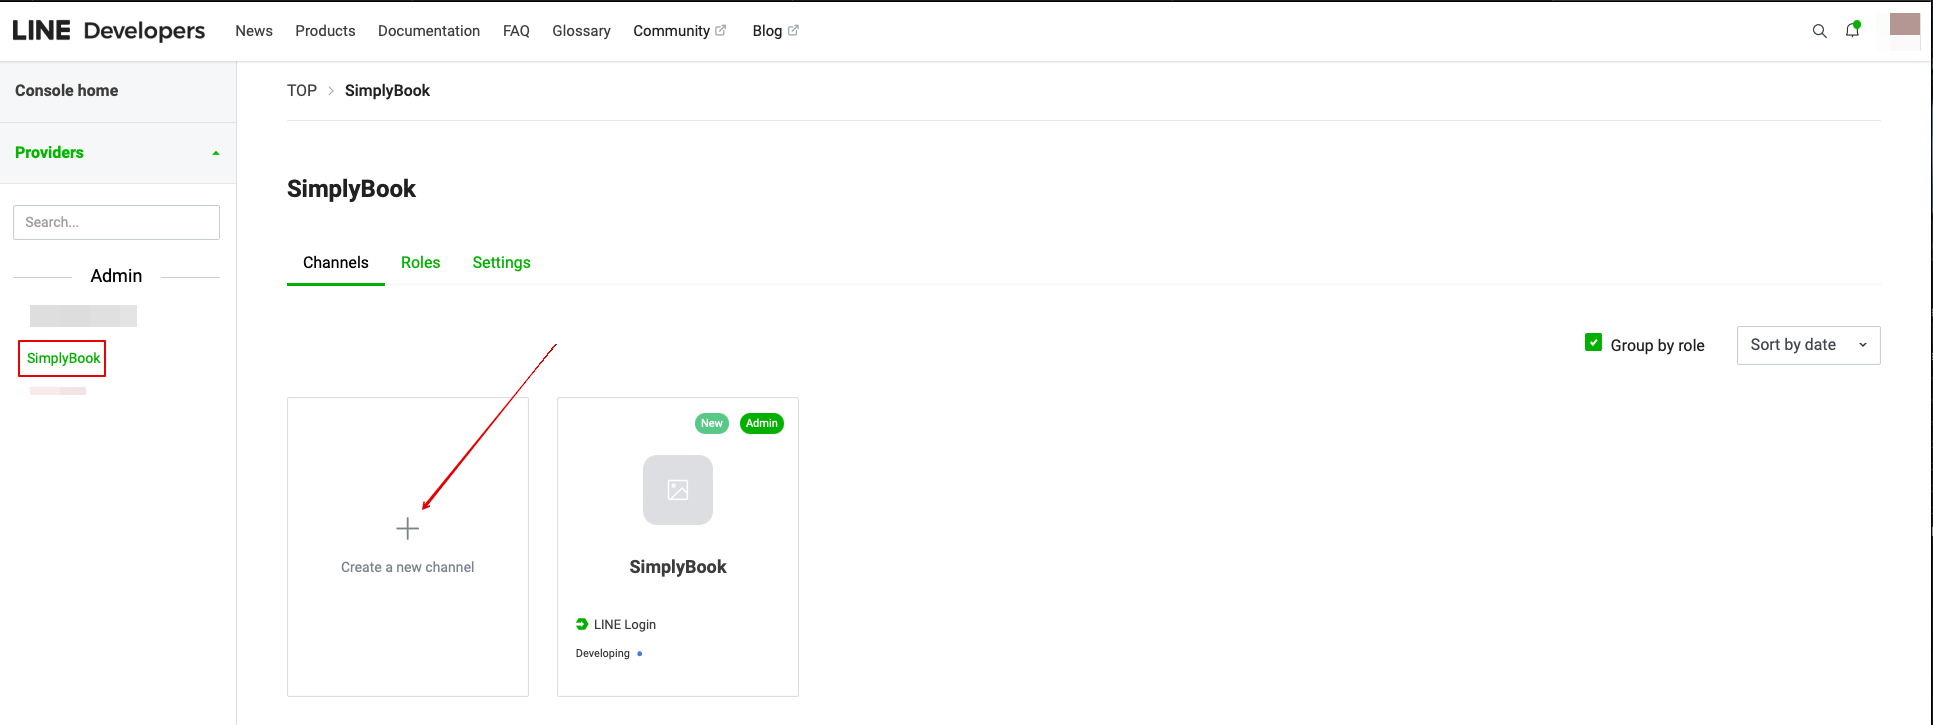
- 2. To integrate a LIFF app, you need to create a provider and a channel on the LINE Developers Console.
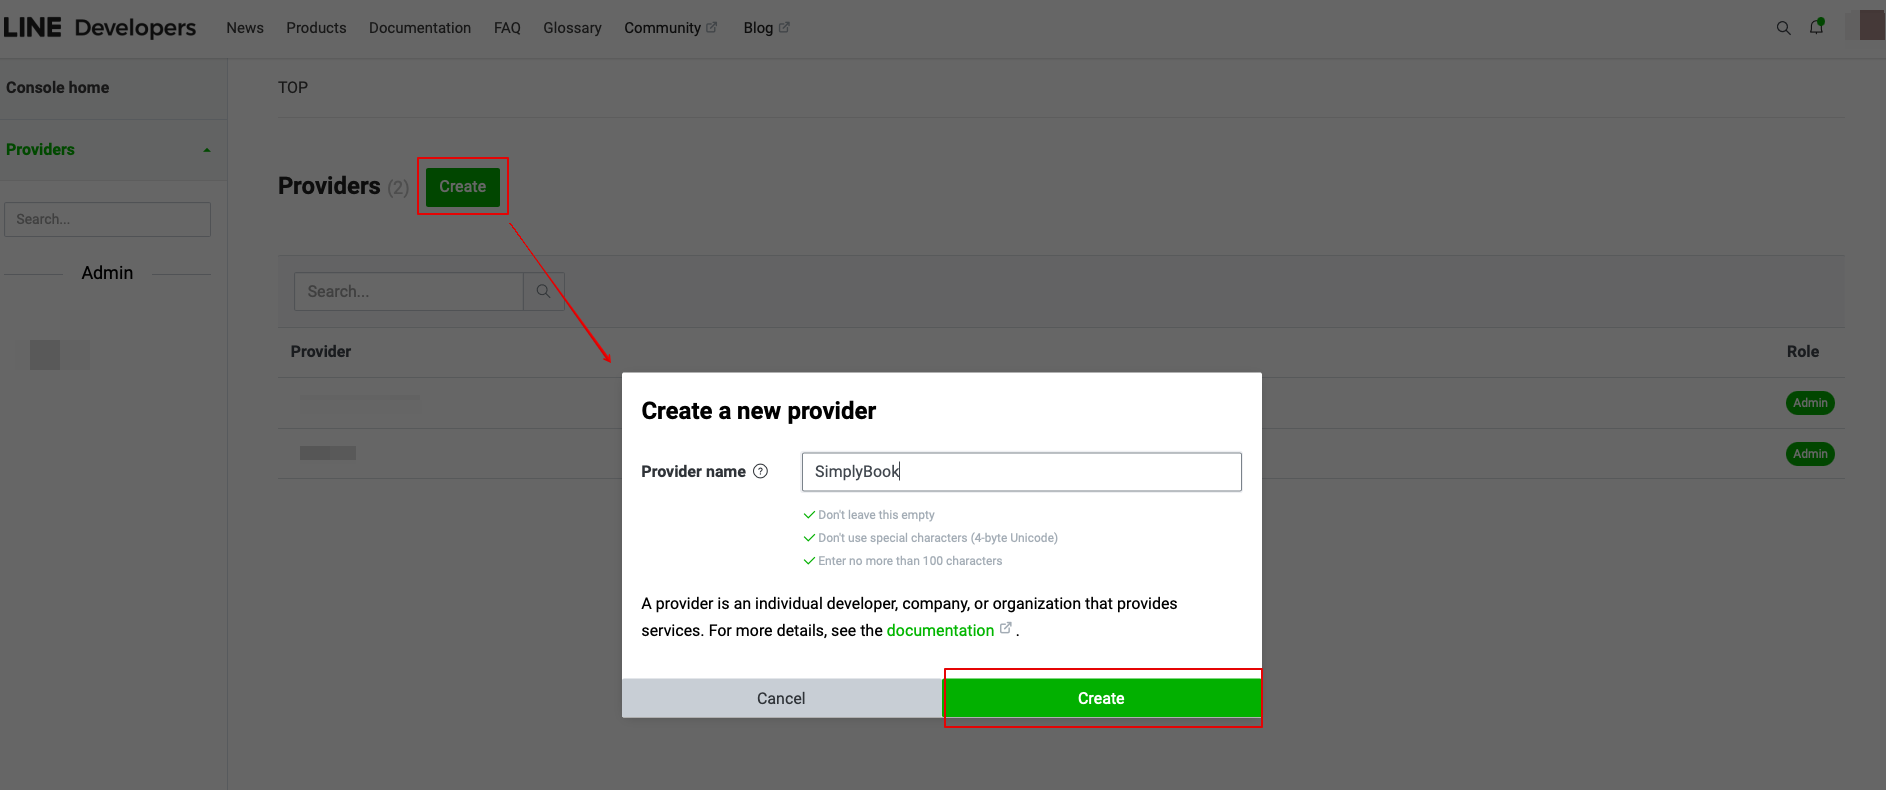
- 3. Once you sign up there, proceed to creating a provider instance.
- (provider can be an individual, a company, or an organization that provides services through the LINE platform)
- Enter the desired name or company name as the provider name to the corresponding form.
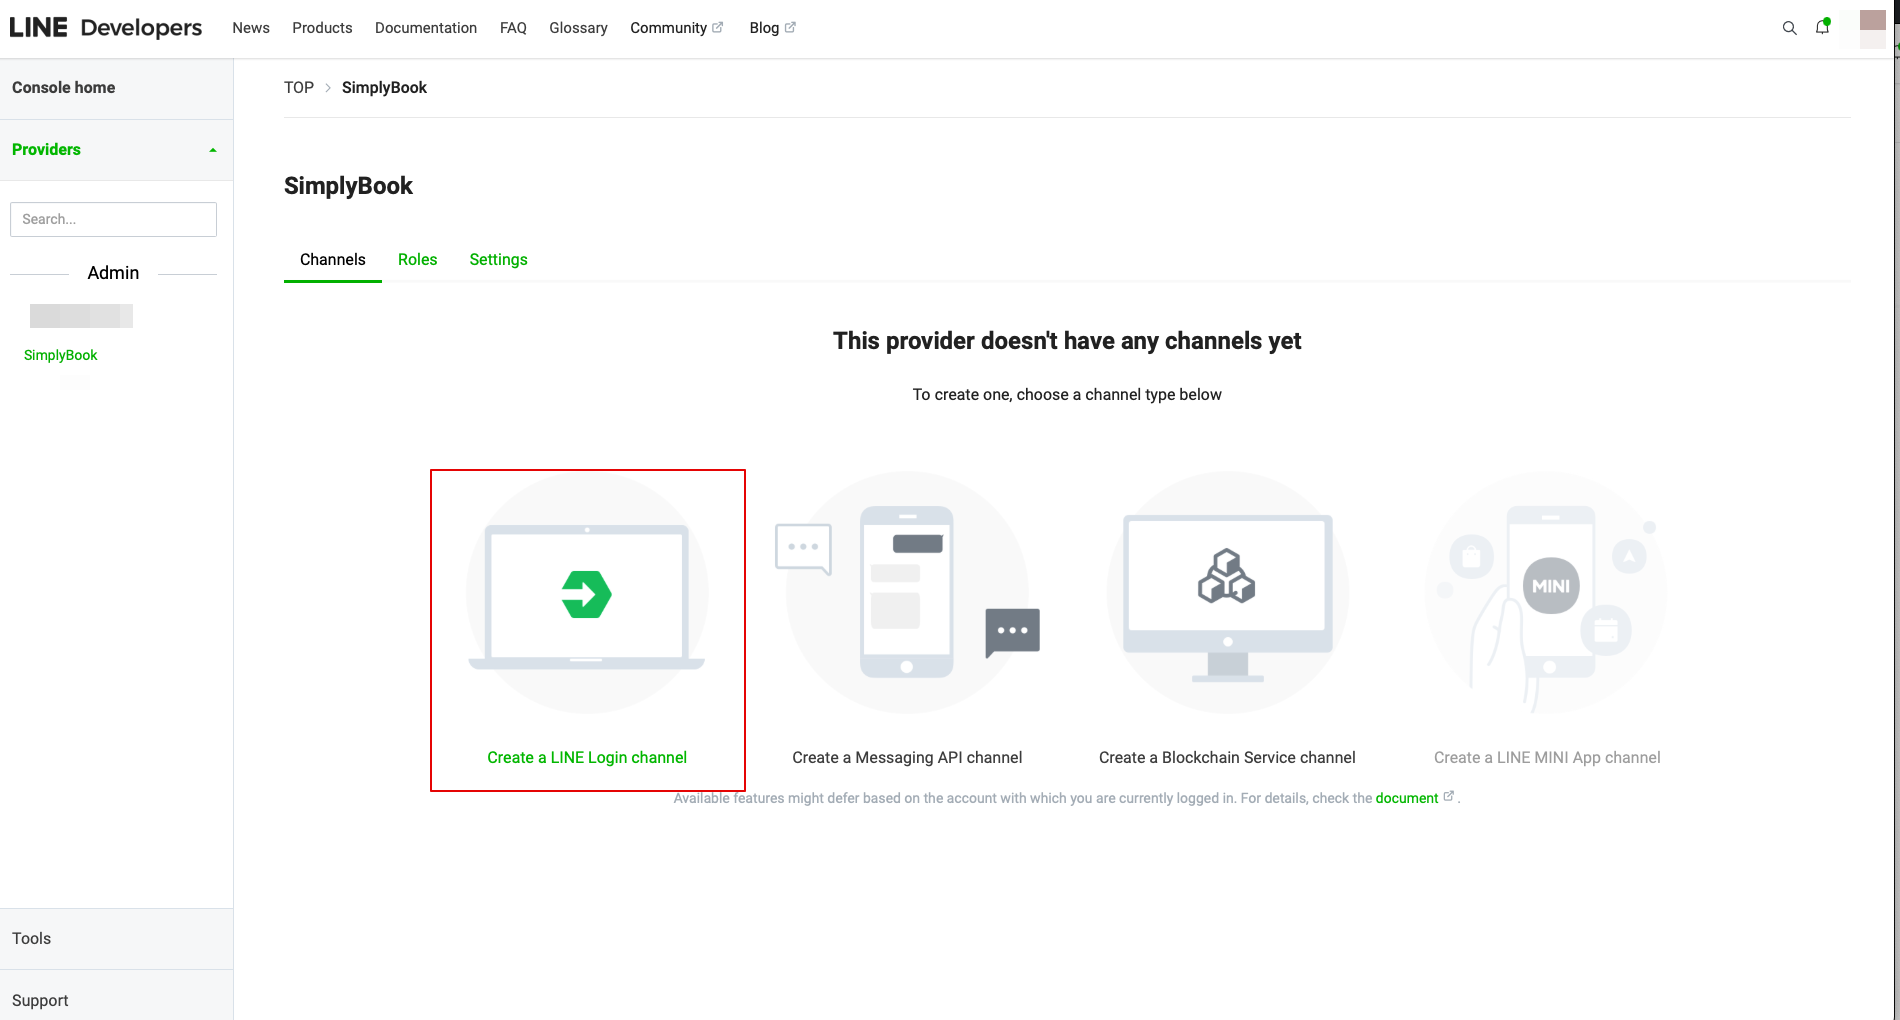
- 4. Then go to create a LINE Login channel.
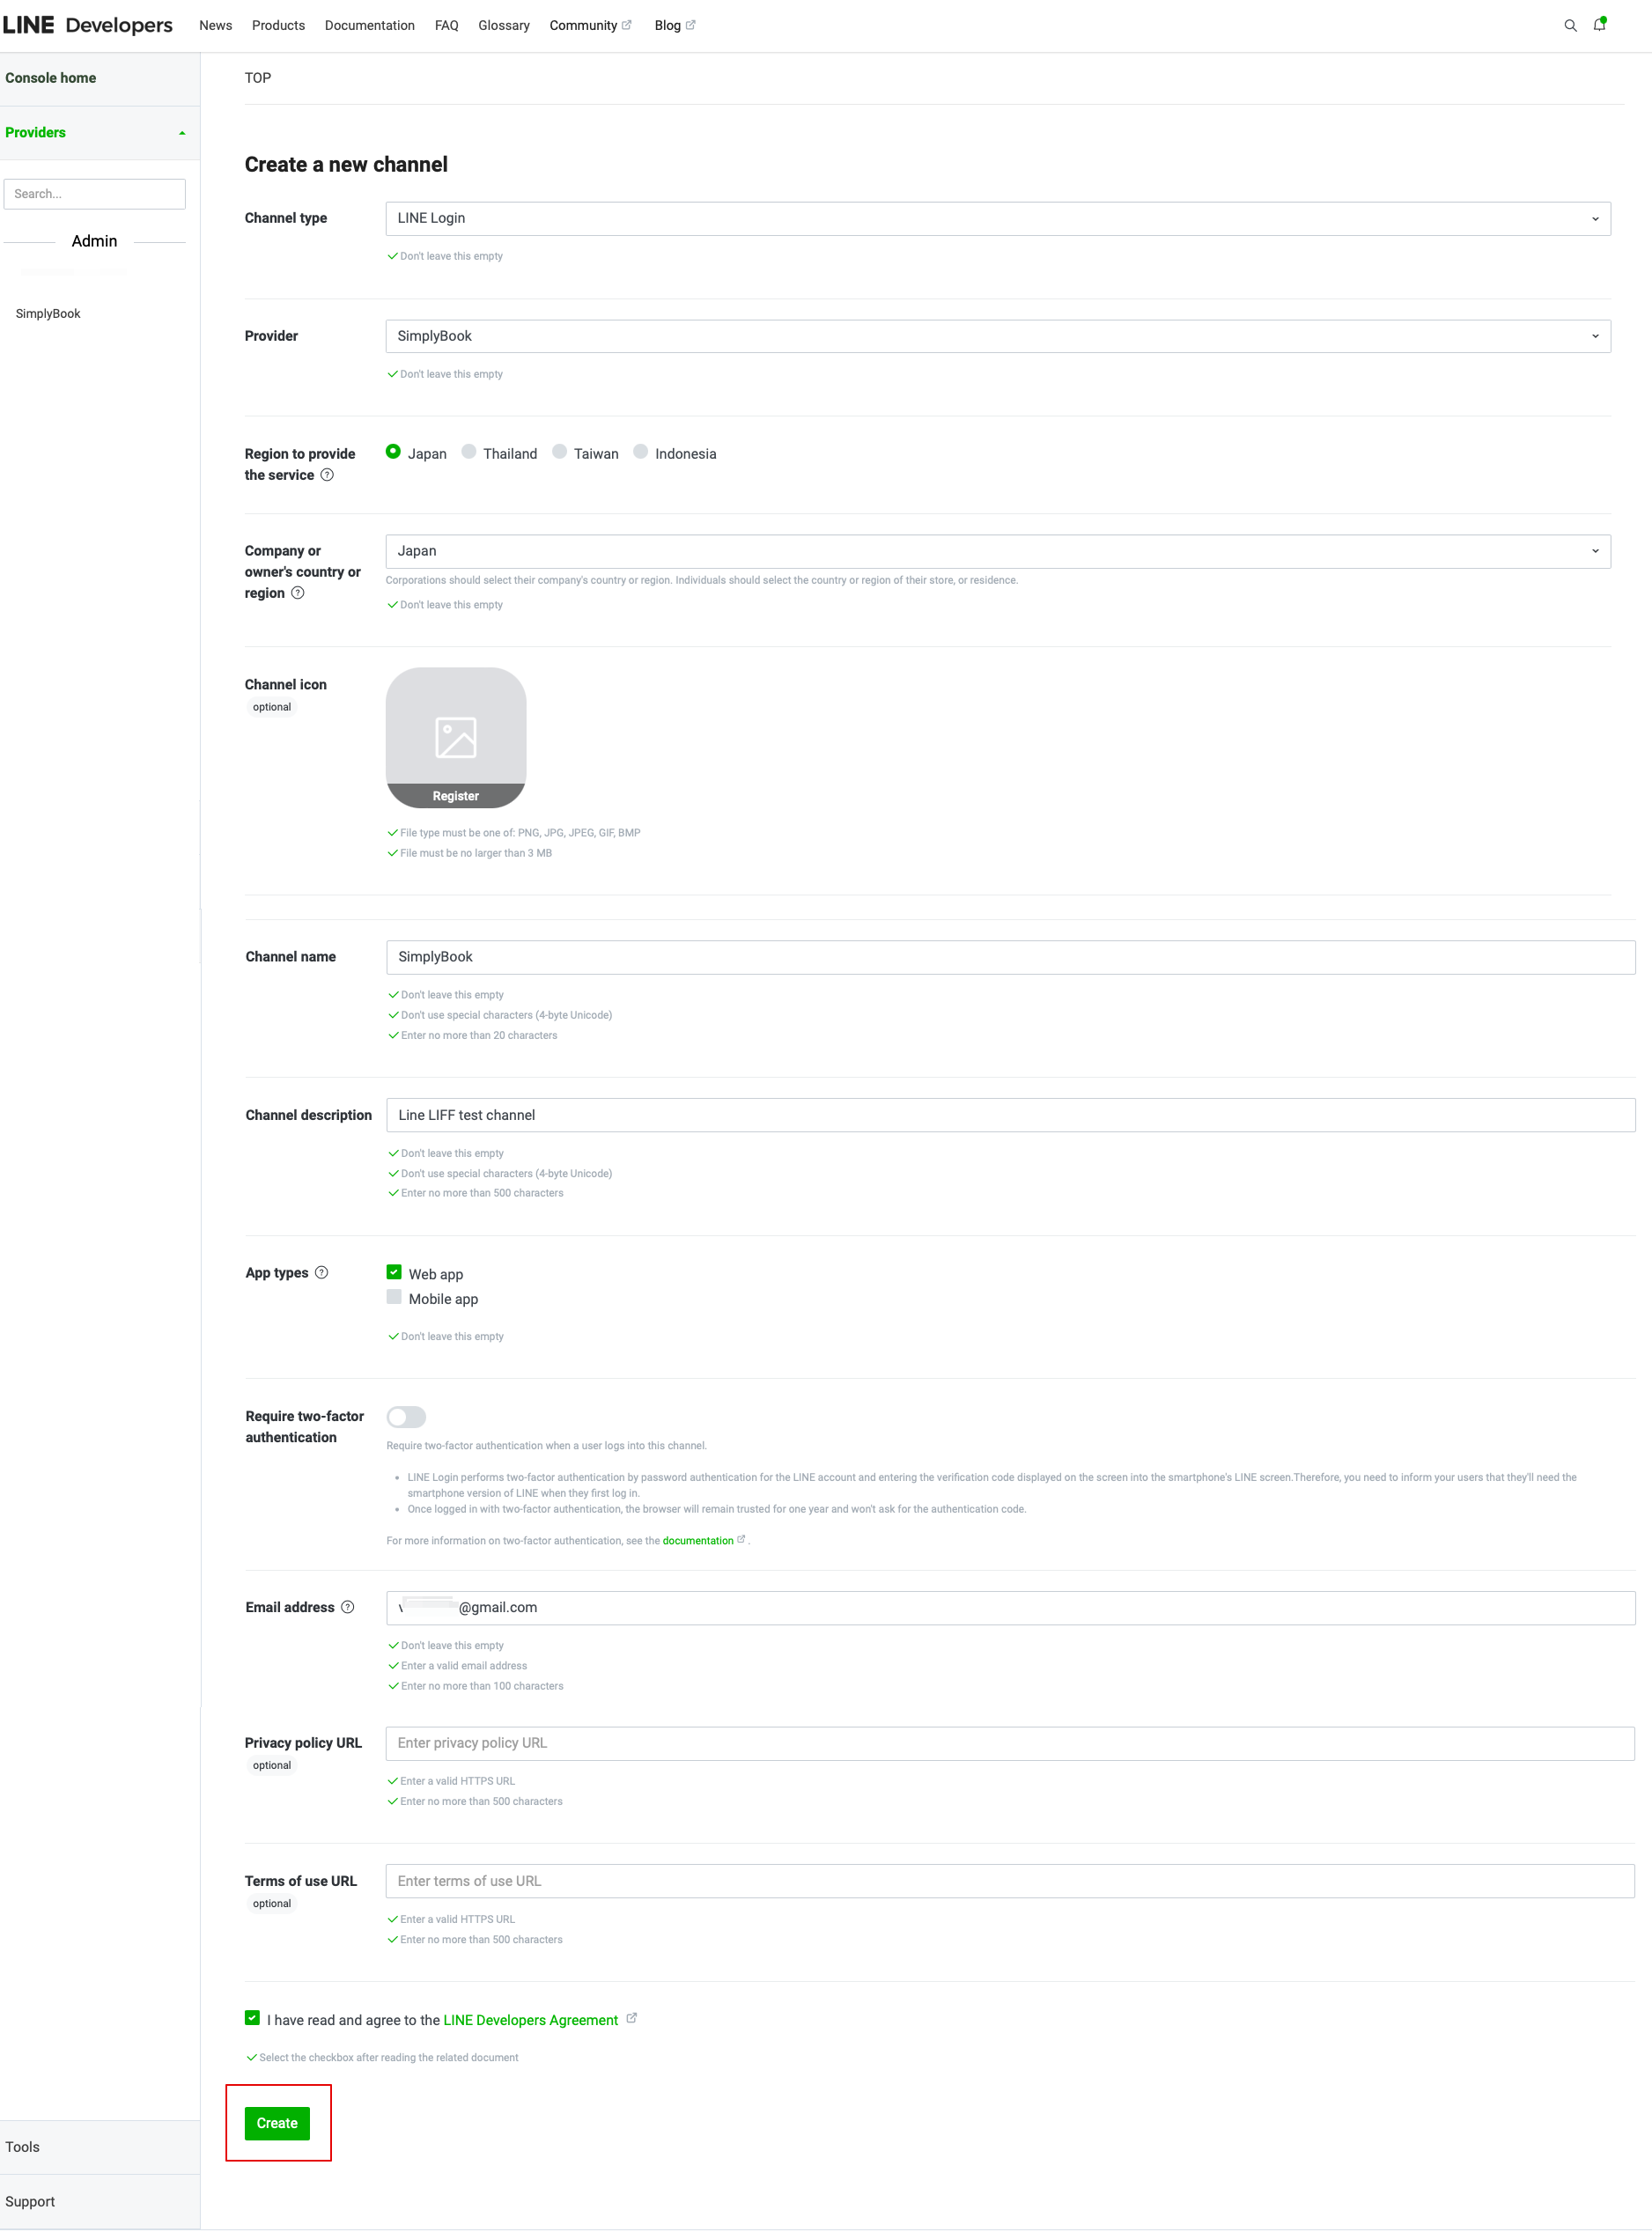
- 5. Add the information to the required fields.
- Make sure to choose the Web app in “App types” section and also enter the email address.
- Once you accept “LINE Developers agreement” please click on “Create” button to finish this step.
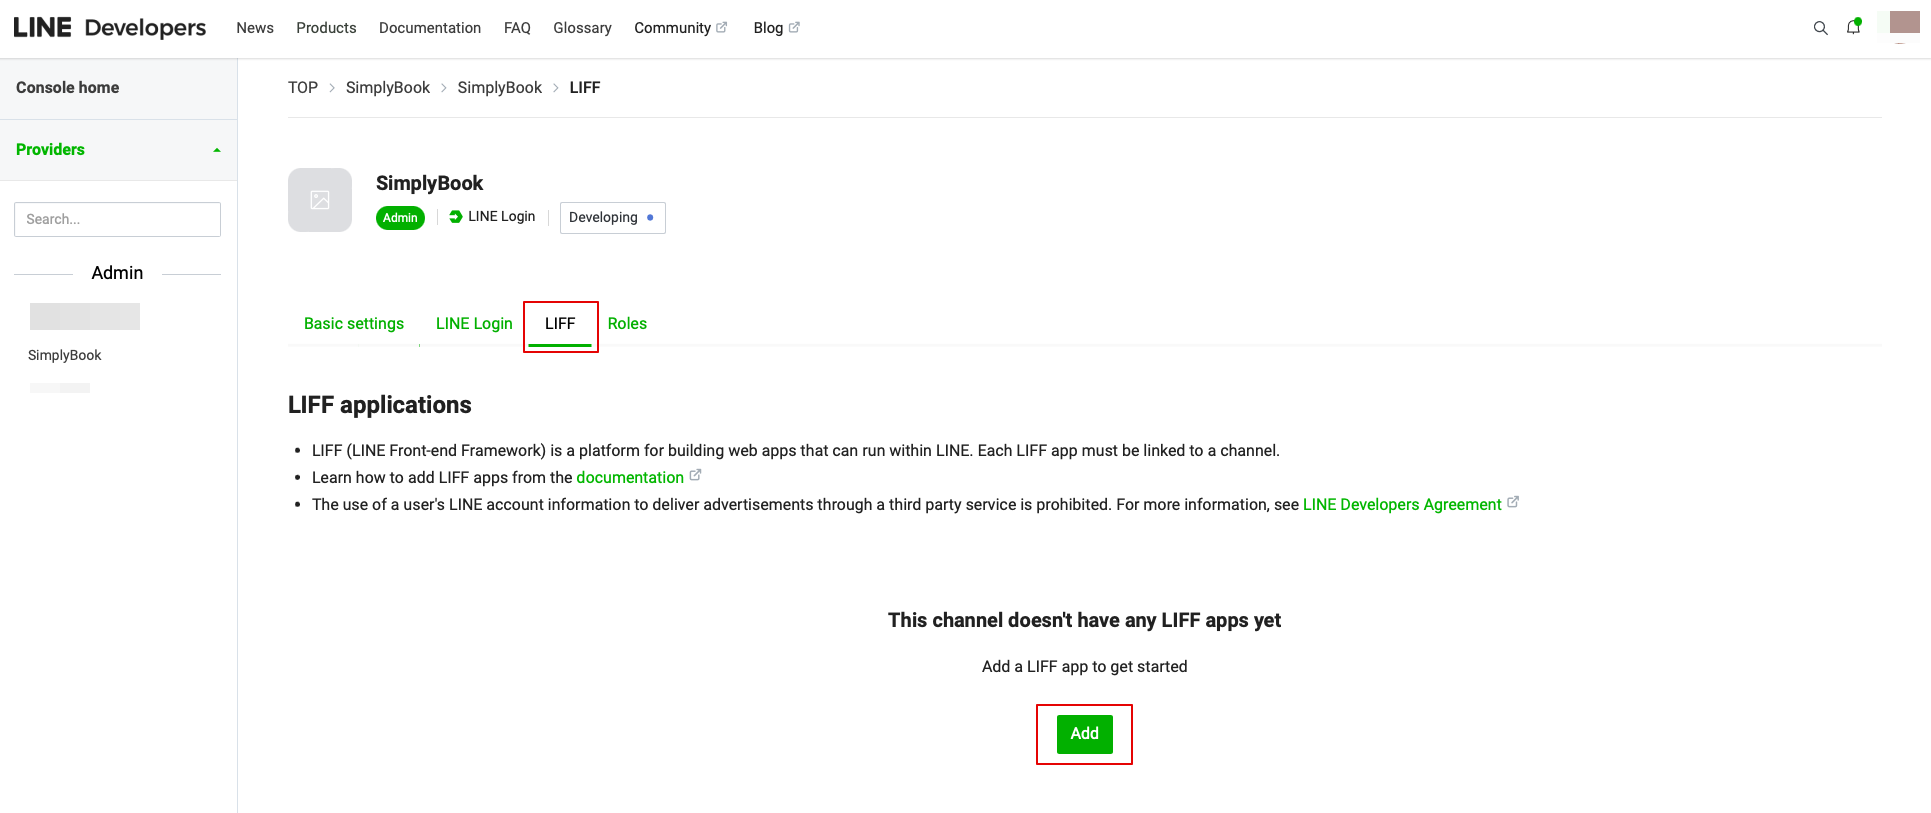
- 6. After the LINE Login is created, click on LIFF taband add the LIFF app there.
You need to enter the following data:
- LIFF app name: your brand/company name;
- Select the app size;
- Endpoint URL: should be copied from LIFF url (Simplybook.me LINE LIFF feature settings);
- (obligatory) Select the following Scopes: openid and profile, otherwise the integration may not work or may not work properly;
- Bot Link feature should be turned on.
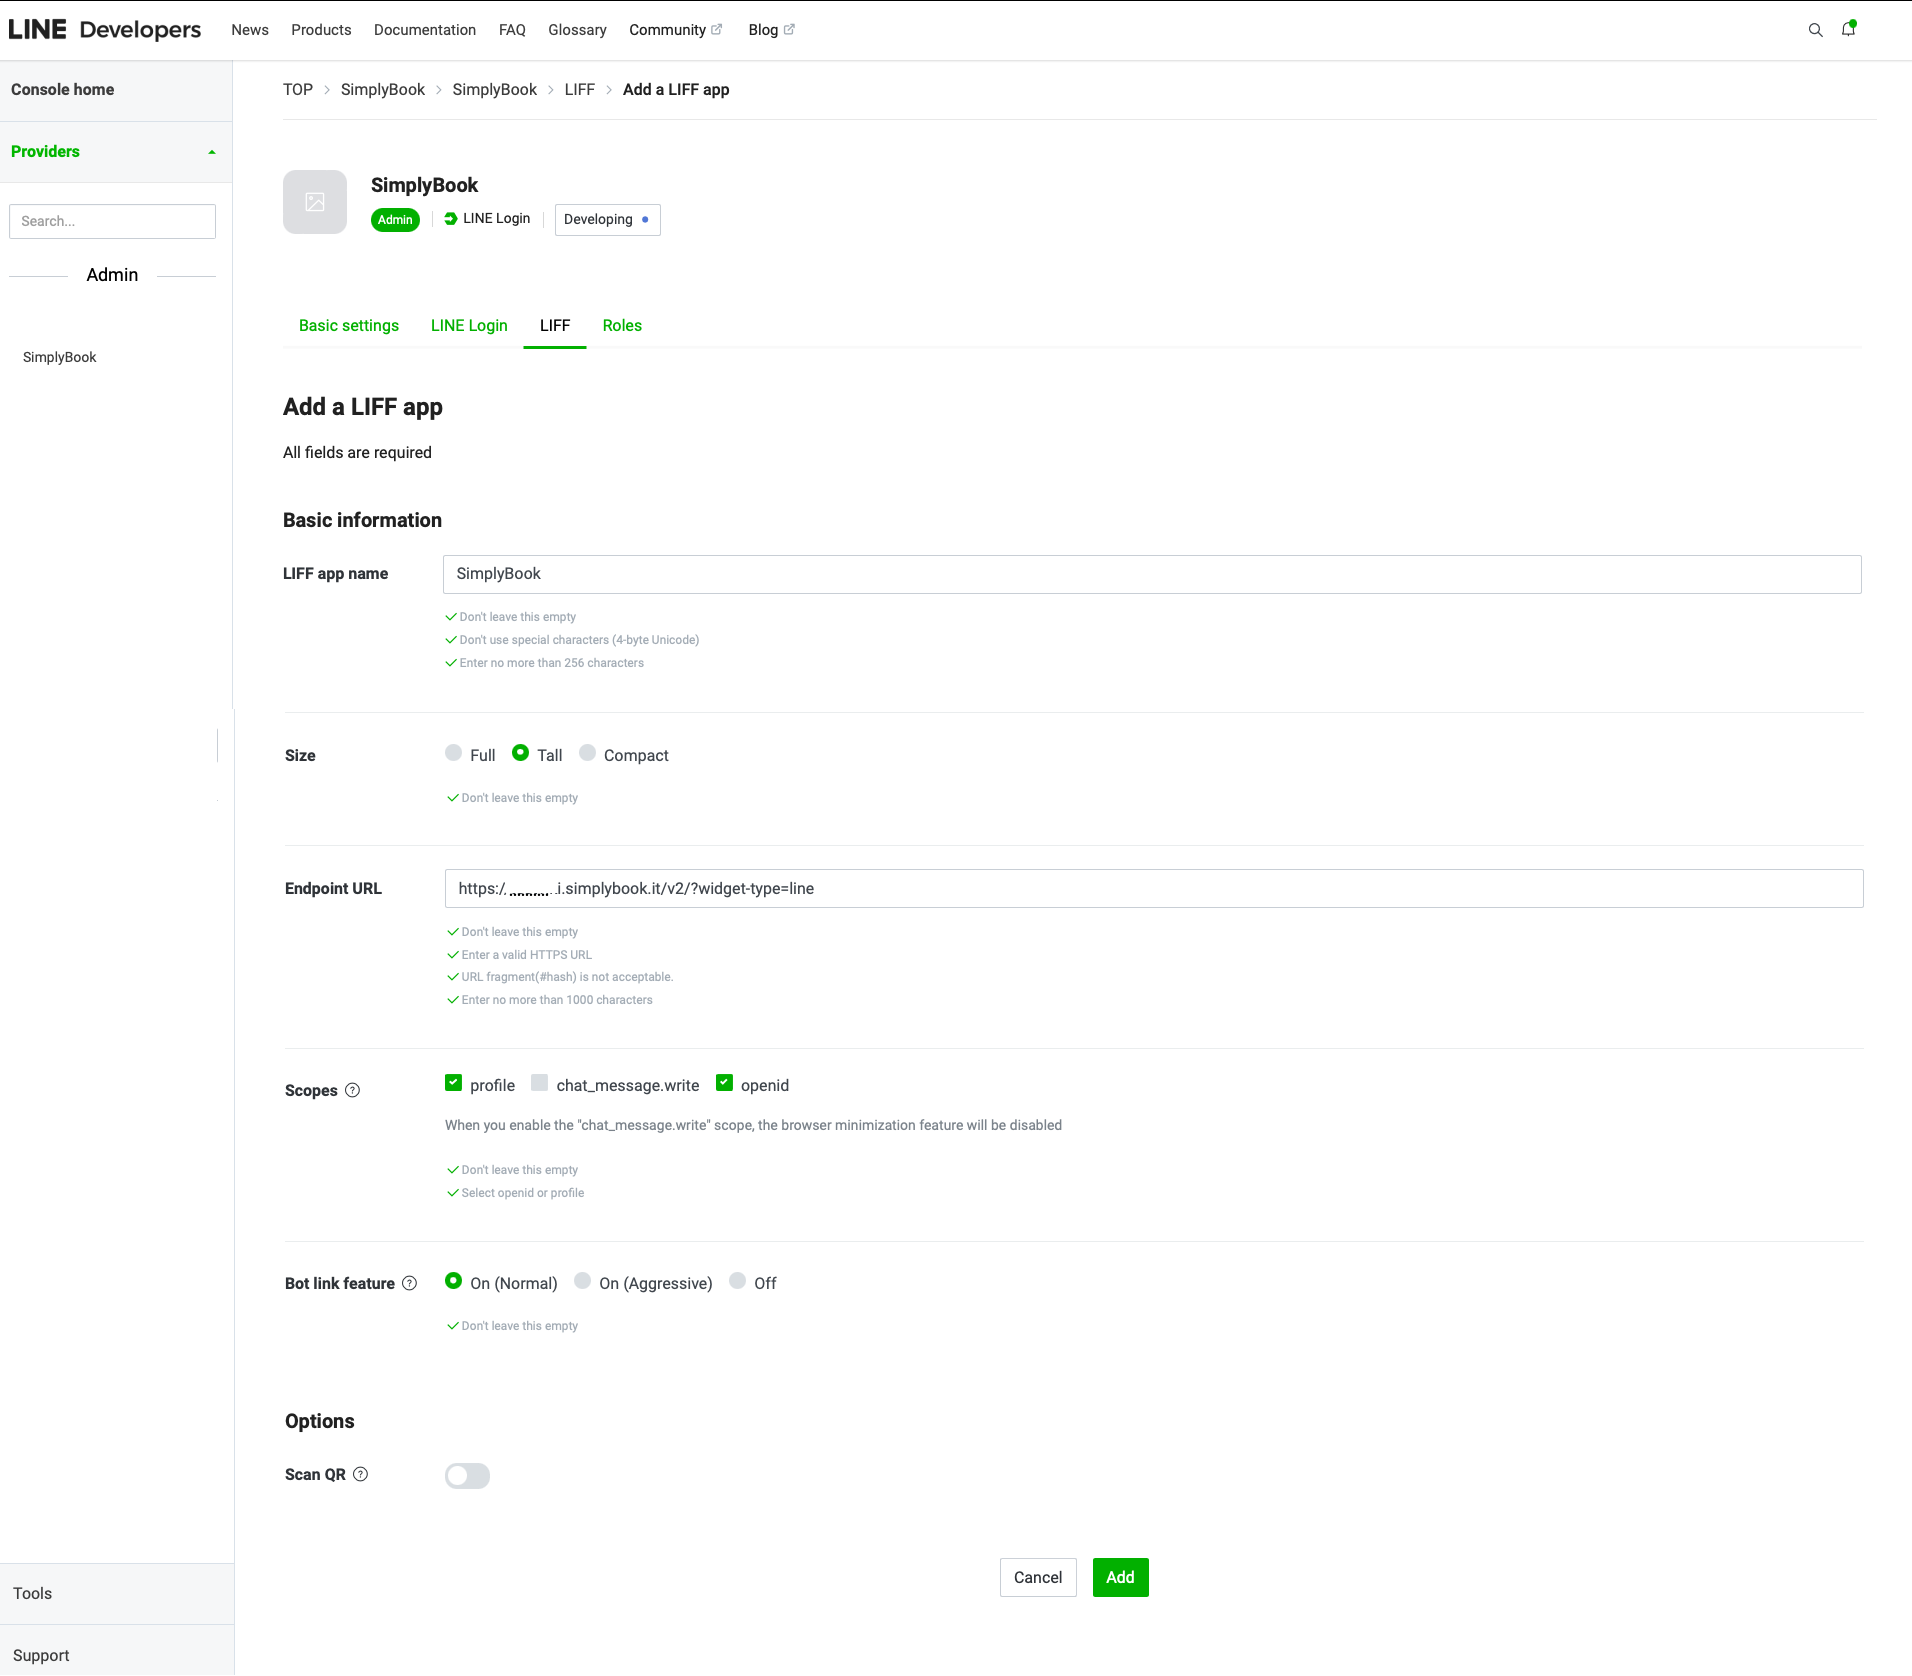
- After all the above settings are completed, click the green Add button to add LINE LIFF.
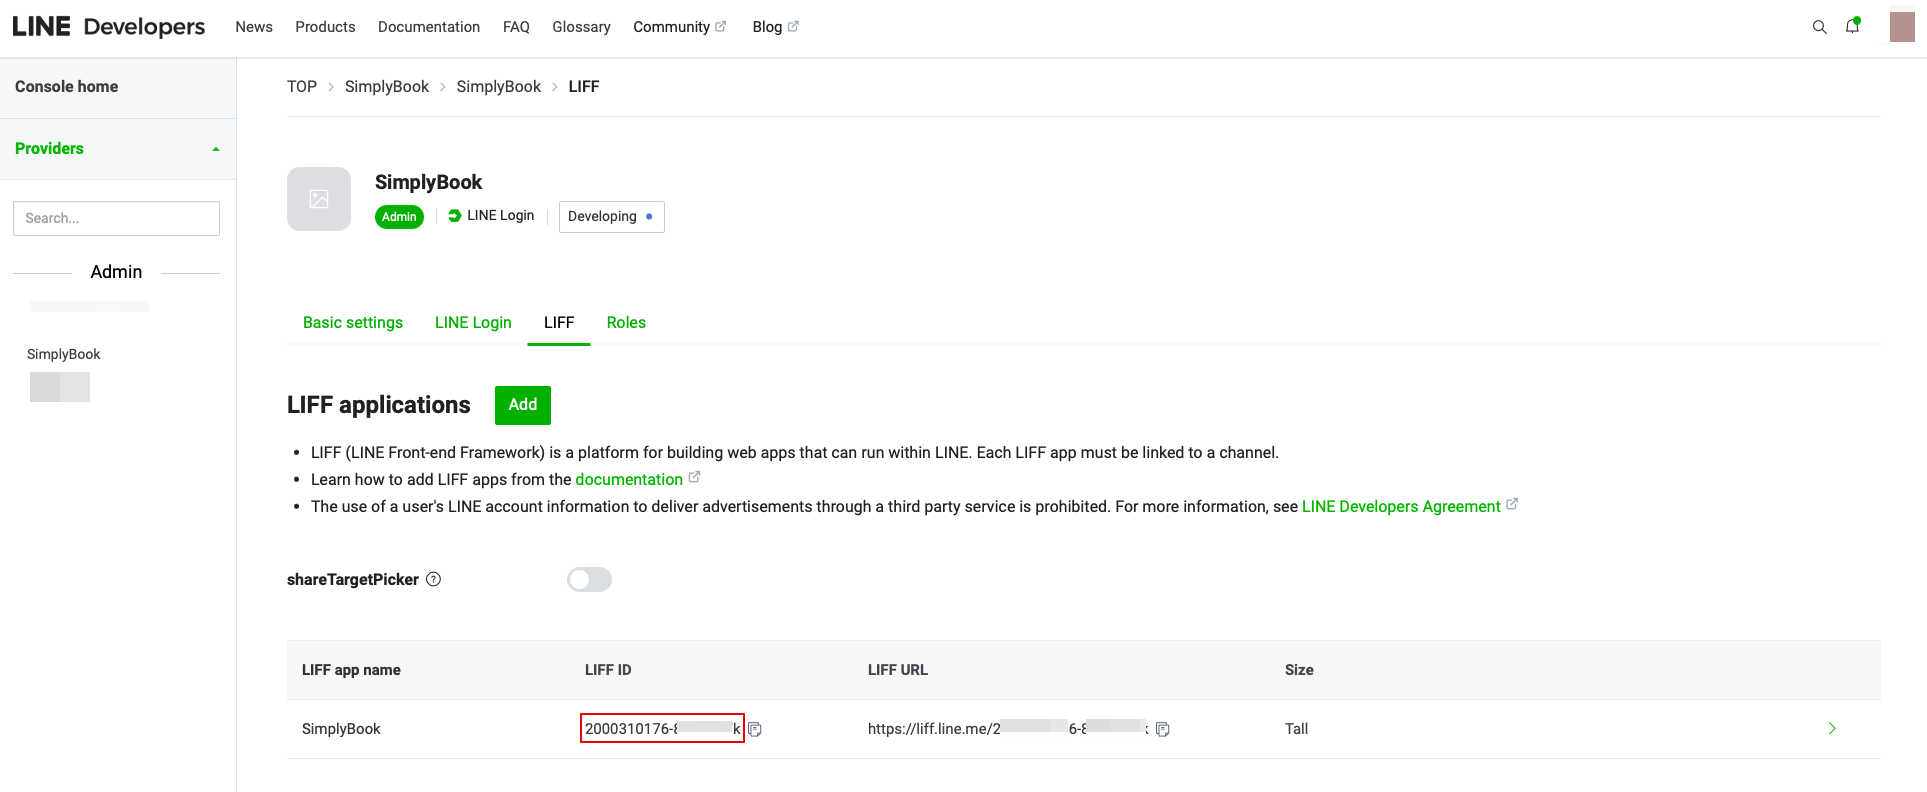
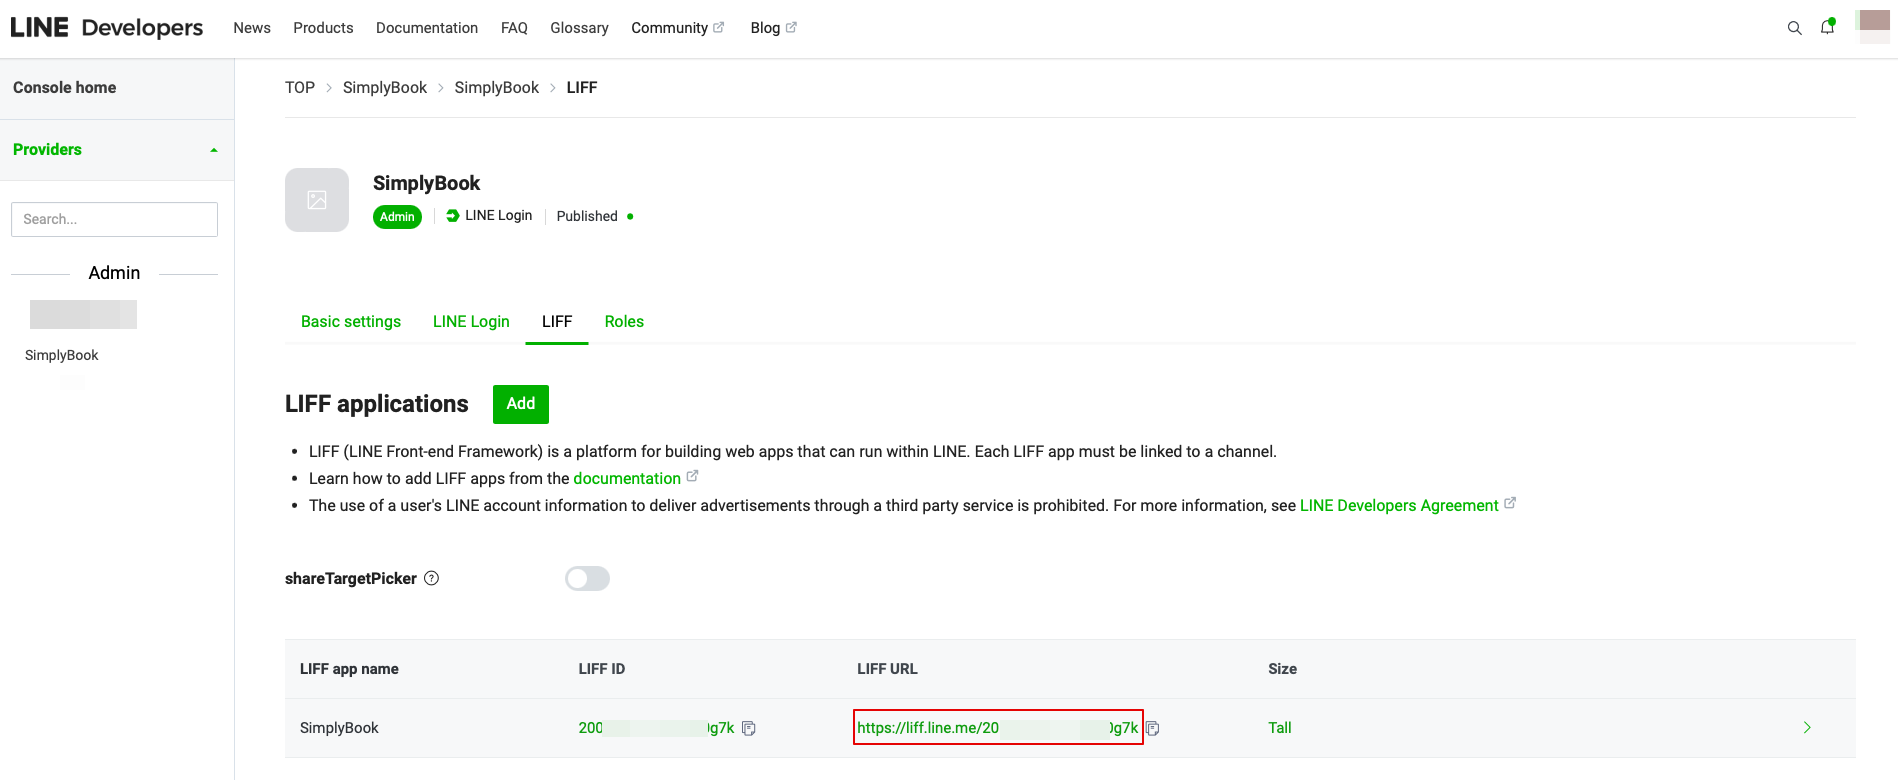
- 7. Then you will be directed to the page where you can see your LIFF ID.
- Please copy the LIFF ID and input it to the corresponding field on the Simplybook side.
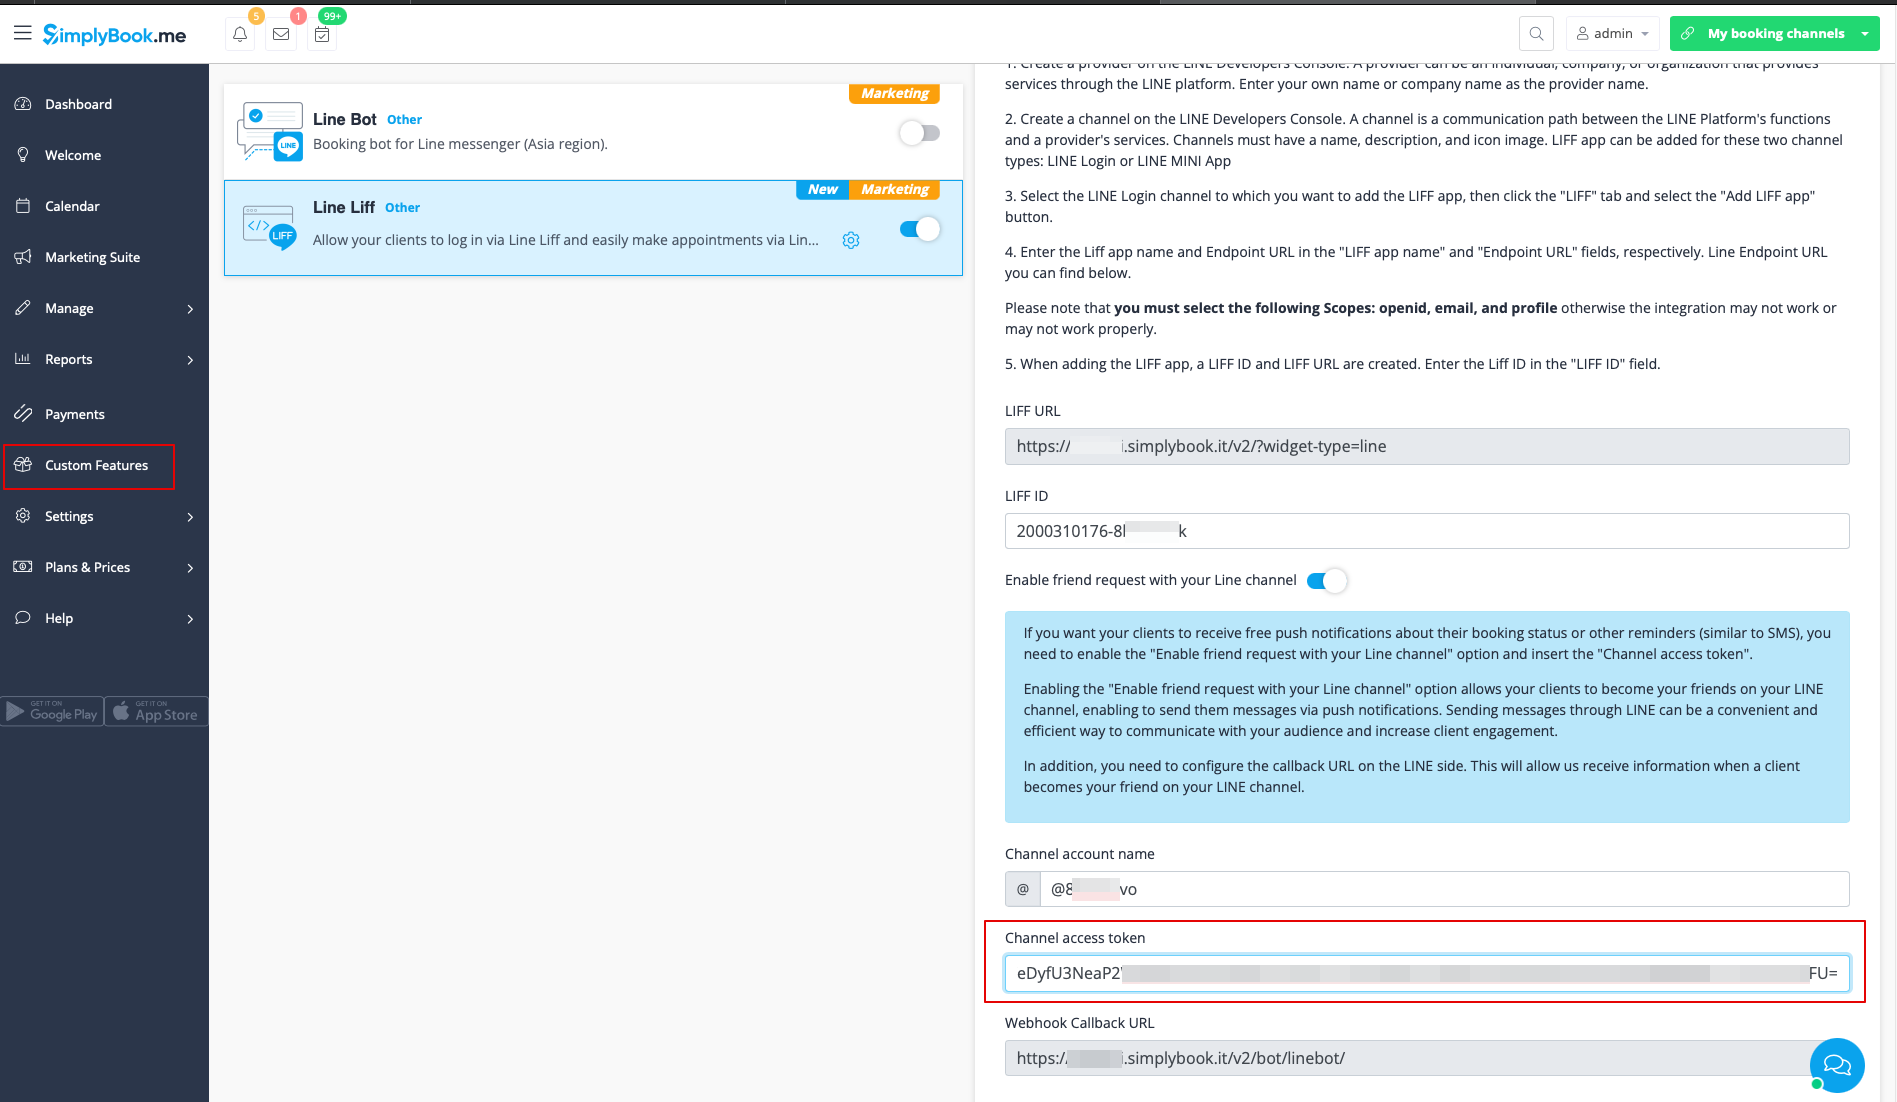
- 8. If you want your clients to receive push notifications about their booking status or other reminders (similar to SMS), you can turn on the "Enable friend request with your LINE channel" option in Simplybook LINE LIFF Custom Feature and insert the "Channel access token".
- (the information on how to obtain the Channel access token will be presented further in the guide)
- In addition, you need to configure the Callback URL on the LINE side. This will allow us to receive information when a client becomes your friend on your LINE channel.
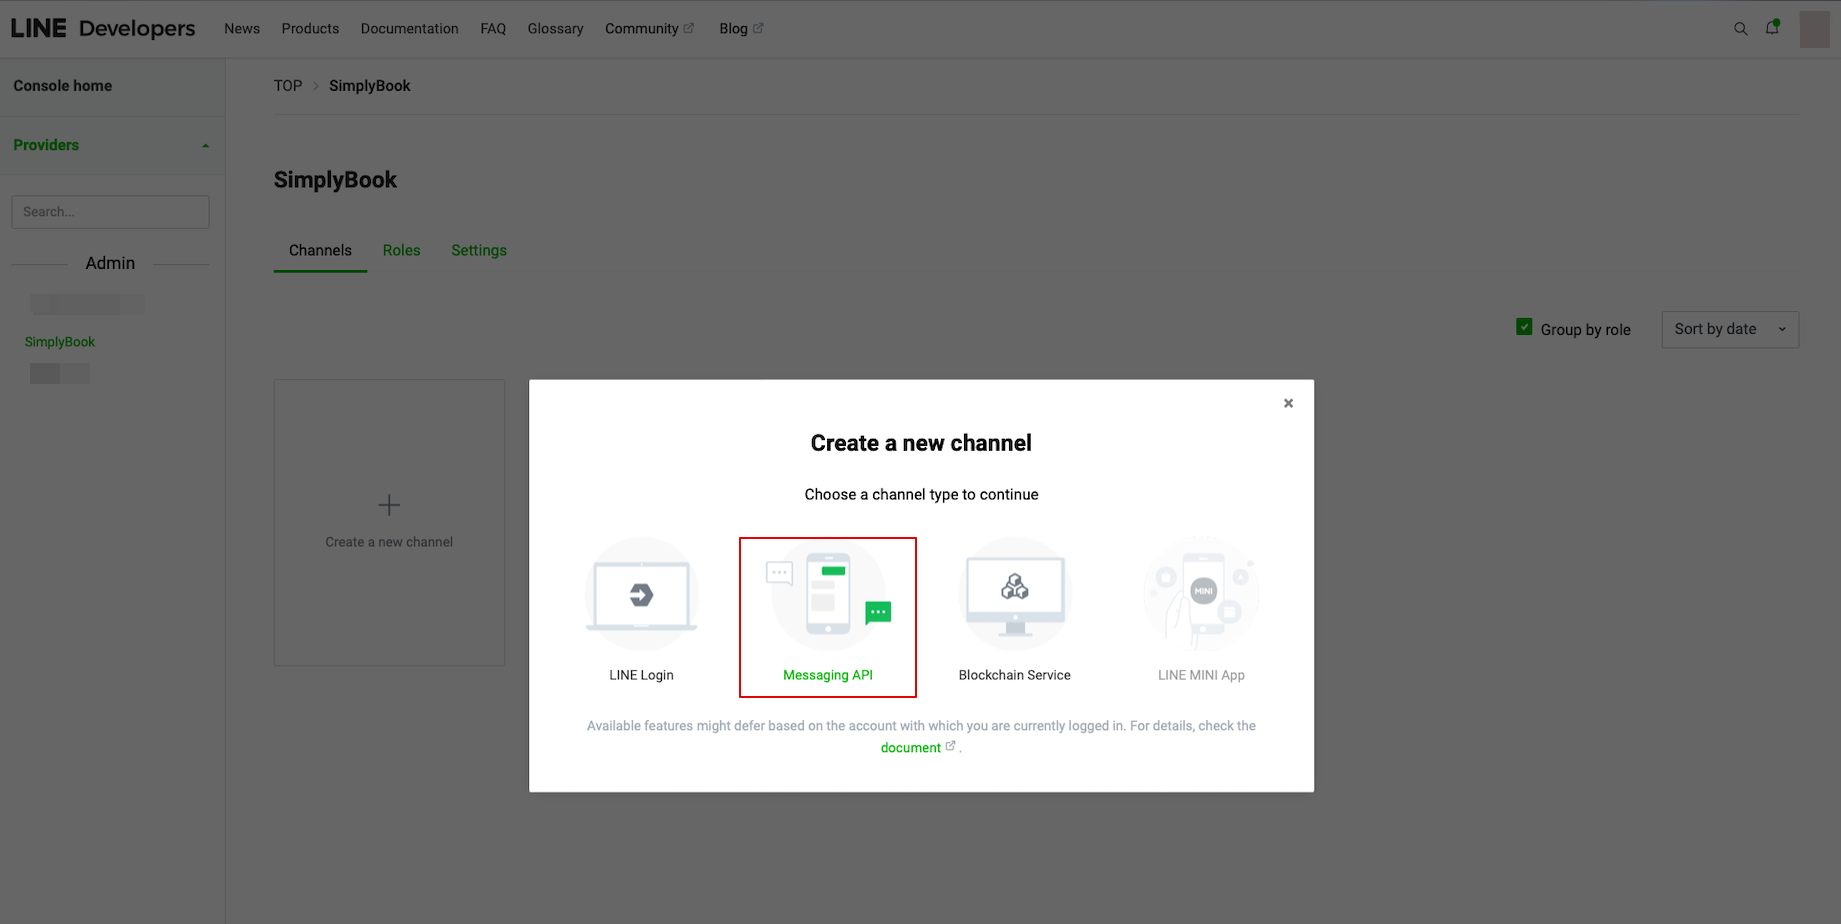
- To do that please go to your LINE LIFF Developers console, select the previously added provider account and create new channel called “Messaging API”
- (both channels must be under the same provider for all the connections to work)
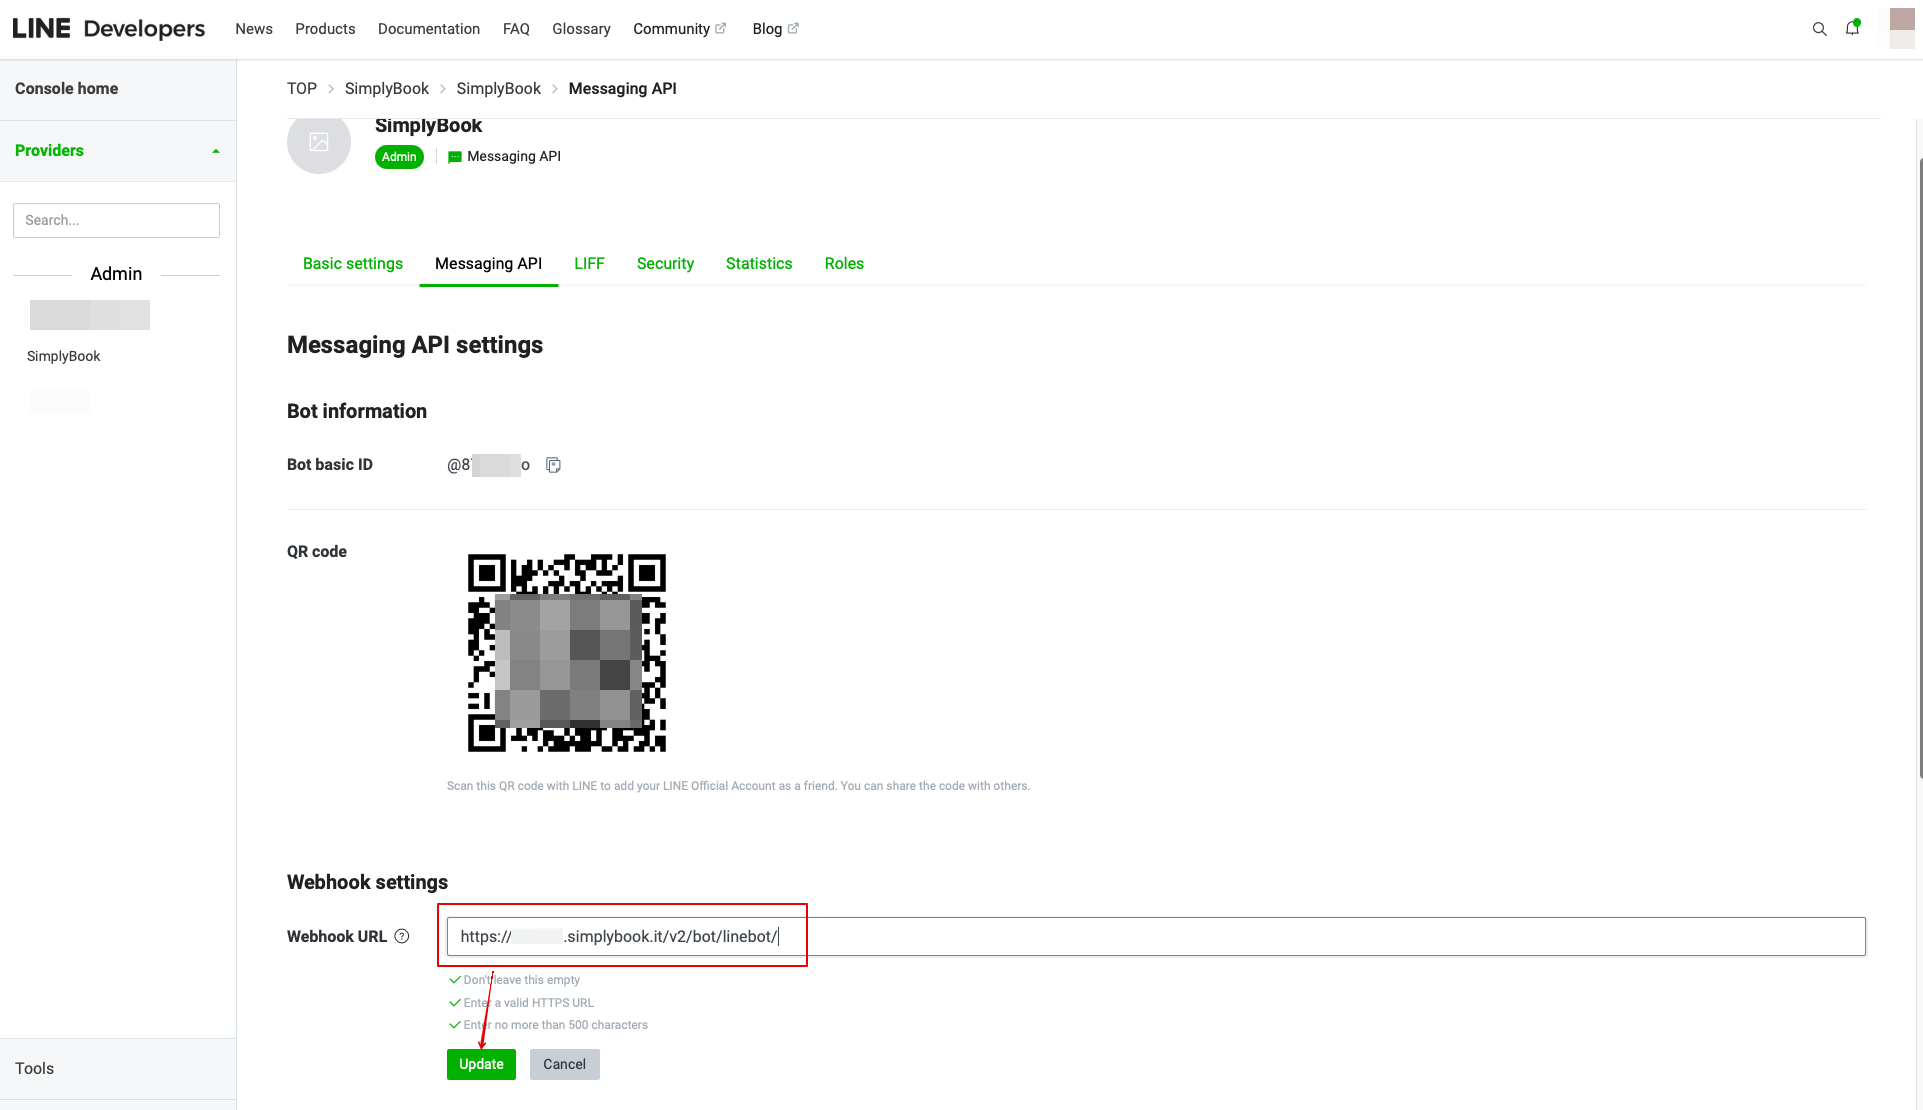
- 9. After completing these settings, select the Message API tab to get the Bot Basic ID. Copy and paste the Bot ID to the Channel account name field of SimplyBook.me LINE LIFF Custom Feature.
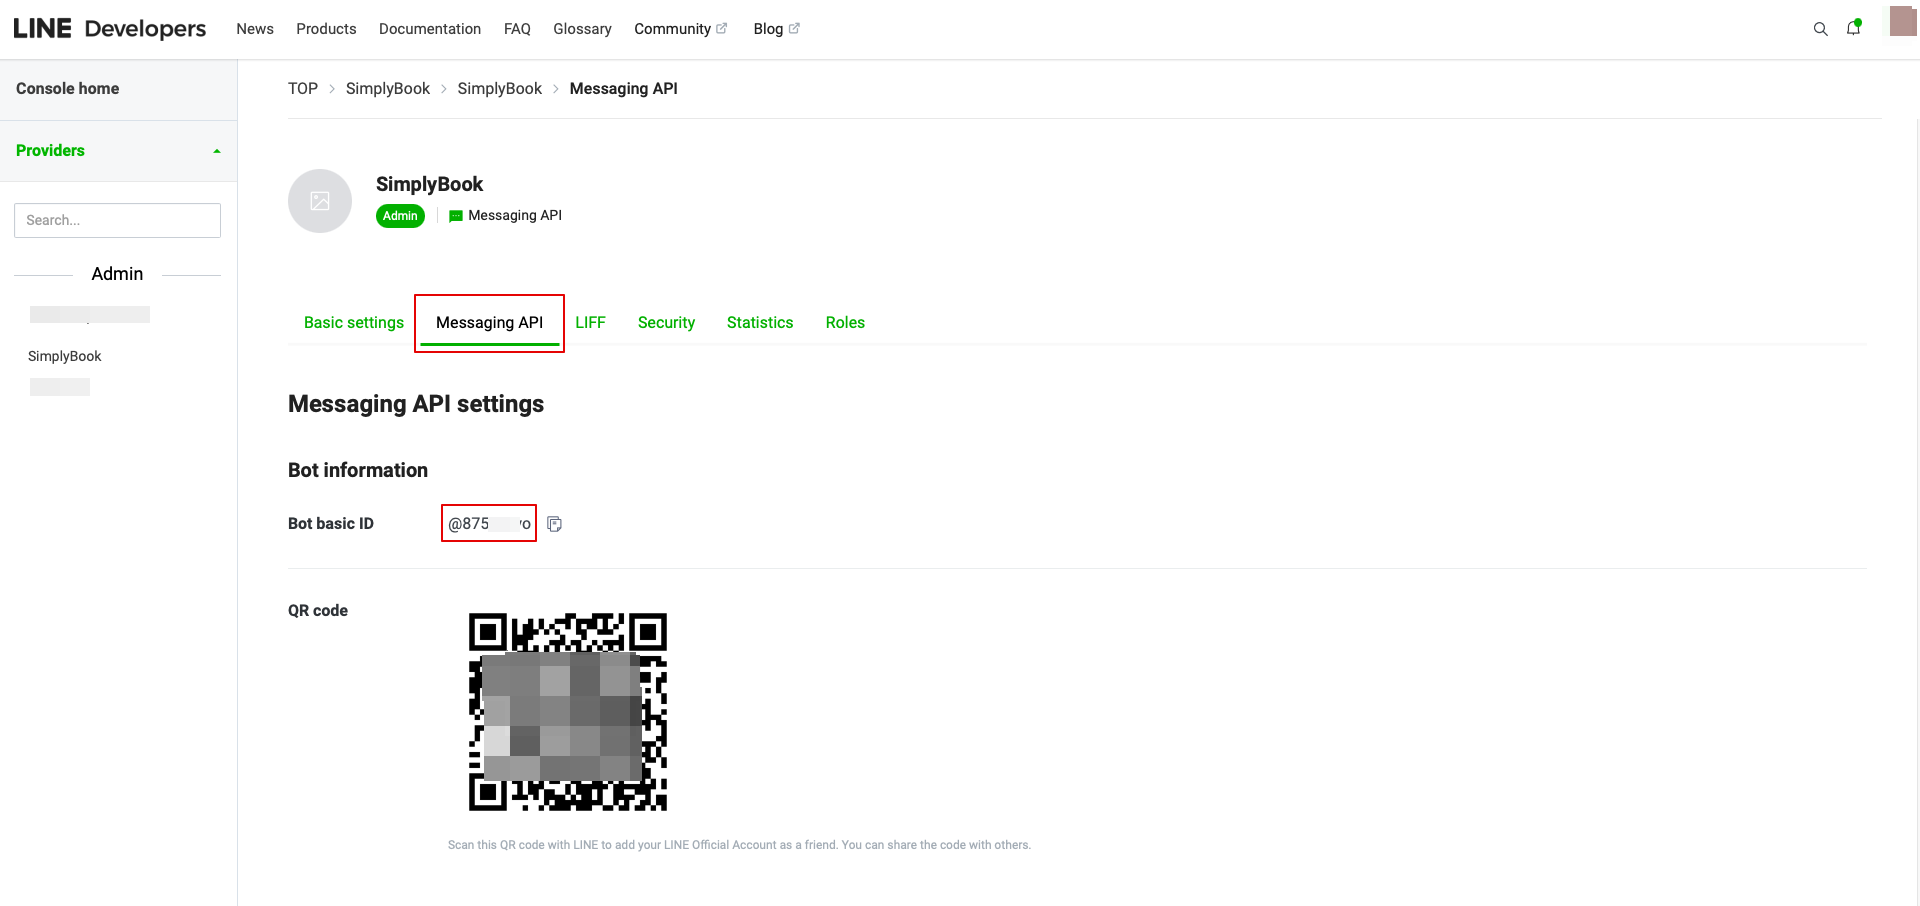

- In the Custom Feature setting you can also see the Webhook Callback URL. Please copy it and paste it to the Webhook URL field on the Line//Messaging API side.
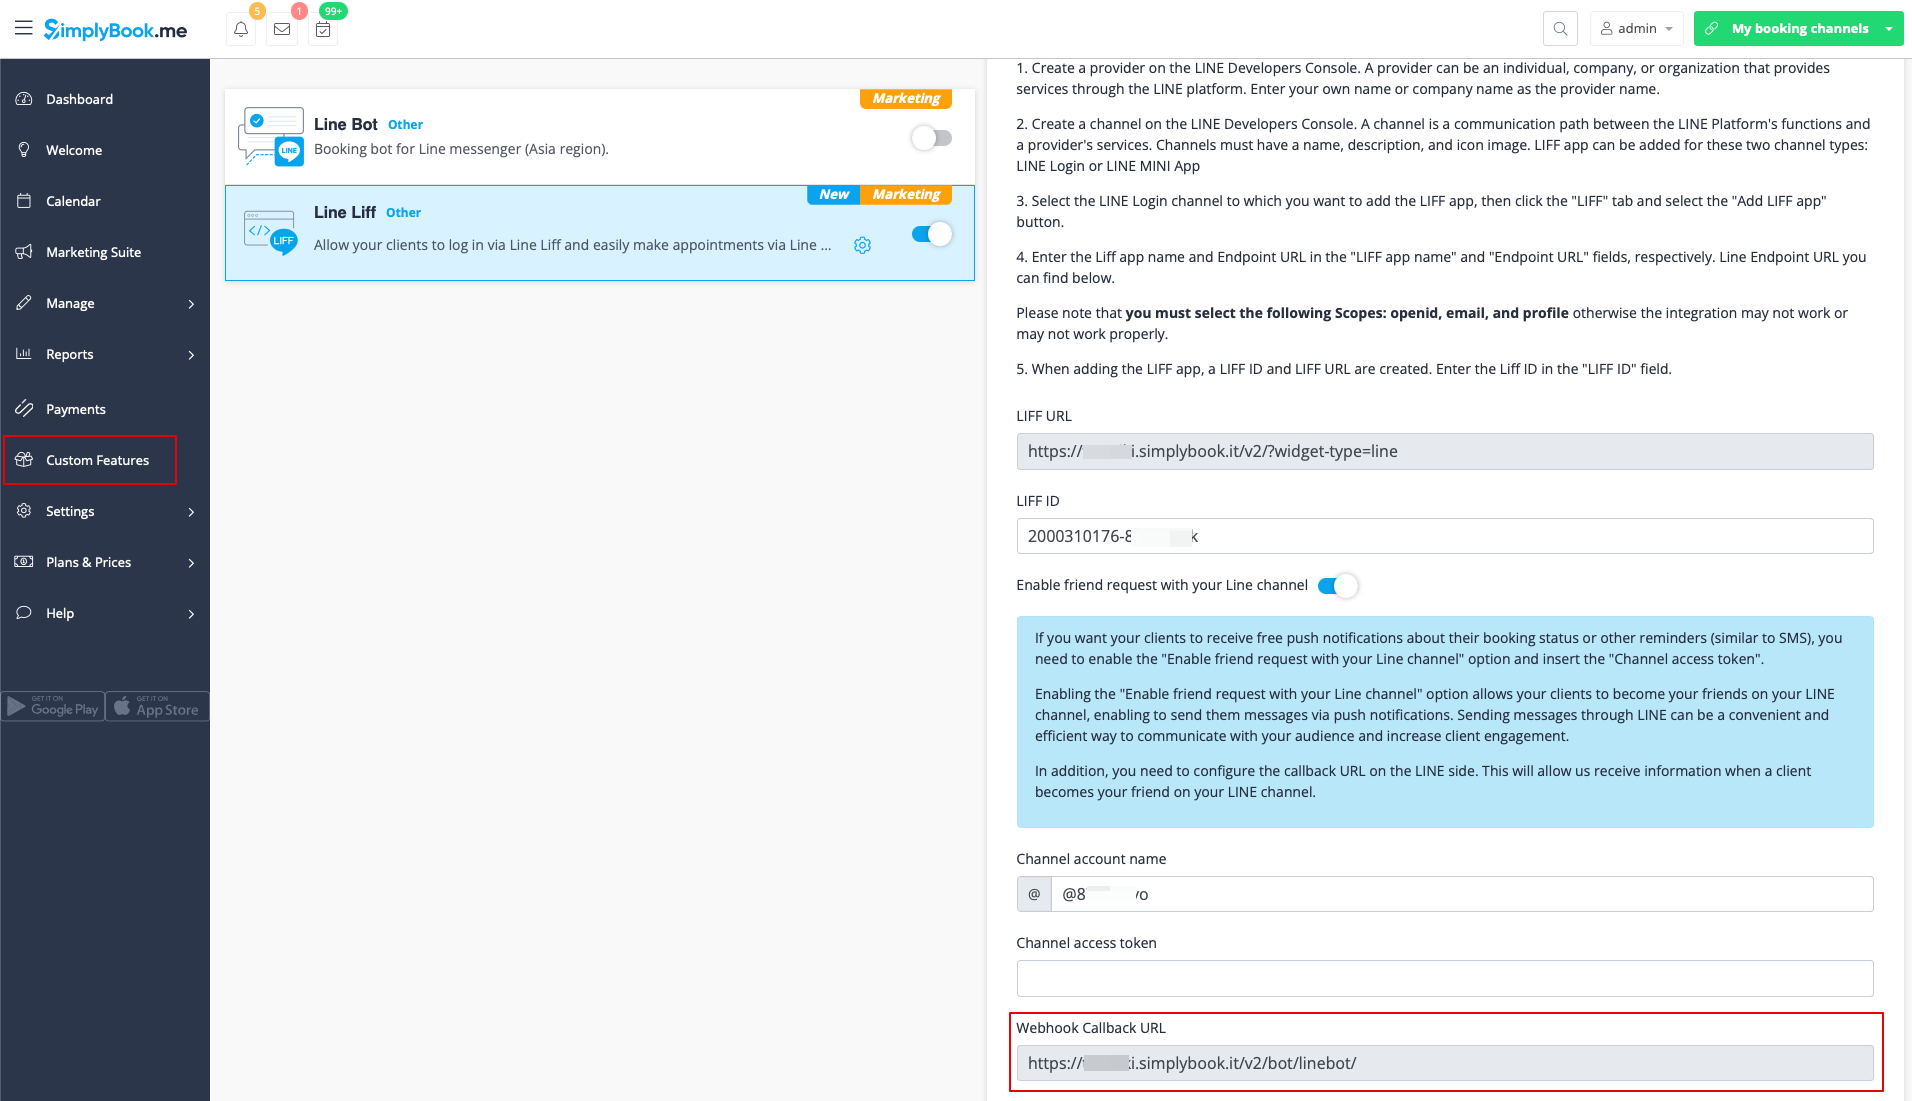
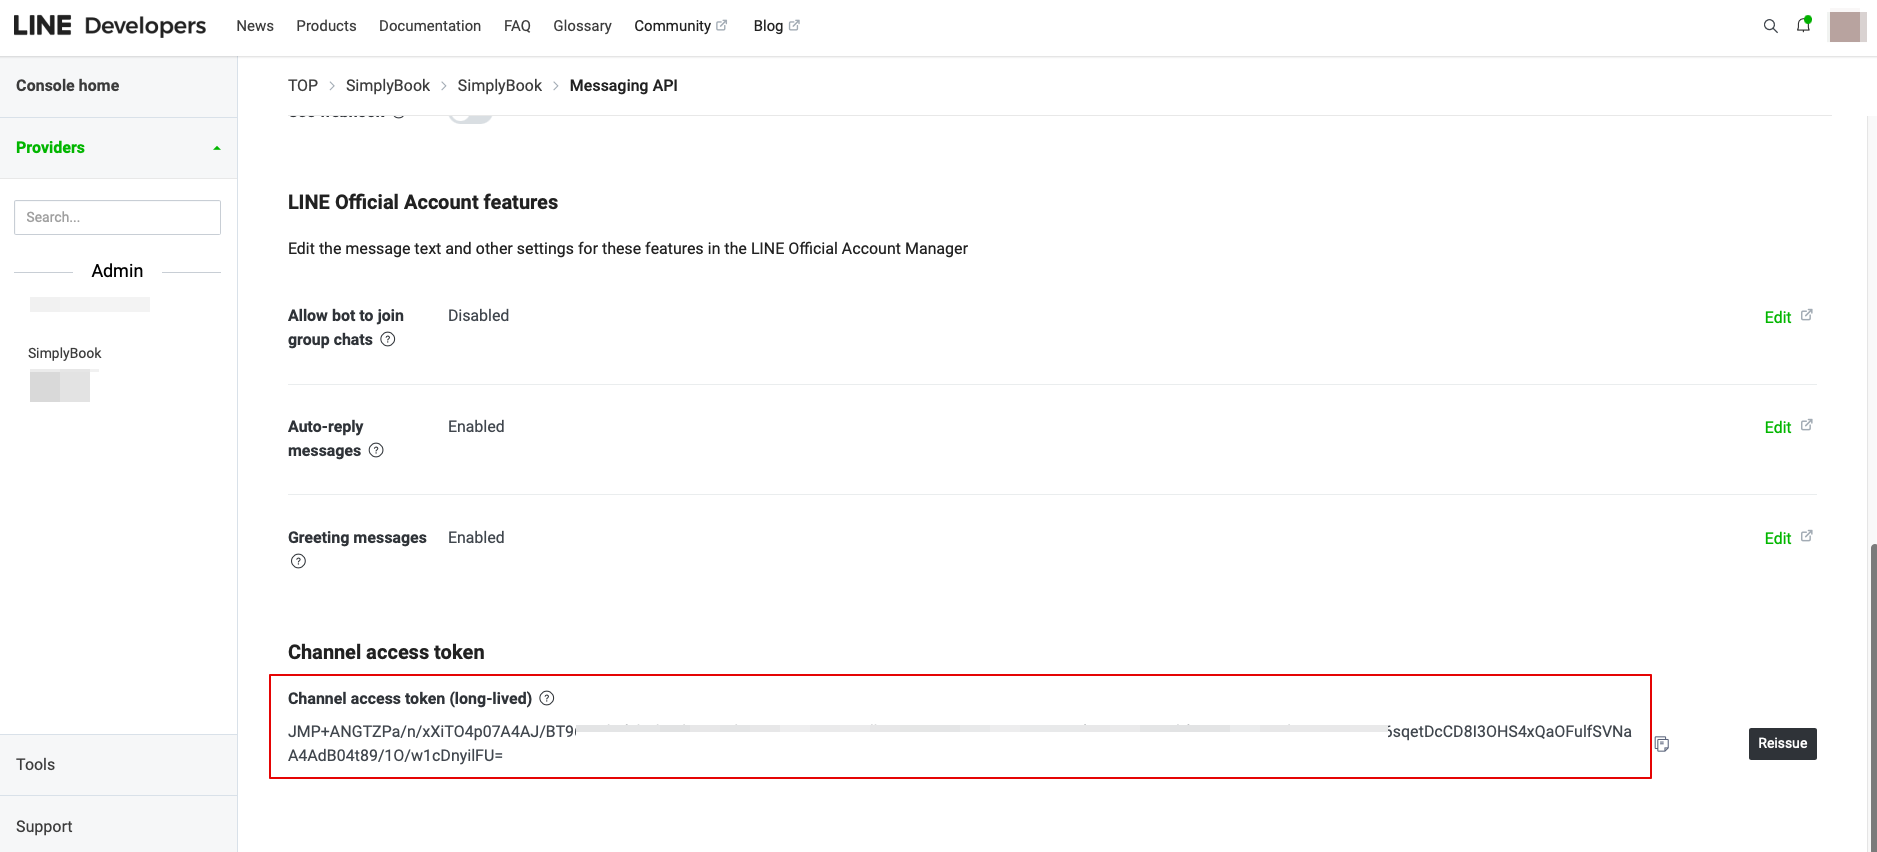
- 10. In the Messaging API on the LINE side you need to scroll down to the Channel access token, issue it, copy the result value and insert it to the Simplybook.me LINE LIFF settings.
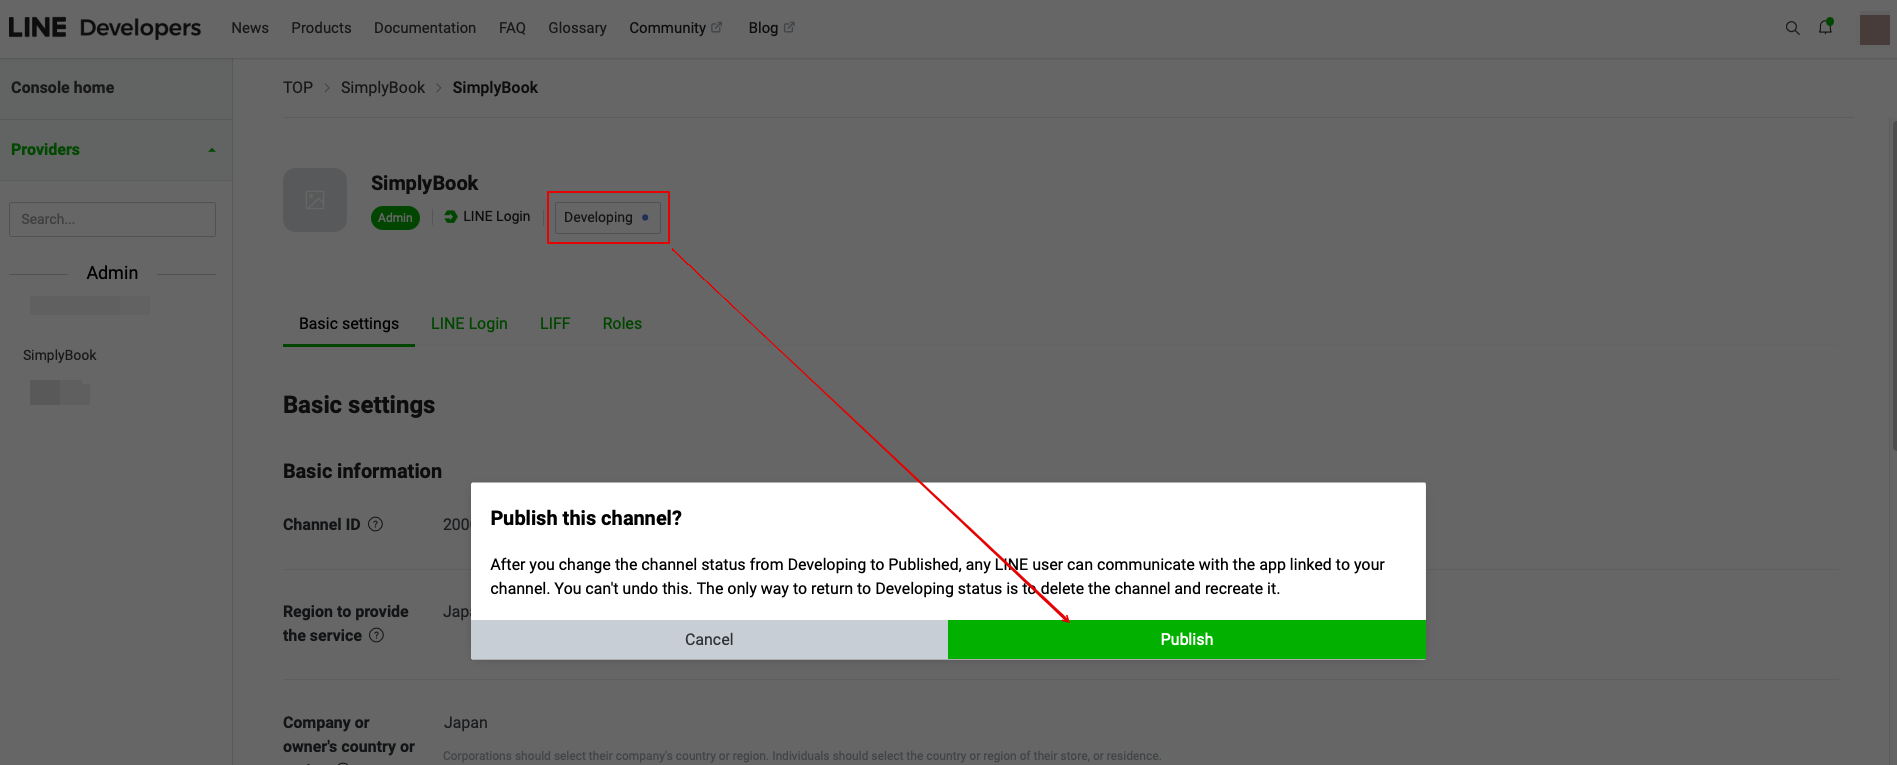
11. Please go back to the LINE Login channel, click the Developing status under the channel name, and change it to Publish.
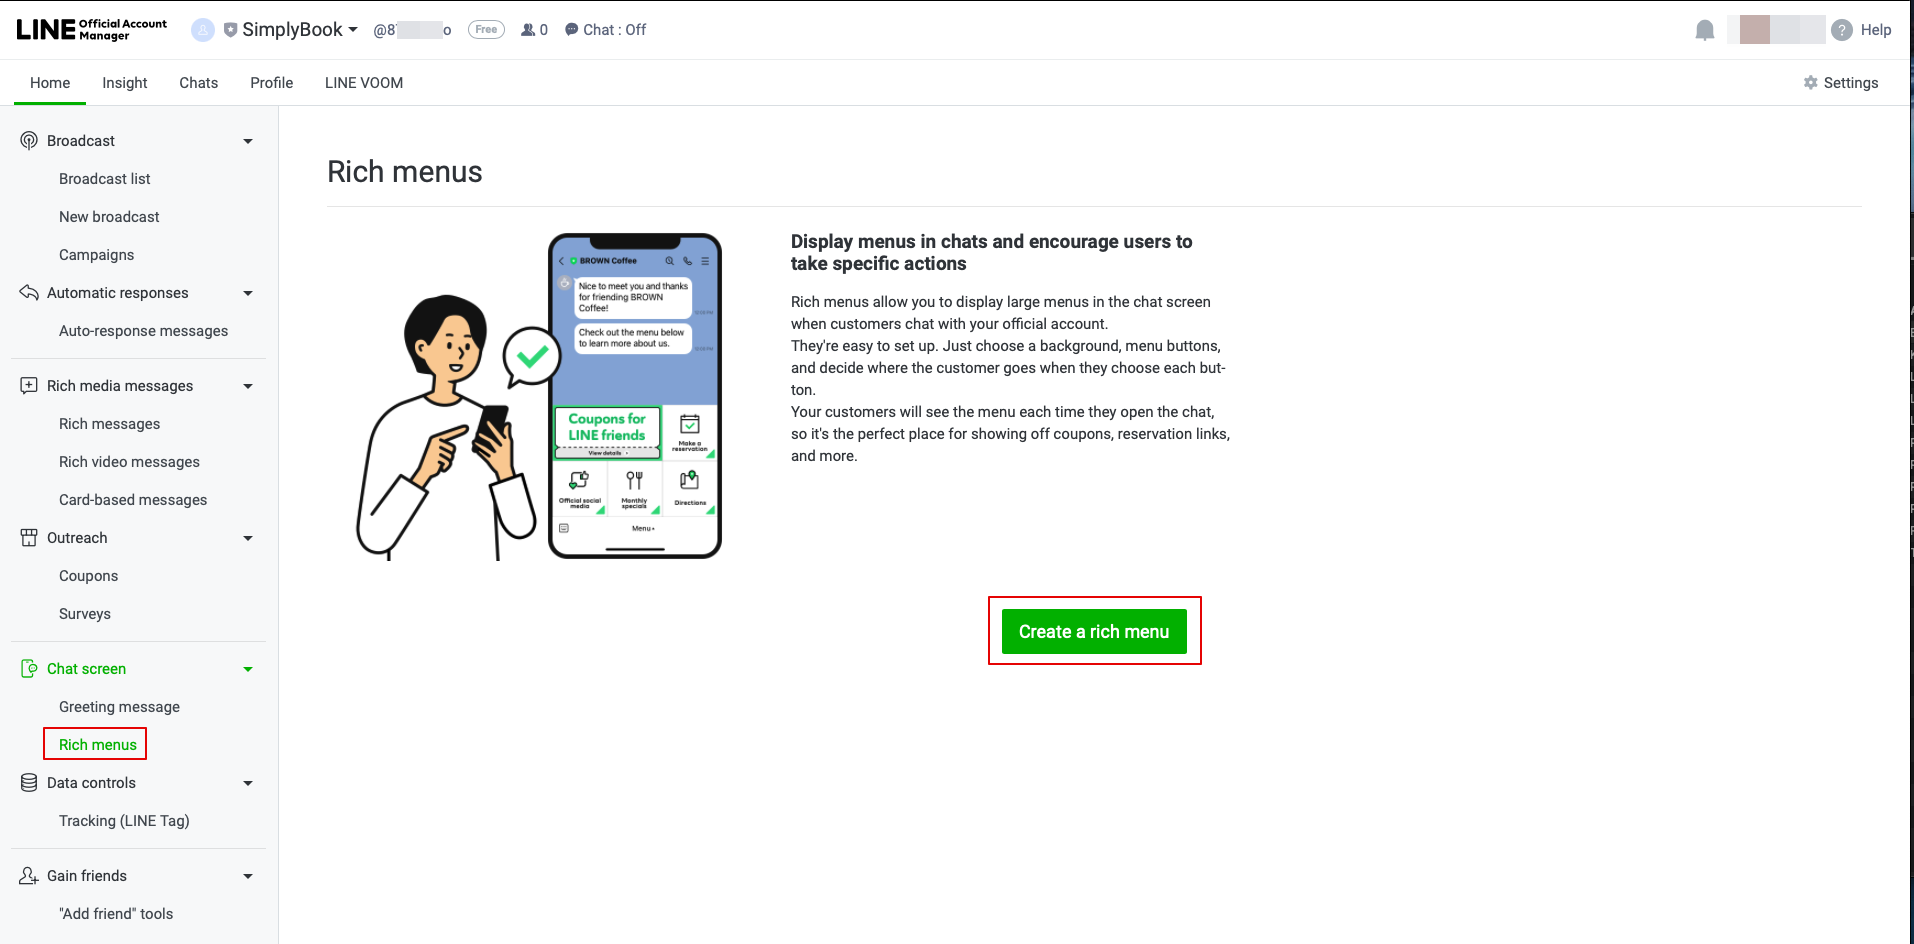
- 12. Once published, you need to log into the Line Official Account under the same LINE account as the Developers Console.
- When you access it, please click on Rich Menu option in the navigation and Create a Rich Menu there.
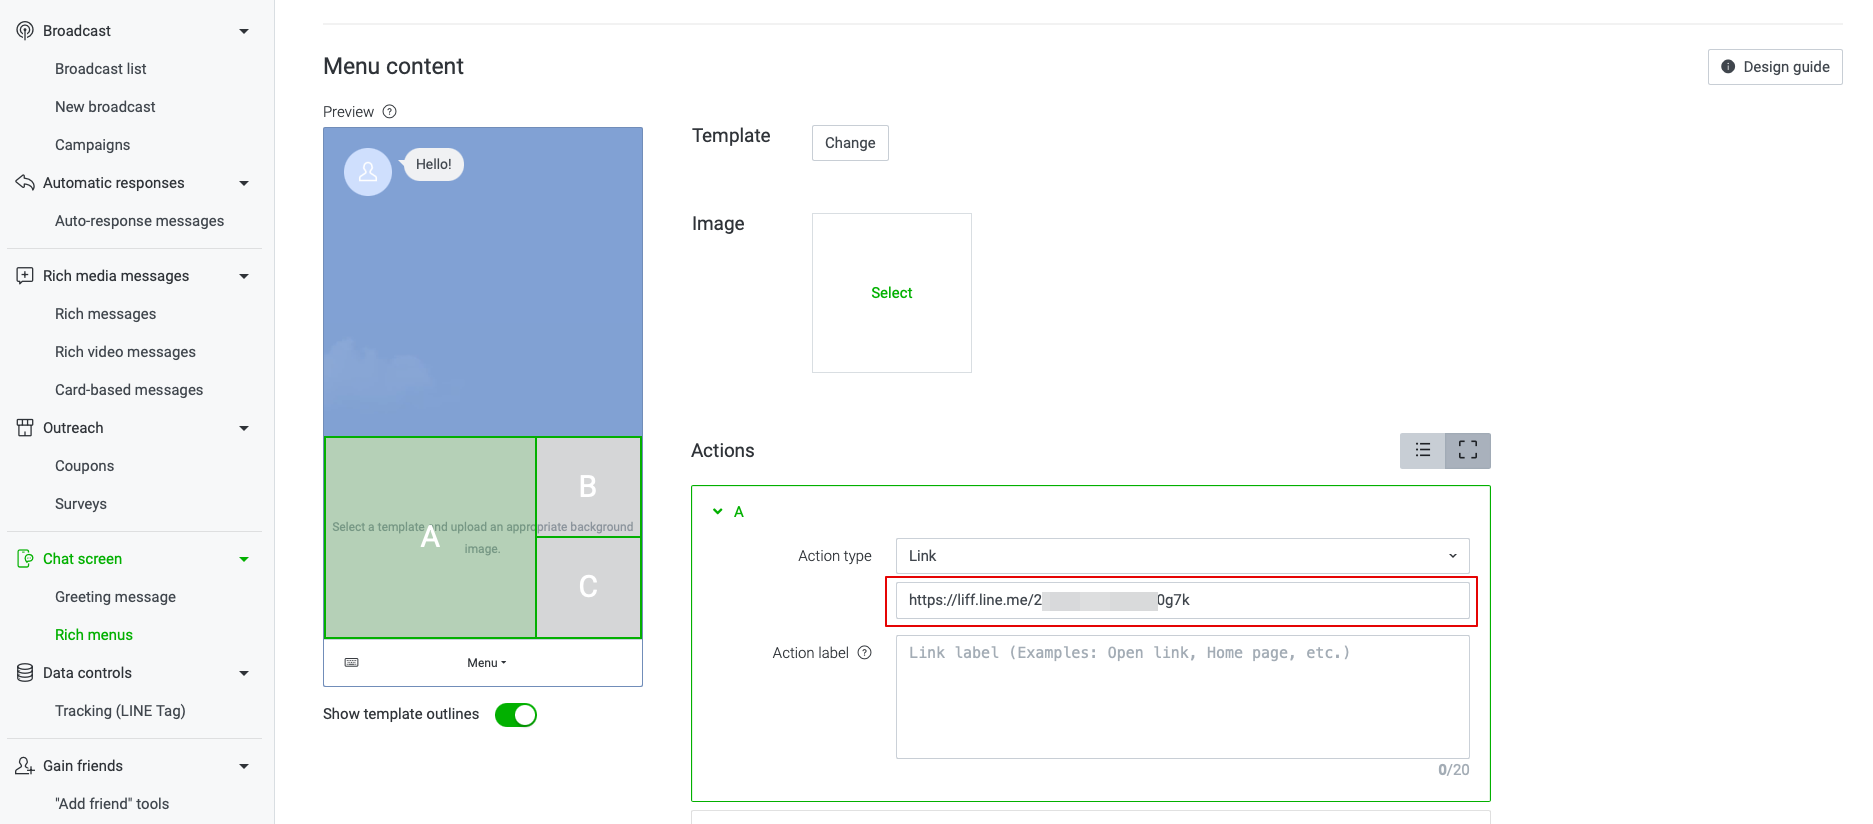
- 13. Fill in the required fields.
- In menu Content please select the template and add the image.
- Choose “Link” type in Actions block and add the LIFF url from the Developer Console//LINE Login channel.
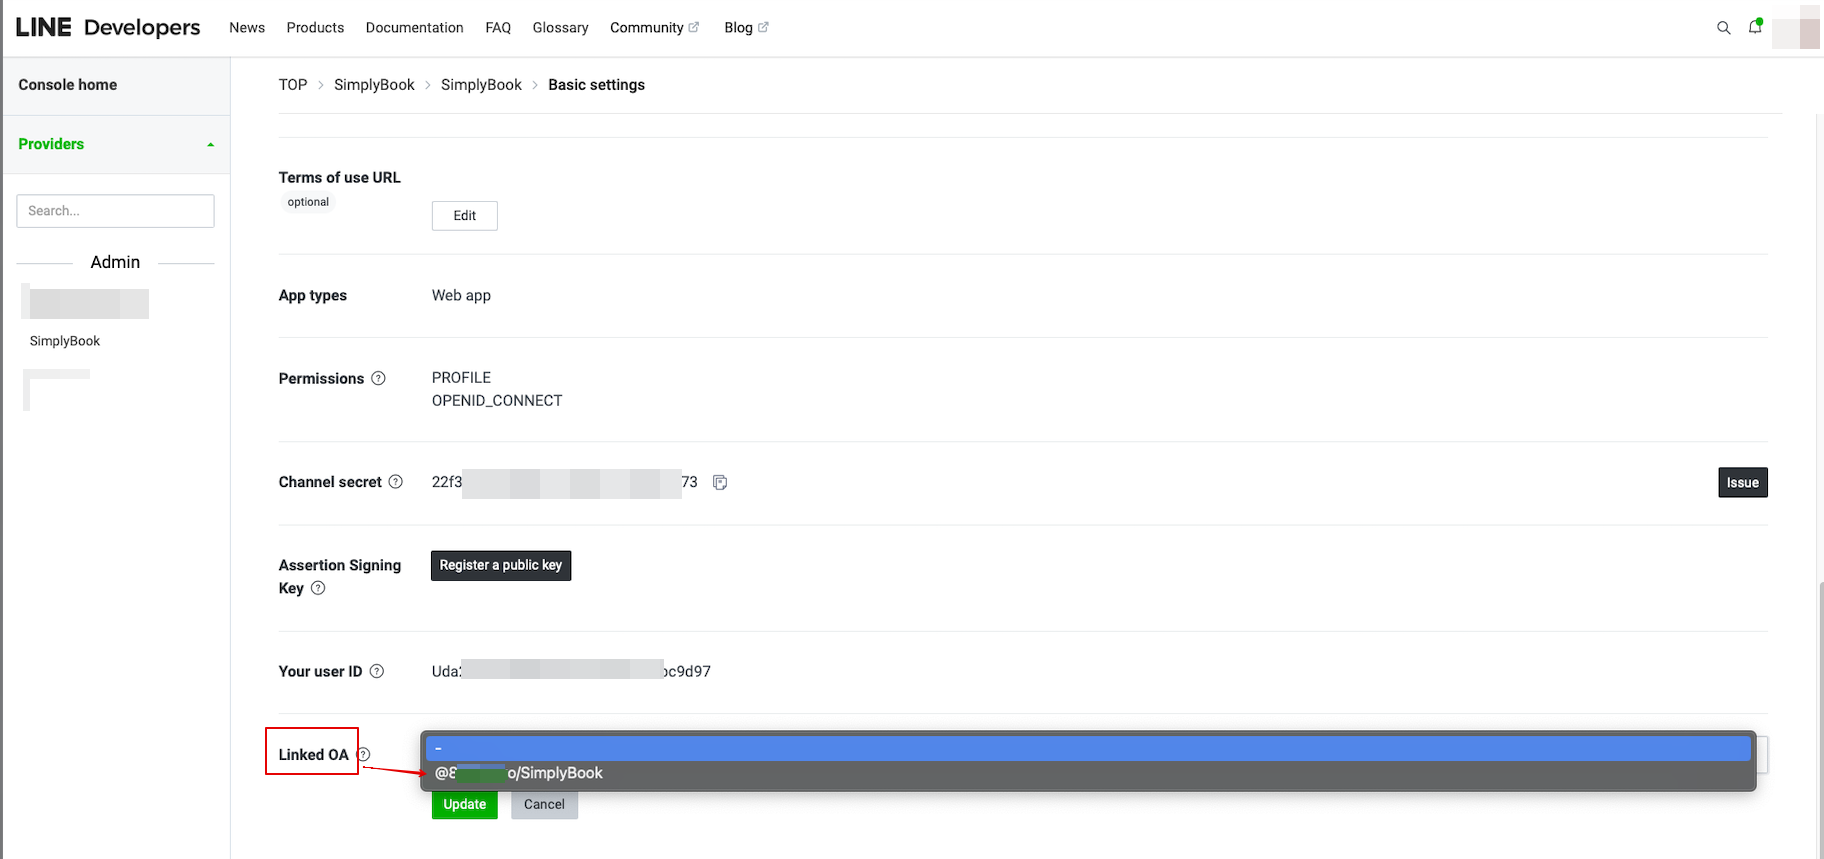
- 14. To link LINE Official account with the LINE Developers account please to to the Developer Console and click on the LINE Login channel. In the Linked OA you need select the Official account to make both parts connected.
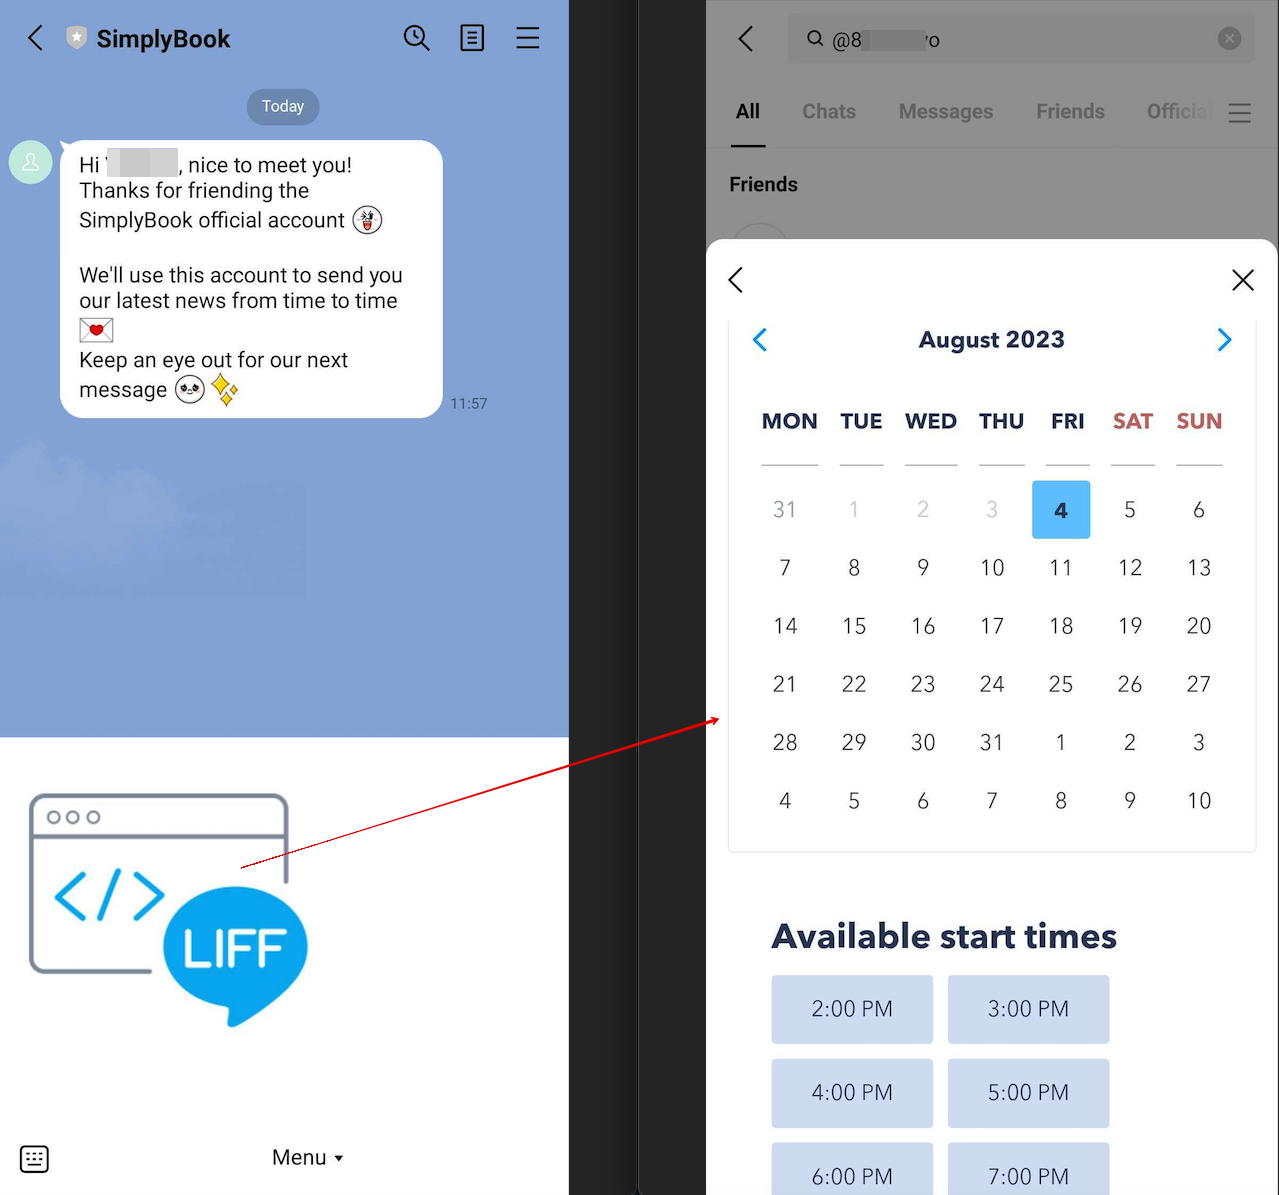
- 15. After opening the Official LINE account page in the LINE app, customers can click on the menu to start the booking process. During the process they can select the services, date and time they want to reserve, login with their LINE account and confirm the reservation.
- The integration also allows the clients to easily see their bookings within this in-app widget.
How to customize LINE Official Account notifications?
Go to the SimplyBook.me admin panel, select Settings → Email and SMS Settings. The LINE booking notifications texts will be consistent with the SMS notification content. If you want to adjust the information included, you can edit the corresponding templates there.
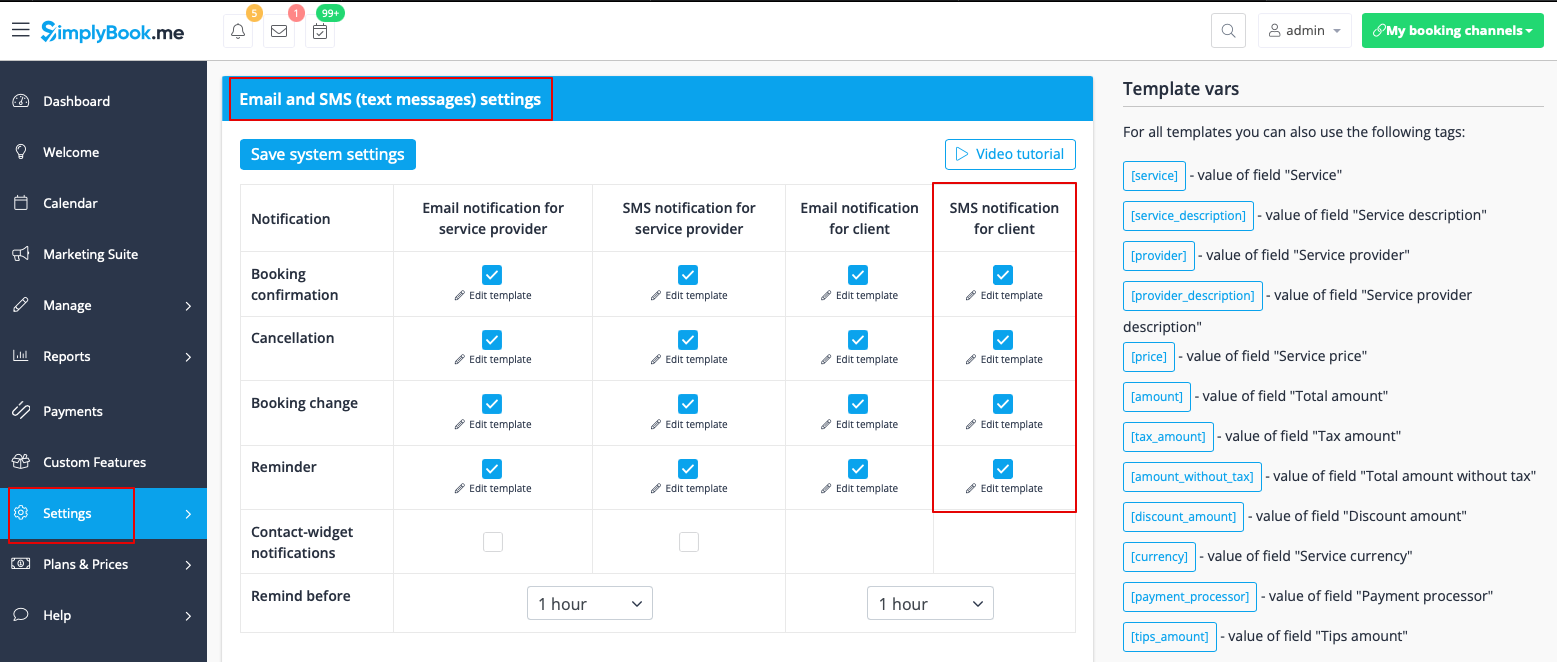
Remark: If you do not check the boxes for client SMS notifications in Settings → Email and SMS Settings, the system will still automatically send appointment reminders and other appointments notifications through LINE.