Tags Custom Feature
This custom feature allows you to add one or more tags to any client, enabling swift filtering of clients in reports, or other custom functionalities like coupons, gift cards, tickets, and memberships. With an intuitive interface, you can easily customize tags to align with your specific requirements, ensuring improved organization and structured client interactions.
How to create tags and assign them to clients
Video tutorial available ![]()
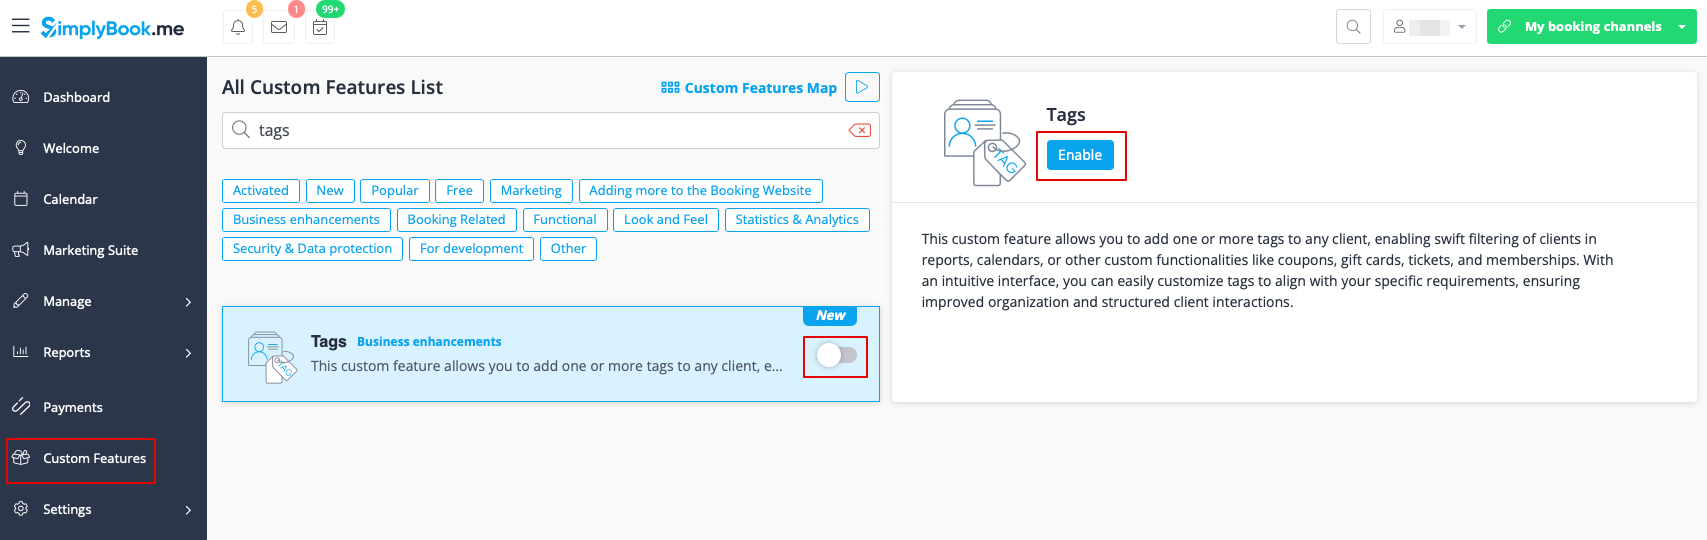
1. To enable this feature go to the Custom Features section using the left-side menu of your admin interface, find Tags, and click on the Enable button or use the switcher.
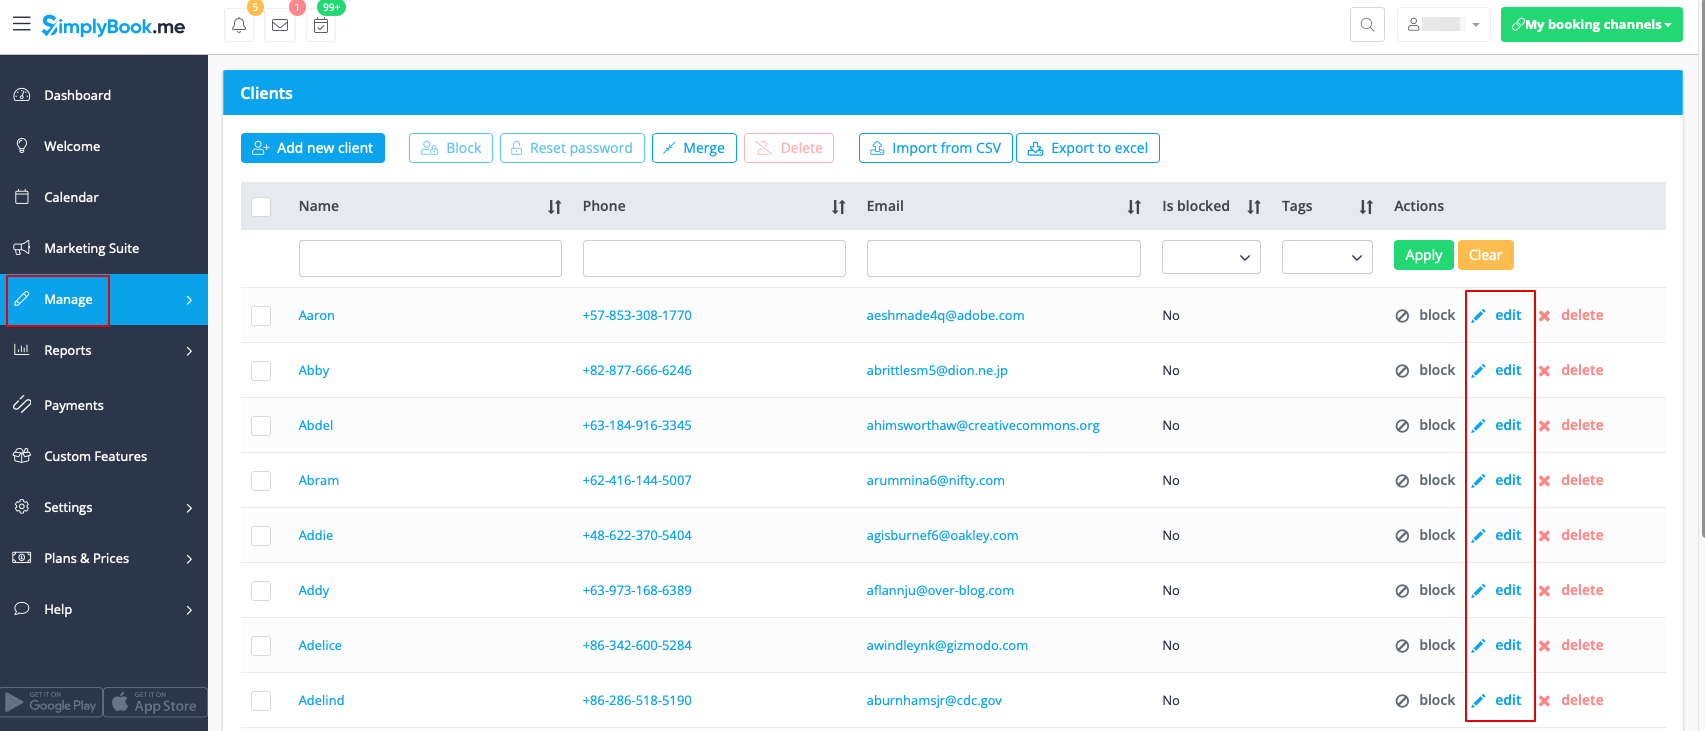
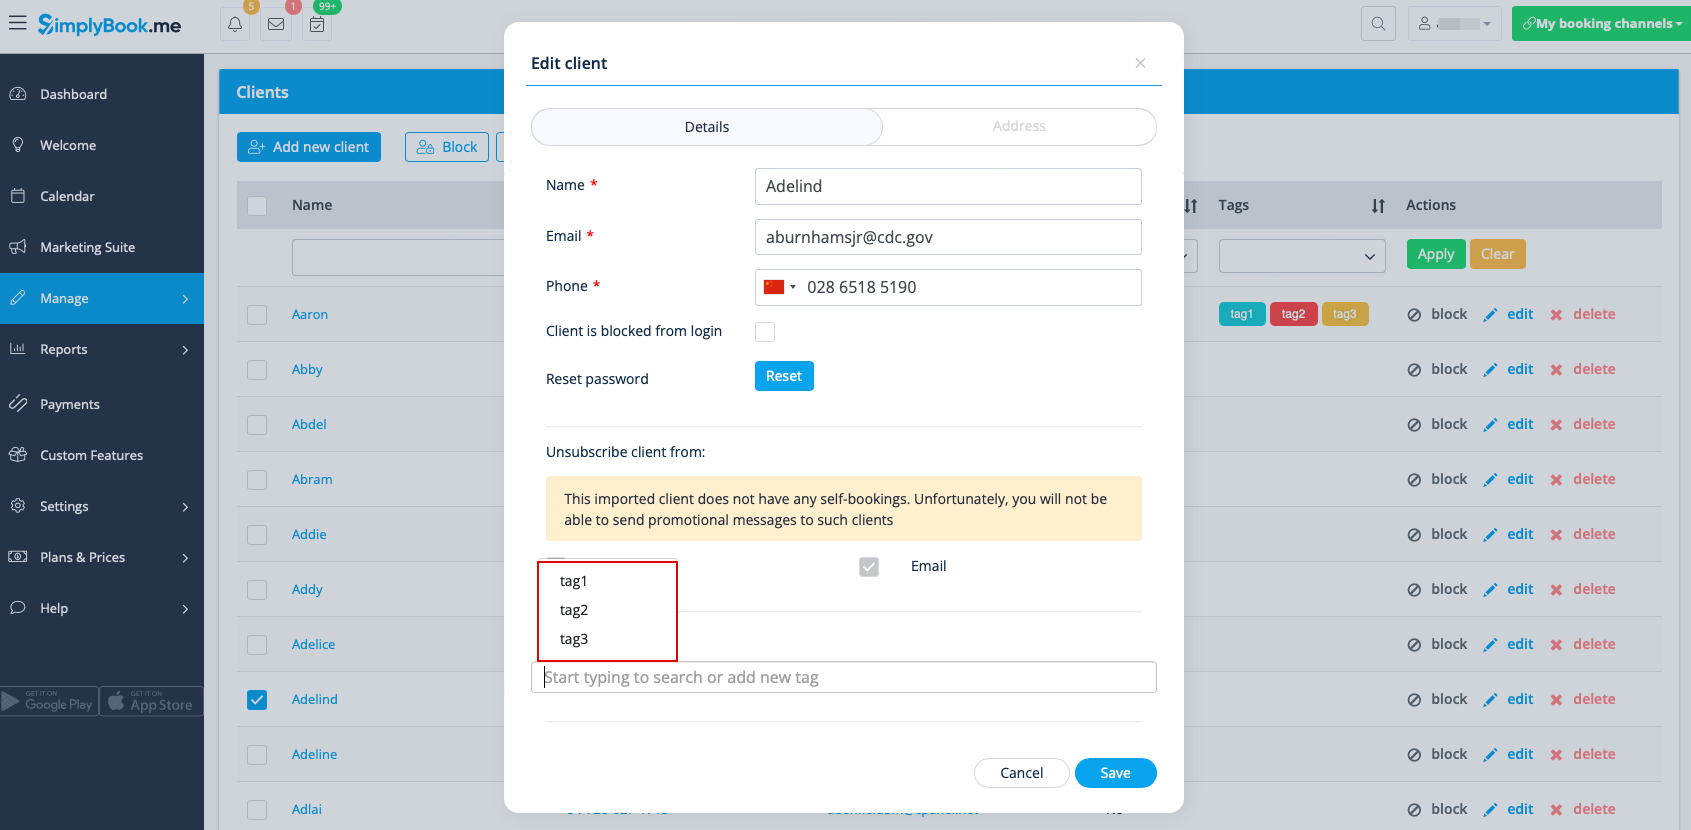
2. To create a tag, go to Manage -> Clients -> click on the Edit button next to the necessary client record.
3. In the Client tags field you can add a new tag and click on the Save button. It is possible to associate more than one tag with one and the same client.
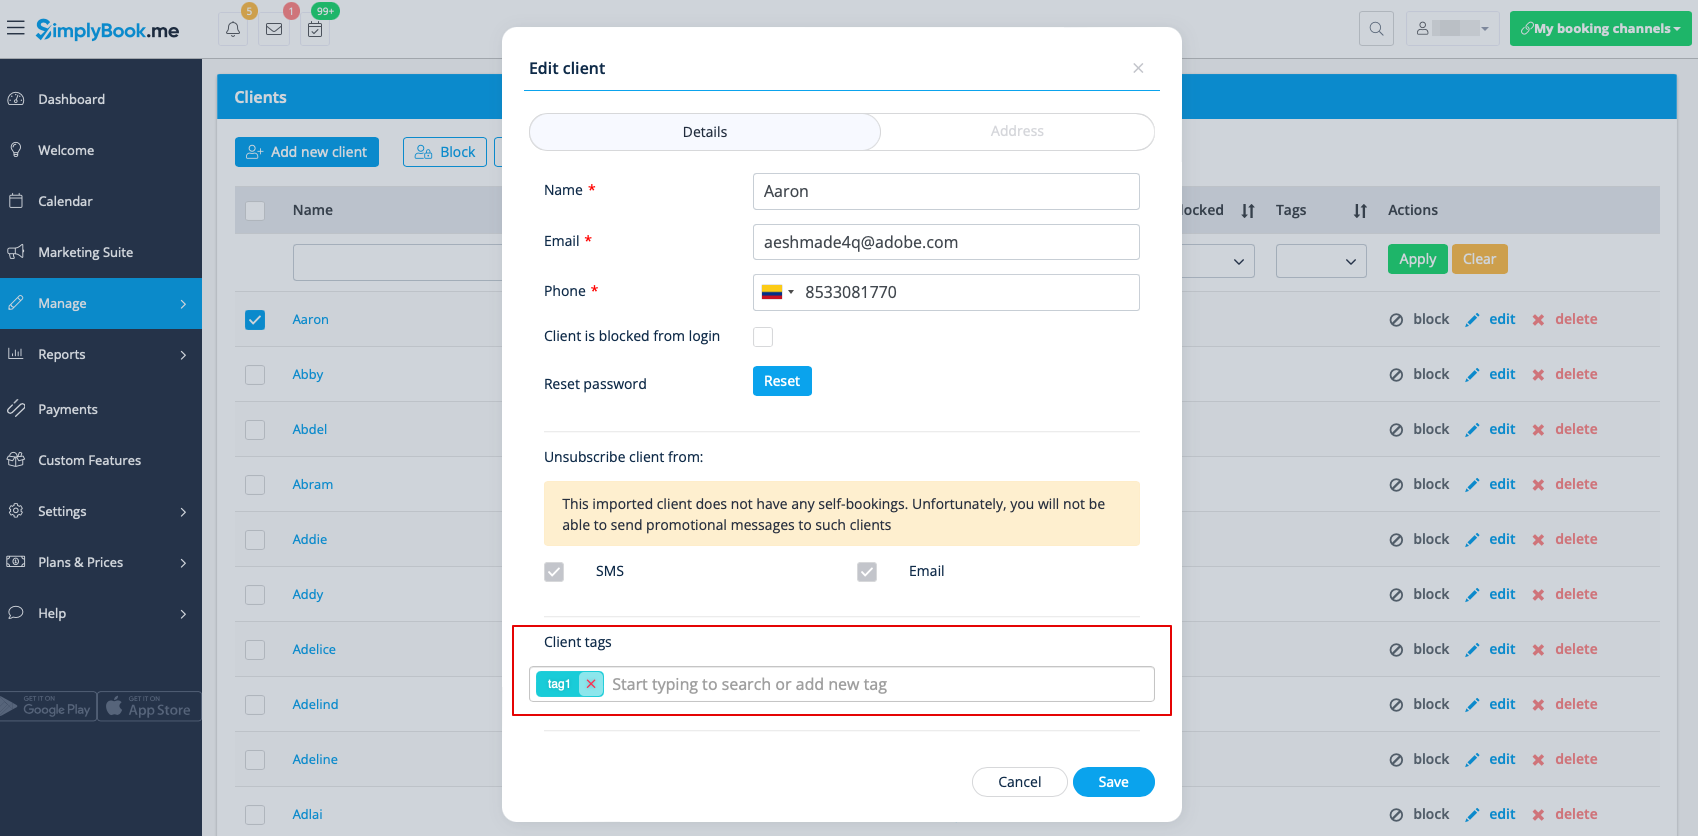
4. From now on, when adding tag(s) for the other clients, once you click on the Client tags field all the tags you added previously will be selectable from the drop-down menu.
How to manage created tags
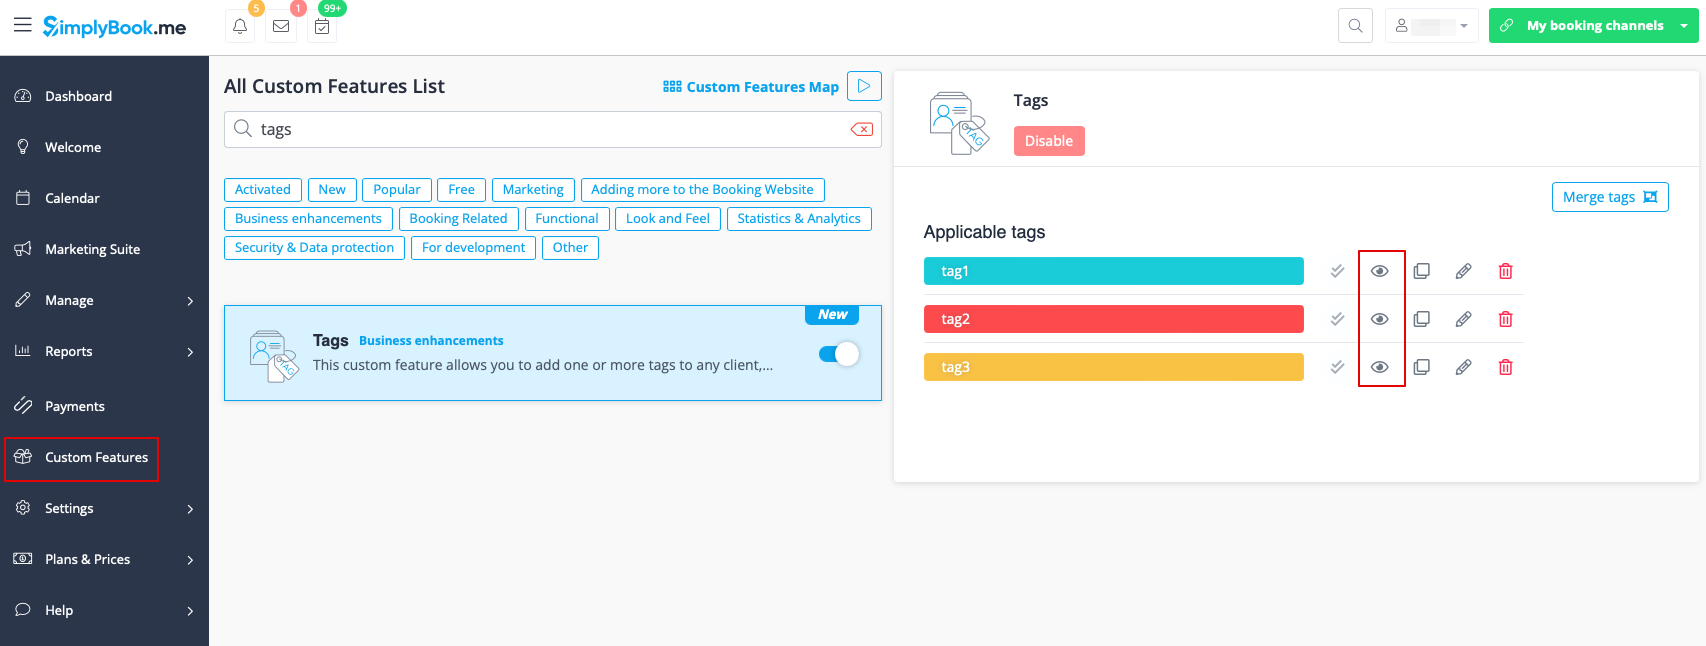
- All the tags you have created can be checked and managed on Tags Custom Feature page. After clicking on the feature name there, you will see all the tags you already have.
- There you can set one or more tags as default. If you set that option for one of several tags, the default ones will be automatically assigned to all new clients.

- As well you can view all the clients associated with the specific tag. After the click on the View button you will be redirected to the Manage-> Clients page where you will see all the clients associated with the selected tag.
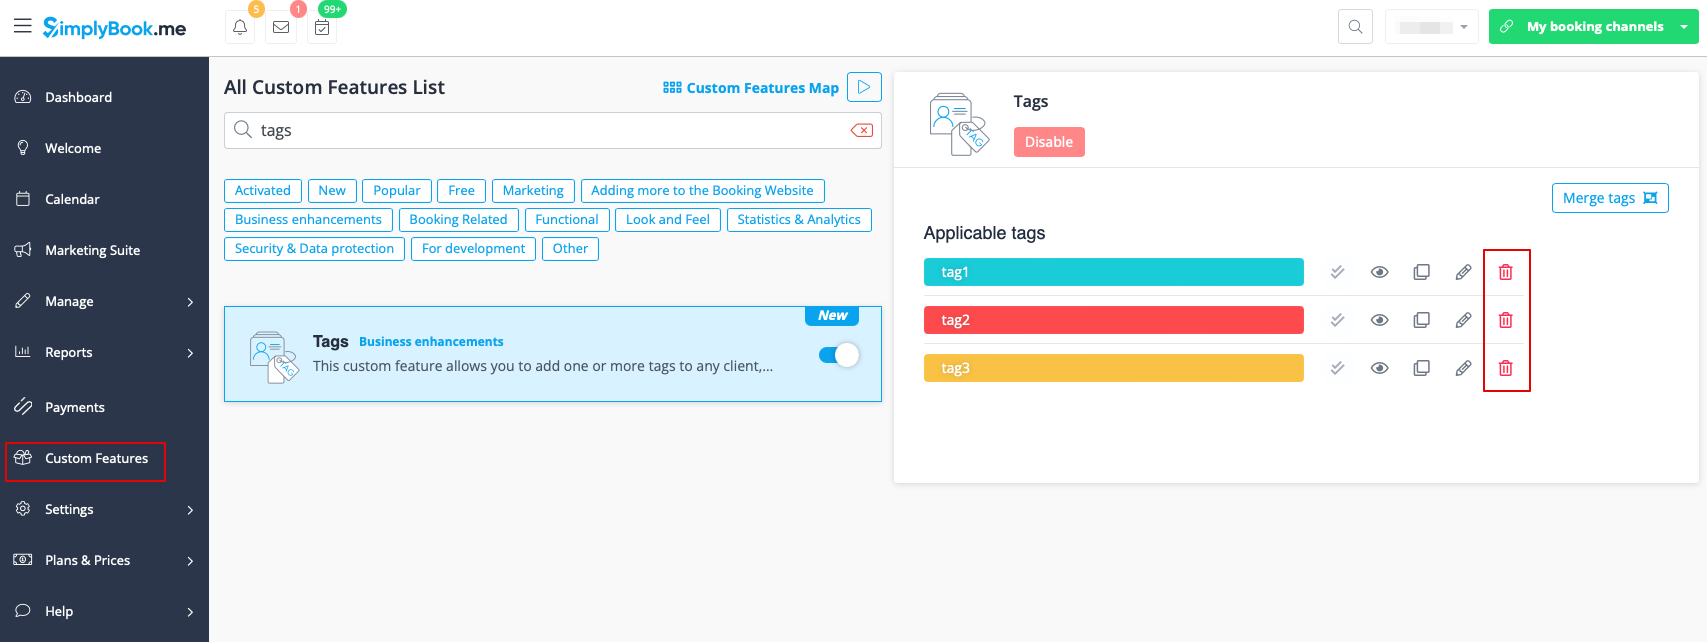
- You can clone the tags if you need to create a new tag with the same settings. All clients that are using this tag will be additionally using the new clone tag.

- It is possible to change the name of the tag or choose a different tag color there by editing the tag.

- If necessary you can delete the tag from the system.
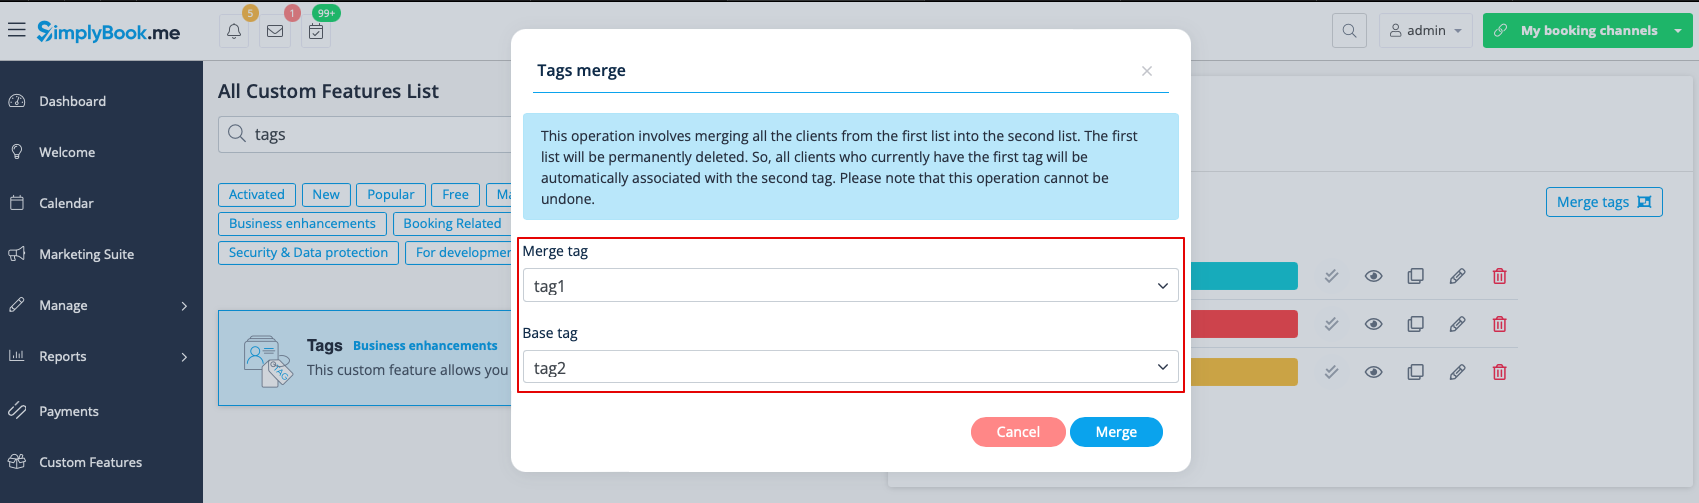
- Additionally, you can merge tags in case you have similar ones. Please select the Merge Tag (it will be removed from the system after merging) and the Base Tag (it will be automatically associated with all the clients who had Merge tag before).

Filtering options:
Please note! It is not possible to select more than one tag simultaneously when filtering by tags.
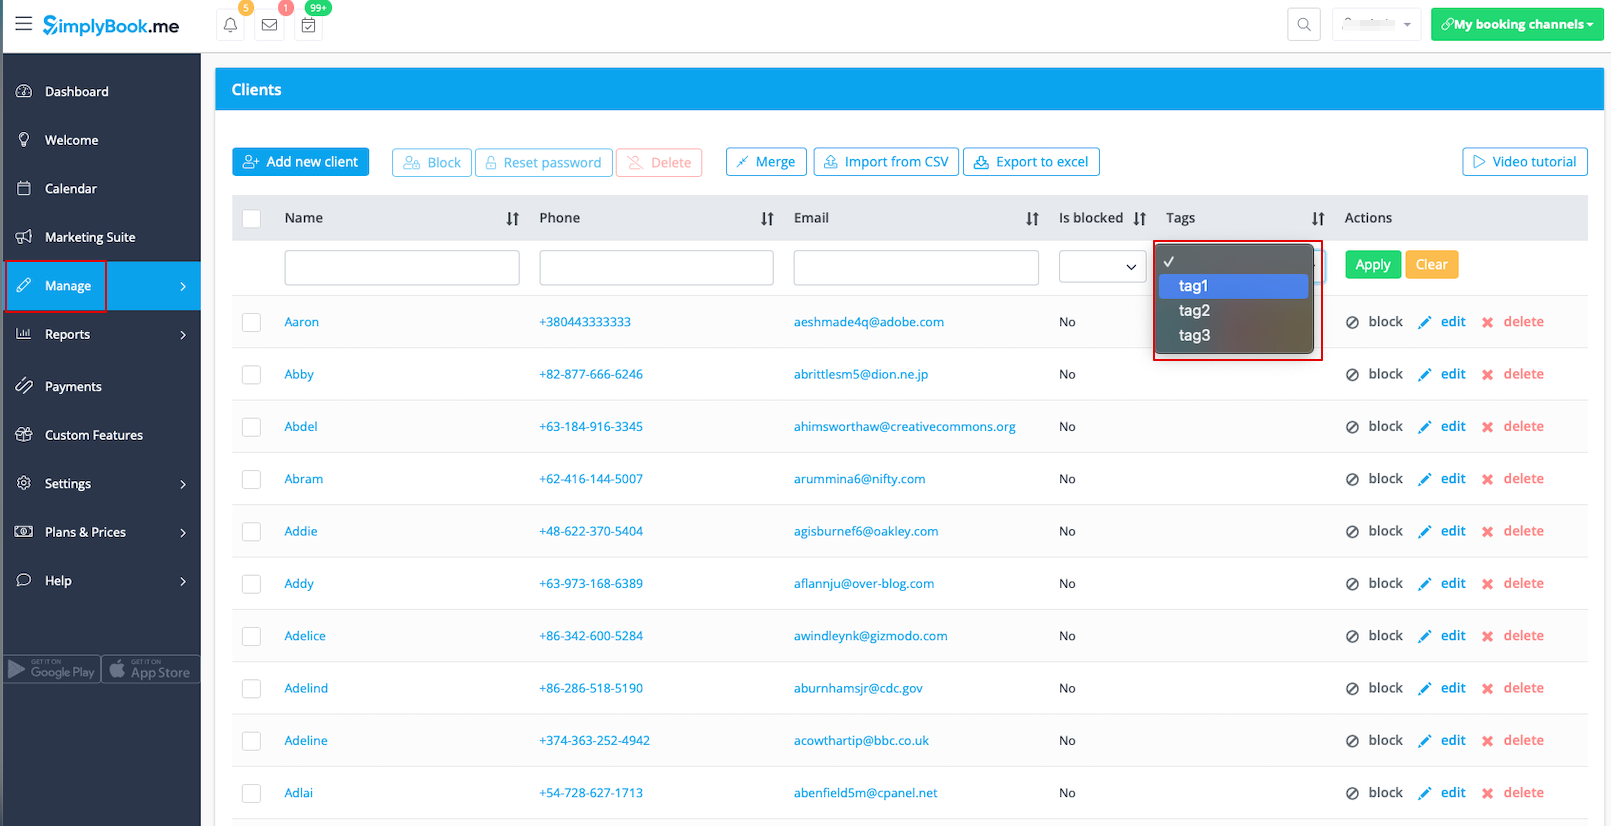
- You can filter clients by tag in Manage -> Clients by clicking on the Tags drop-down section and selecting the corresponding tag.
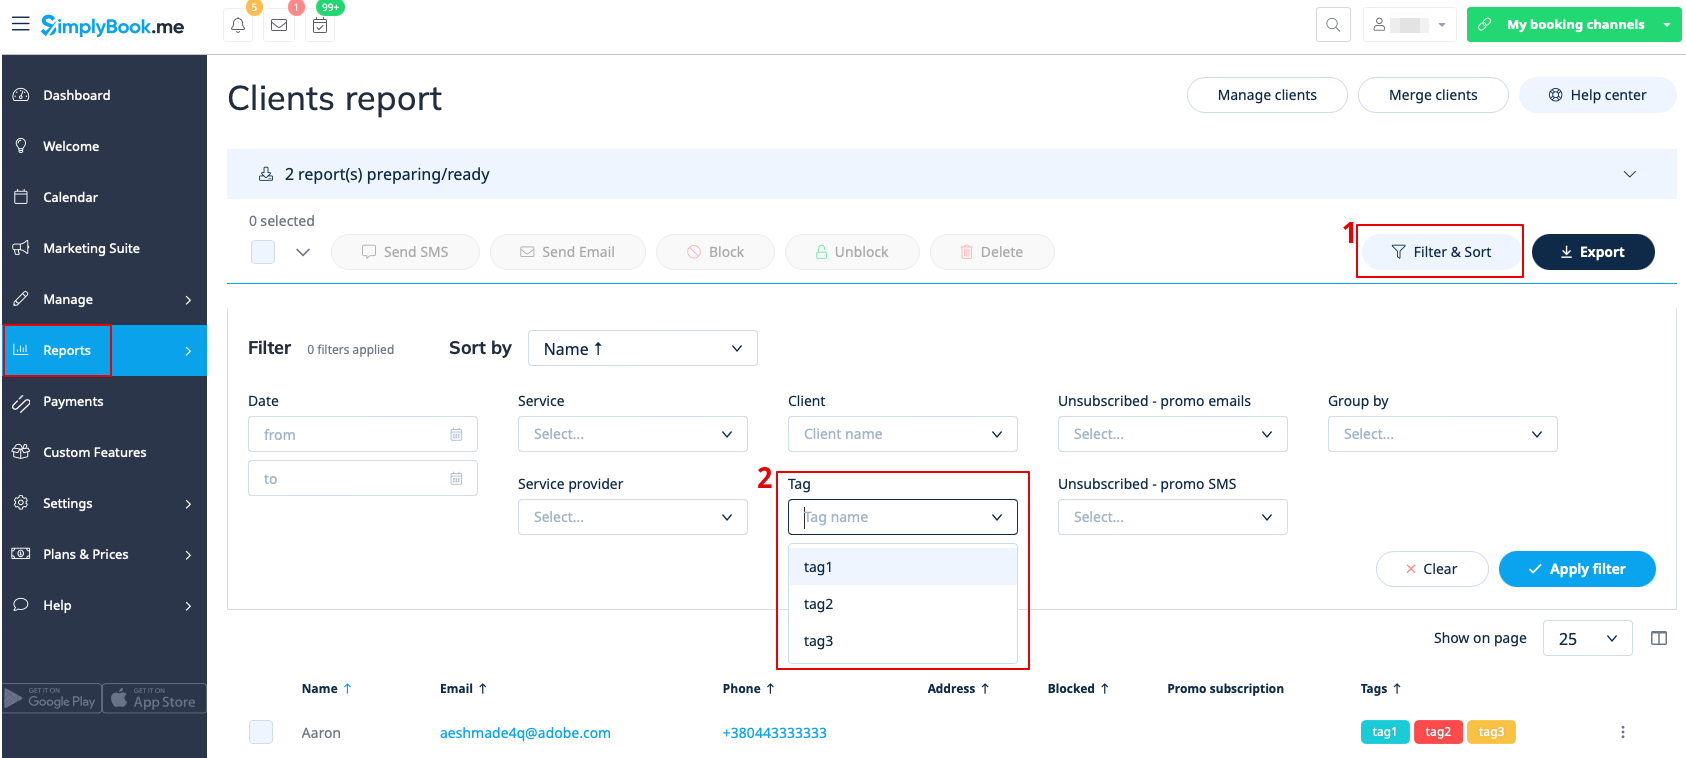
- Clients can also be filtered by Tag in Reports -> Clients by clicking on the Filter & Sort button.
- Filtering by Tag option is also available for the Issued Packages, Membership Payments, Issued Coupons&Gift Cards, Tickets and Loyalty Points reports.
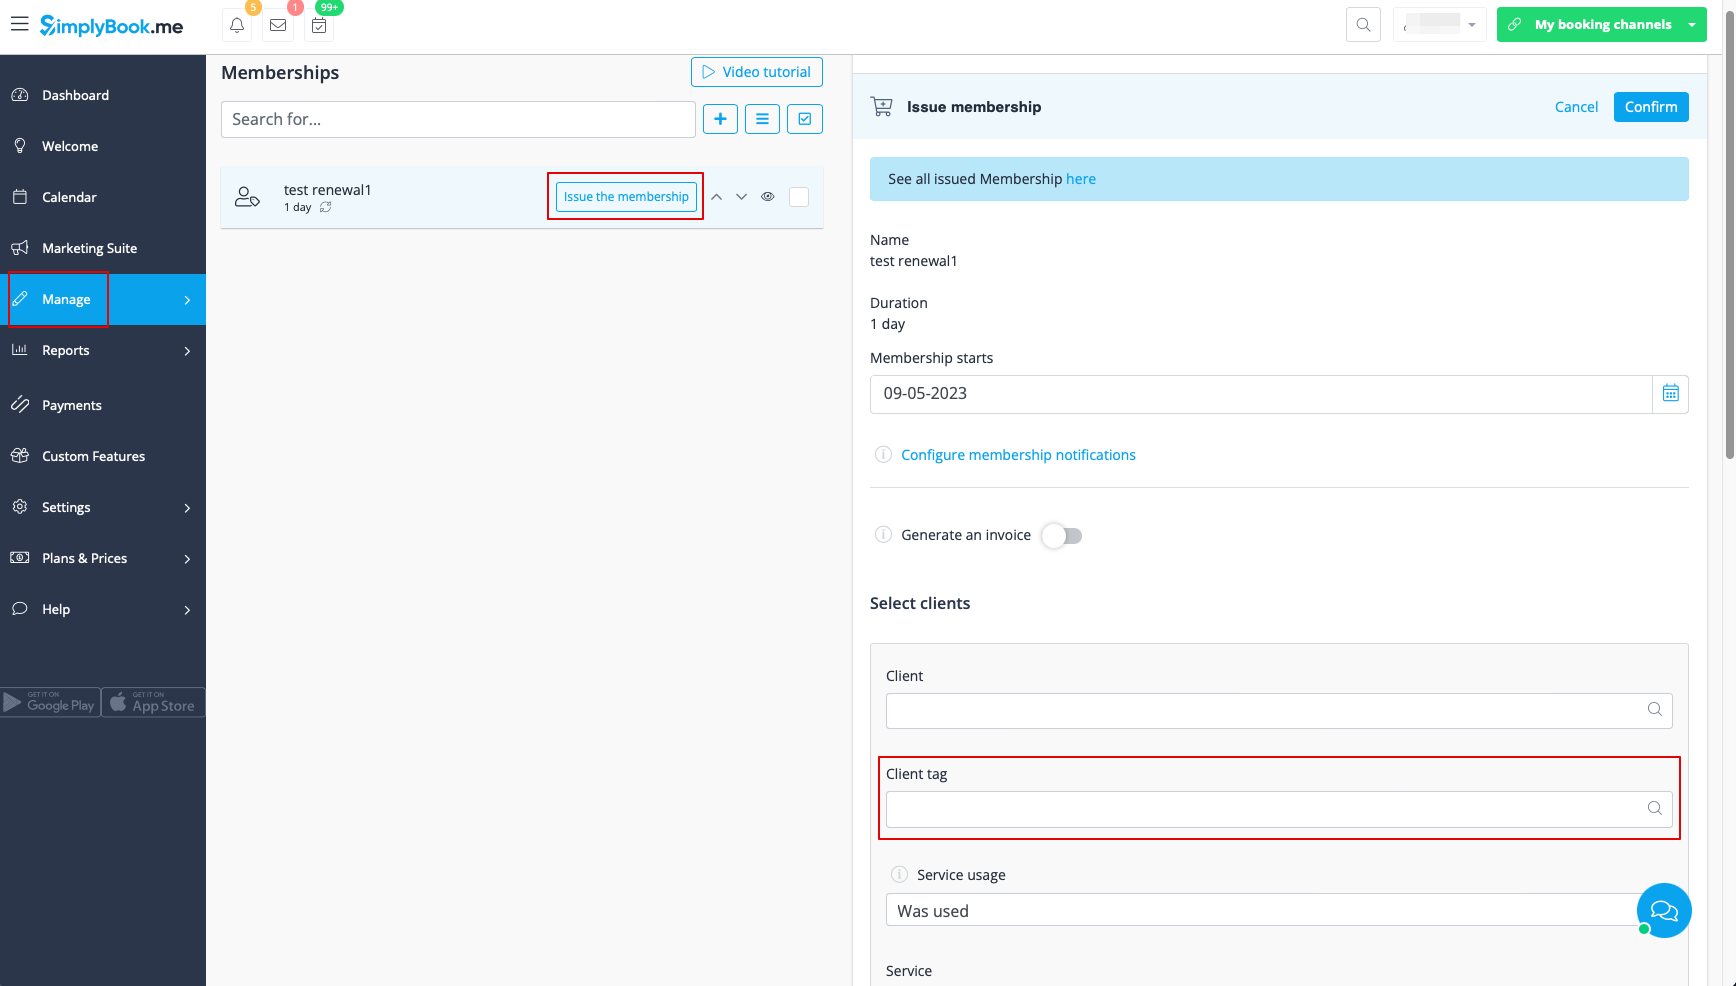
- Apart from that you can filter by the specific tag while issueing memberships, gift cards, coupons and packages from admin side in Manage -> Memberships/Packages/Coupons&Gift cards -> Issue -> Show/Hide filter -> Client tag -> choose the necessary tag and apply the filter and then check the boxes with the filtered client records.