Difference between revisions of "Terms and Conditions custom feature"
From SimplyBook.me
| Line 16: | Line 16: | ||
;How to use | ;How to use | ||
:1. Enable this feature on your Custom Features page. | :1. Enable this feature on your Custom Features page. | ||
| − | [[File:Terms and conditions enable path | + | [[File:Terms and conditions enable path new cf.png|border| center]] |
<br><br> | <br><br> | ||
| − | :2. Go to its settings to | + | :2. Go to its settings on the right to manage your Terms and Conditions. |
| − | |||
<br><br> | <br><br> | ||
| − | :3. Add | + | :3. Add the text. You can use HTML formatting there to adjust the look and make it required to agree to your terms with each booking even if the same client books the services from time to time. |
| − | [[File:Terms and conditions settings | + | [[File:Terms and conditions settings path new cf.png|border| center]] |
<br><br> | <br><br> | ||
Revision as of 14:14, 29 October 2020
If you want your business to be bulletproof then this Custom Feature is a MUST. Use it to create and manage terms & conditions for your company towards your clients.
The text inserted in the Custom Feature will be displayed on the "Details" page above the "Book Now" button or on sign up step if you are using Client login feature as a checkbox with text "I agree with -your company name- Terms & Conditions" and the clients will need to agree to it to be able to book your services
Free custom feature!
- How to use
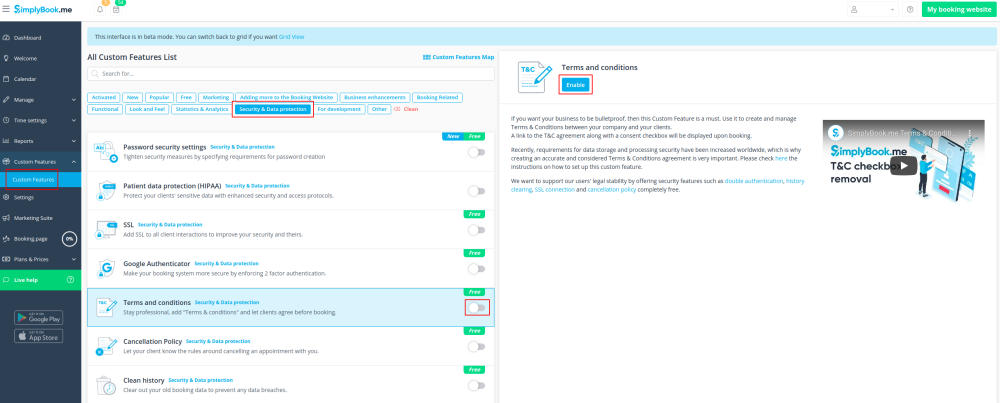
- 1. Enable this feature on your Custom Features page.
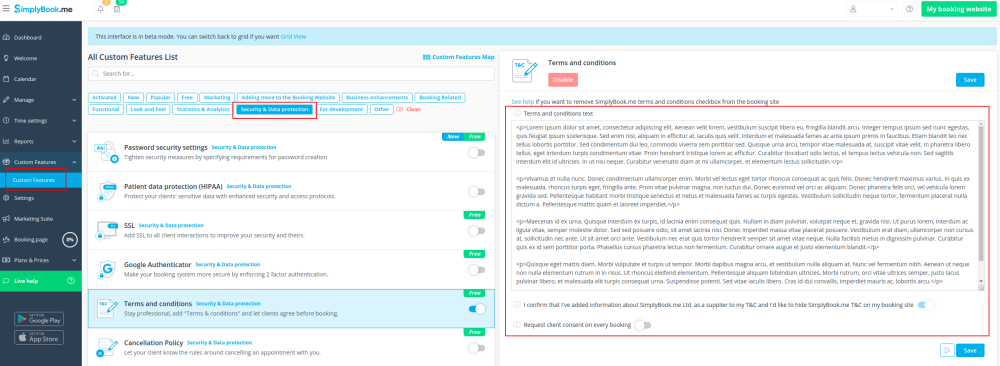
- 2. Go to its settings on the right to manage your Terms and Conditions.
- 3. Add the text. You can use HTML formatting there to adjust the look and make it required to agree to your terms with each booking even if the same client books the services from time to time.

