Difference between revisions of "Facebook Pixel Custom Feature/de"
From SimplyBook.me
(Created page with "Individuelle Funktion "Facebook Pixel"") |
(Created page with "left <br>Verwalten Sie Analysen für Ihre Buchungswebsite mit Facebook Pixel <br><br><br><br>") |
||
| Line 8: | Line 8: | ||
| − | + | [[File:Tracking icon.png|left]] <br>Verwalten Sie Analysen für Ihre Buchungswebsite mit Facebook Pixel | |
| − | [[File:Tracking icon.png|left]] <br> | ||
<br><br><br><br> | <br><br><br><br> | ||
| − | |||
<div lang="en" dir="ltr" class="mw-content-ltr"> | <div lang="en" dir="ltr" class="mw-content-ltr"> | ||
Revision as of 14:41, 15 March 2024
Verwalten Sie Analysen für Ihre Buchungswebsite mit Facebook Pixel
Please Note! This custom feature is not compatible with Facebook and Instagram Bookings
Analytics tools integration guide
- How to use
- 1. Enable Facebook Pixel on your Custom Features page, Statistics and Analytics section.
- 2. Navigate to Data Sources on your Facebook business page and either select the previously selected pixel or create a new one by clicking on Connect data sources button.
- 3. Copy 16-digit pixel code.
- 4. Paste it to the Pixel ID field on SimplyBook.me side. Save settings.
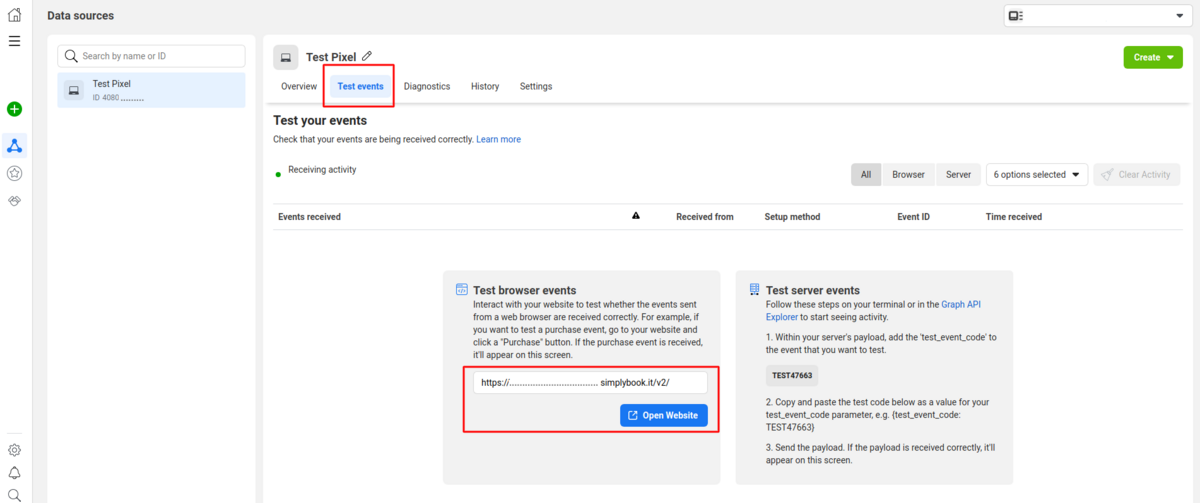
- 5. (optional) You can test events using the corresponding tab on your Facebook business page.
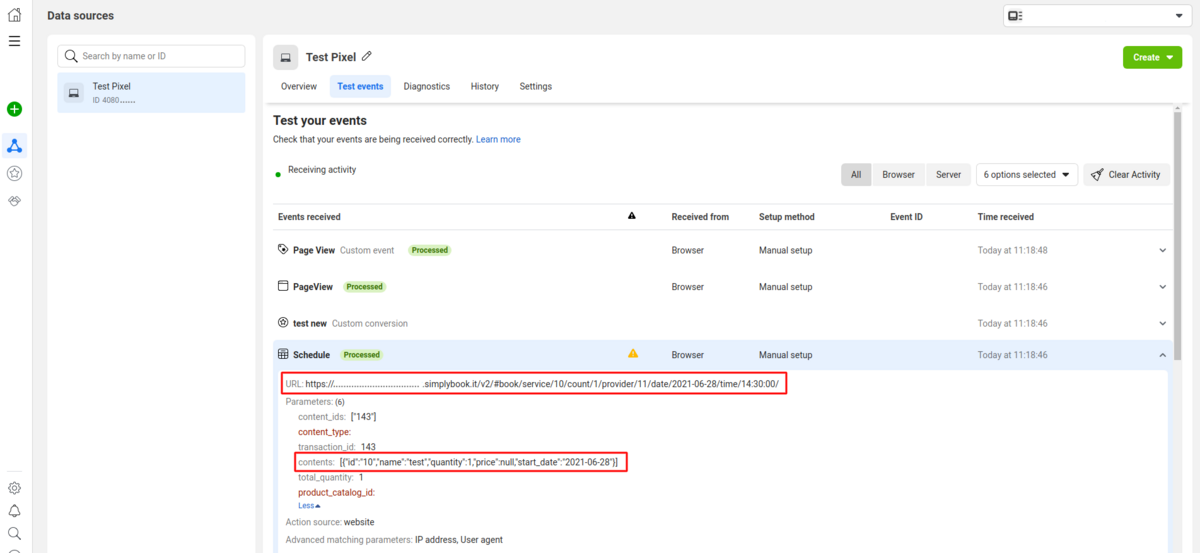
- Simply paste your booking website url there, navigate to it and go through the pages to create the activity.
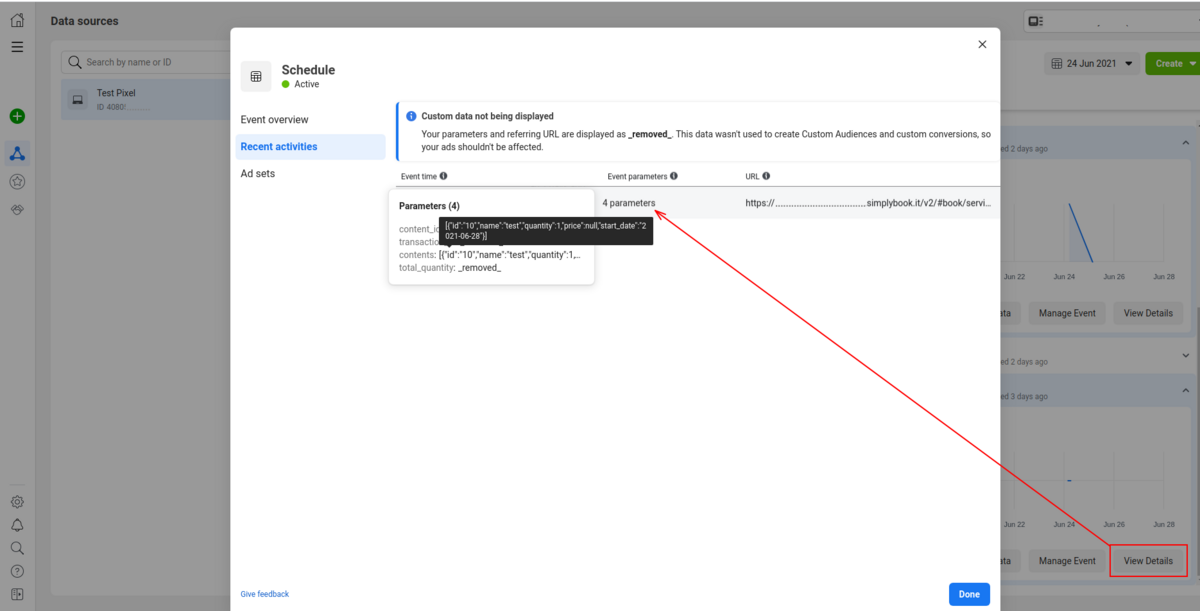
- View the urls, events and their parameters. It is possible to see simple pageviews, schedule and purchase events.
- 6. In the Overview Facebook tab you will be able to see the real events with the details in parameters.
Useful links:


