Difference between revisions of "WordPress integration"
From SimplyBook.me
| (10 intermediate revisions by the same user not shown) | |||
| Line 1: | Line 1: | ||
| + | {{#seo: | ||
| + | |title=WordPress plugin - SimplyBook.me | ||
| + | |titlemode=append | ||
| + | |keywords=faq, frequently asked questions, booking software, appointment system questions, appointments online, calendar software, booking system, booking calendar, scheduling software, online appointment scheduling, online scheduling, plugin, wordpress integration, widget, website widget, wordpress plugin | ||
| + | }} | ||
| + | |||
__FORCETOC__ | __FORCETOC__ | ||
| − | |||
| − | '''' | + | ==With the help of WordPress plugin== |
| + | :1. In your WordPress admin interface navigate to <span style="background-color:#d4f8e5; padding:5px; border-radius:5px;">Plugins</span> -> <span style="background-color:#d4f8e5; padding:5px; border-radius:5px;">Add new Plugin</span> and search for '''Simplybook'''.<br> | ||
| + | :Install it and Activate. | ||
| + | [[File:Add sb plugin to wp new.png|1200px|center|link=https://help.simplybook.me/images/c/c5/Add_sb_plugin_to_wp_new.png]] | ||
<br><br> | <br><br> | ||
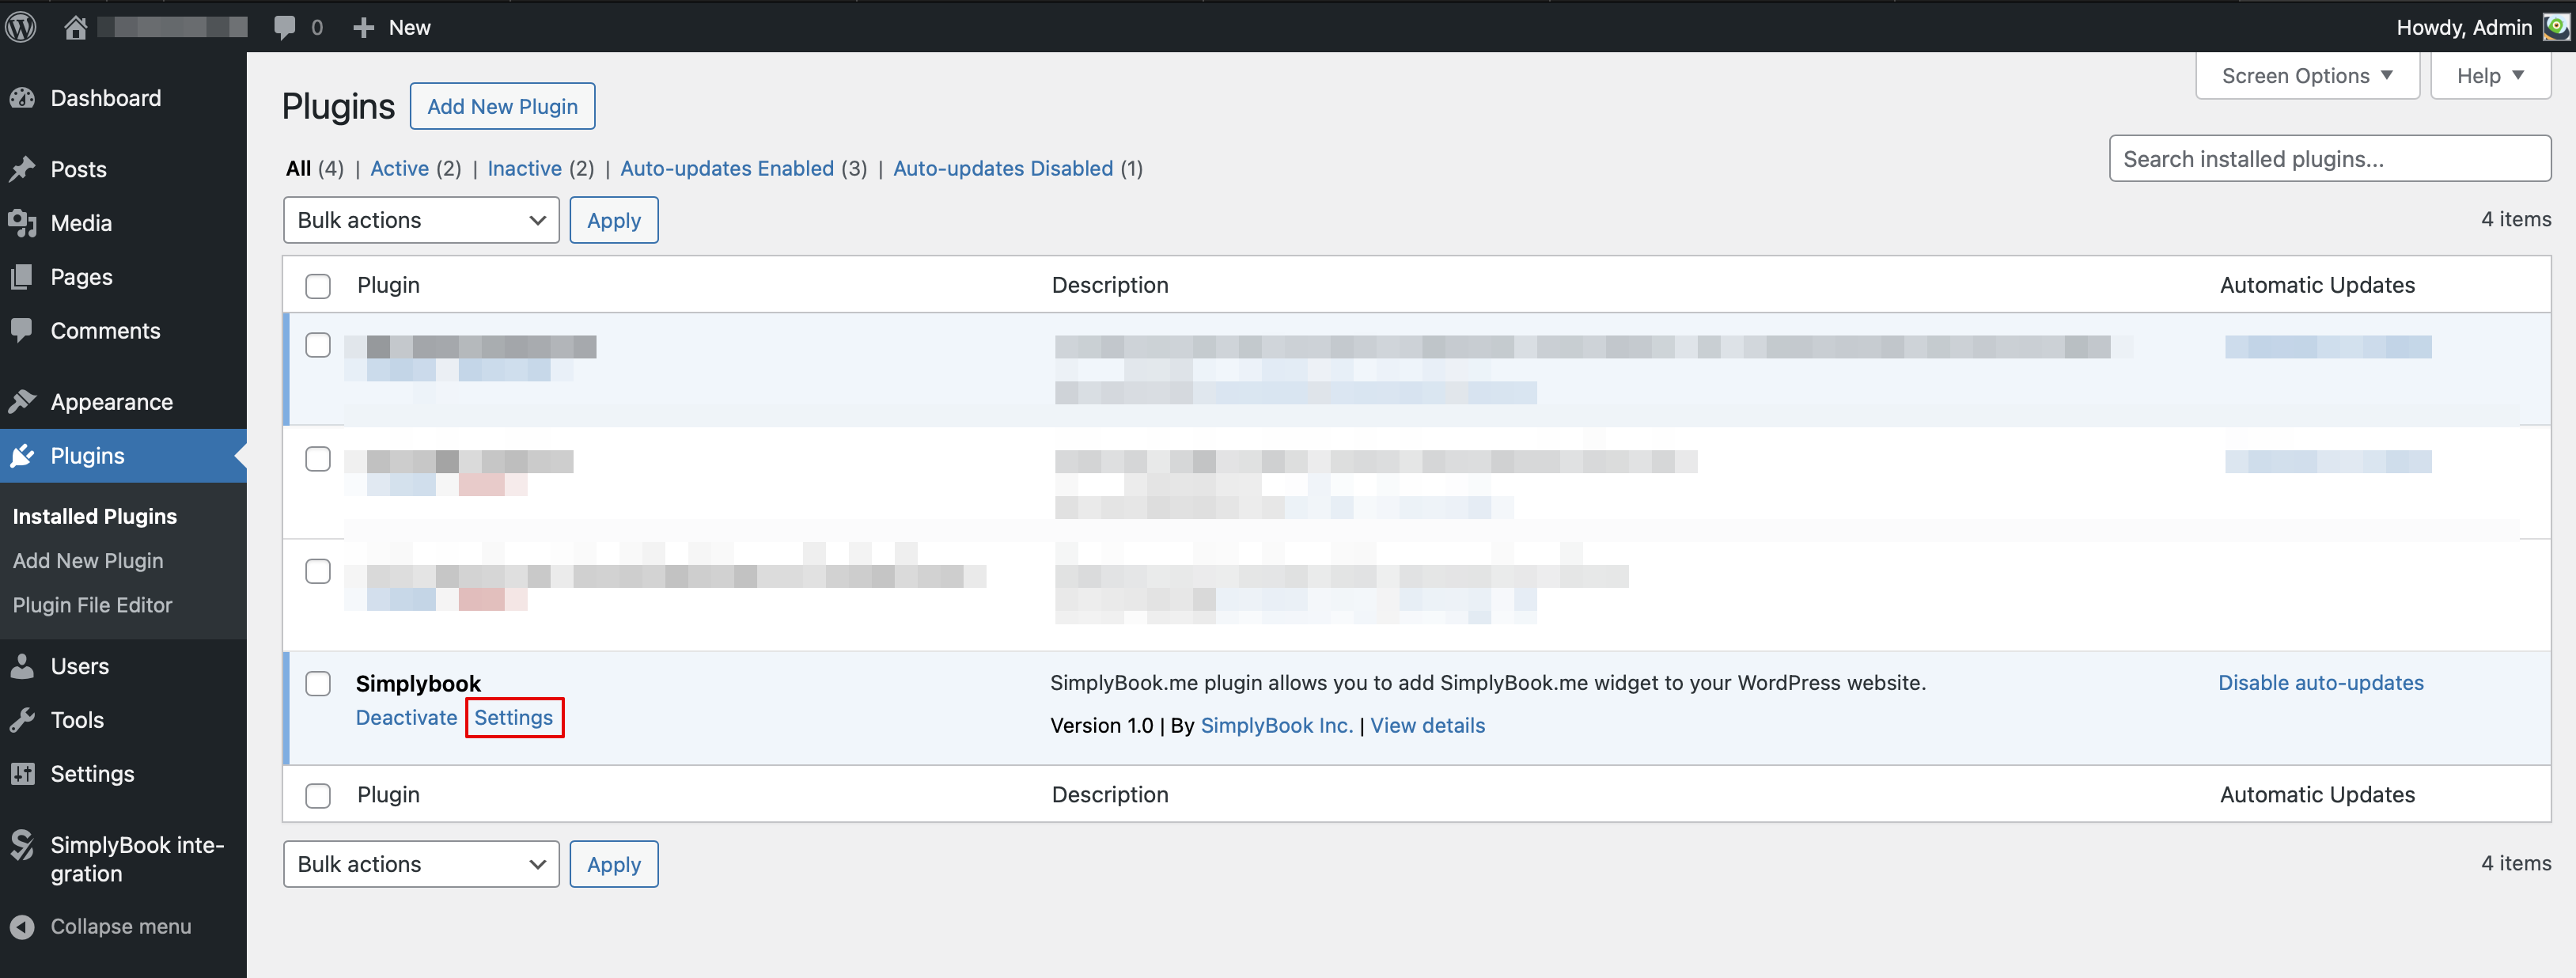
| − | ; | + | :2. Navigate to plugin <span style="background-color:#d4f8e5; padding:5px; border-radius:5px;">Settings.</span> |
| − | : | + | [[File:Wp plugin settings new.png|1200px|center|link=https://help.simplybook.me/images/2/25/Wp_plugin_settings_new.png]] |
| − | |||
| − | [[File: | ||
<br><br> | <br><br> | ||
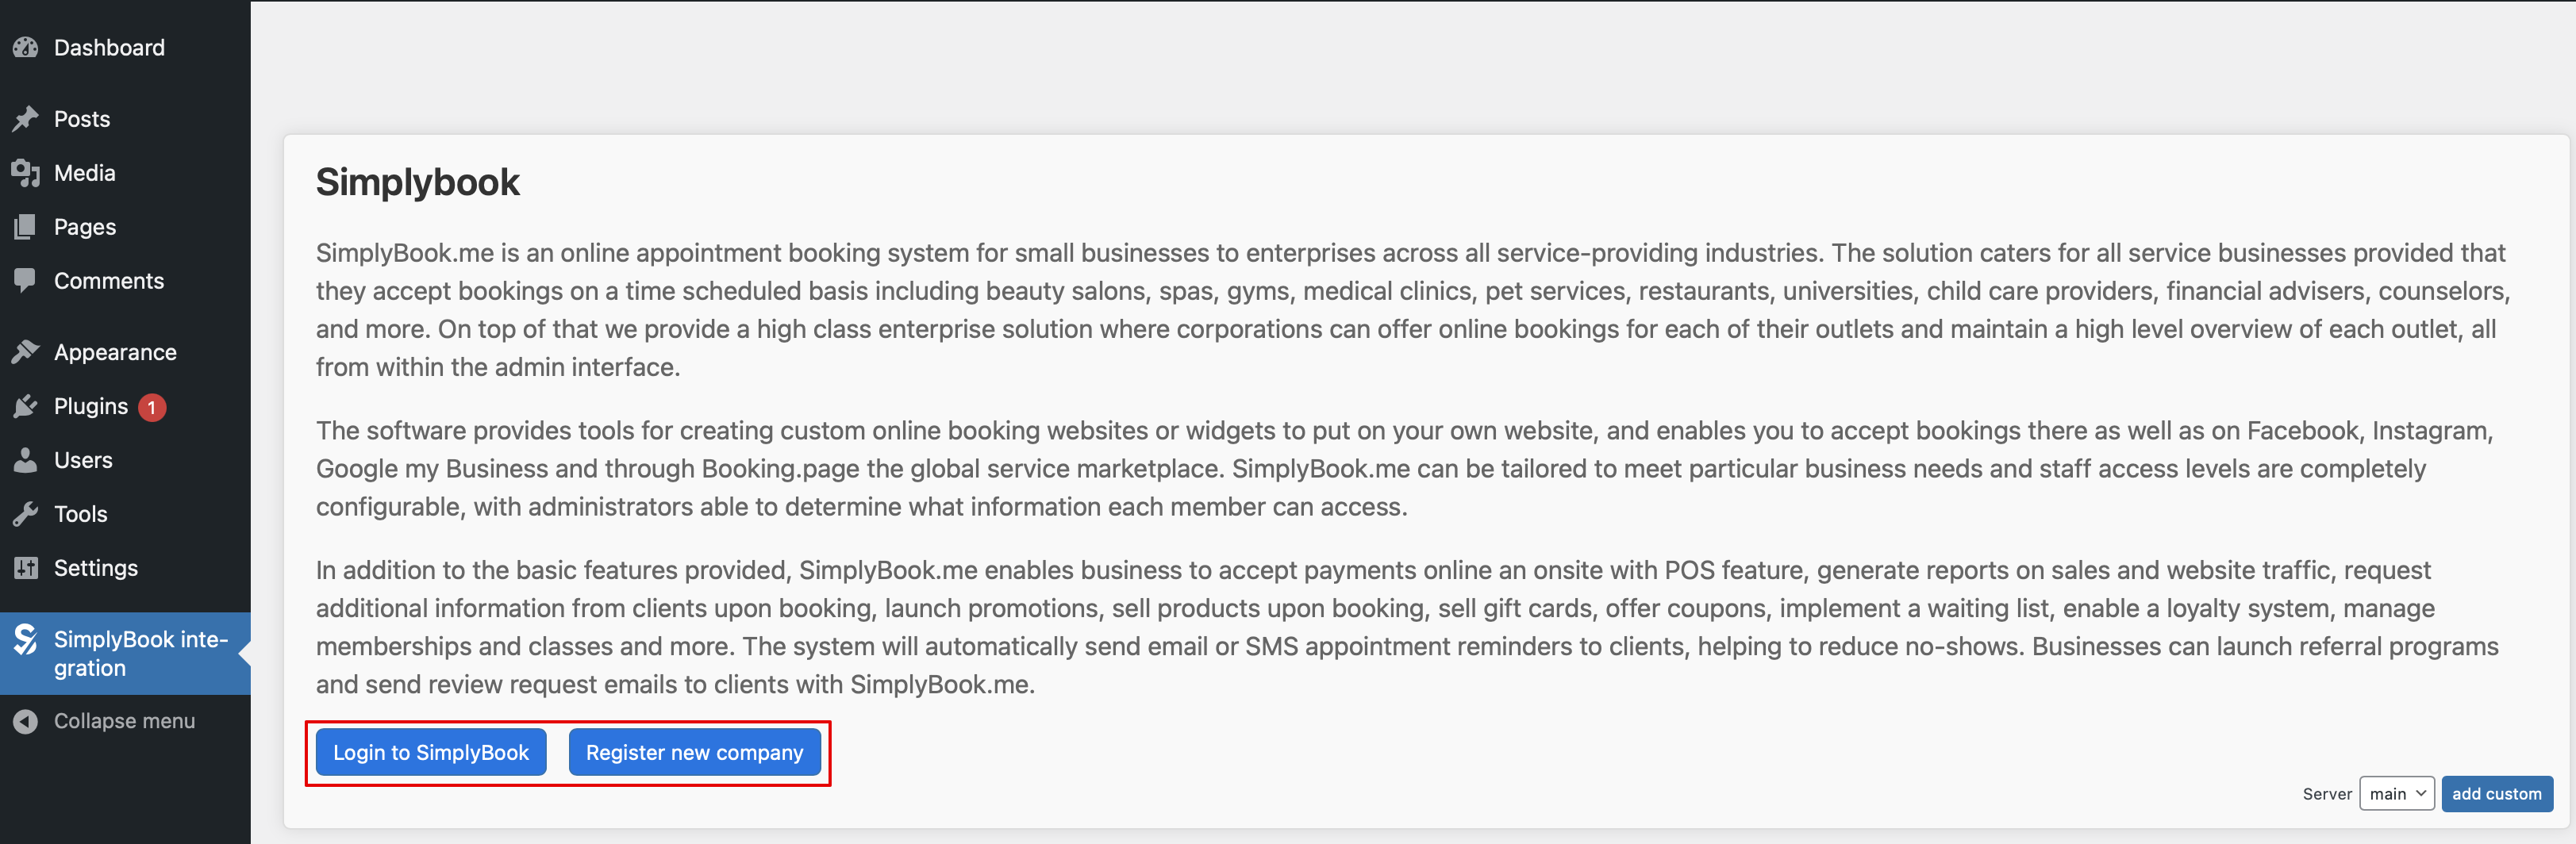
| − | + | :3. If you already have an account with SimplyBook.me please choose the <span style="background-color:#d4f8e5; padding:5px; border-radius:5px;">login</span> option there.<br> | |
| − | : | + | :If you have not created it yet, simply click on <span style="background-color:#d4f8e5; padding:5px; border-radius:5px;">registration</span> option and sign up following the suggested steps. |
| − | + | [[File:Wp plugin login or register upd.png|1200px|center|link=https://help.simplybook.me/images/3/38/Wp_plugin_login_or_register_upd.png]] | |
| − | |||
| − | [[File: | ||
<br><br> | <br><br> | ||
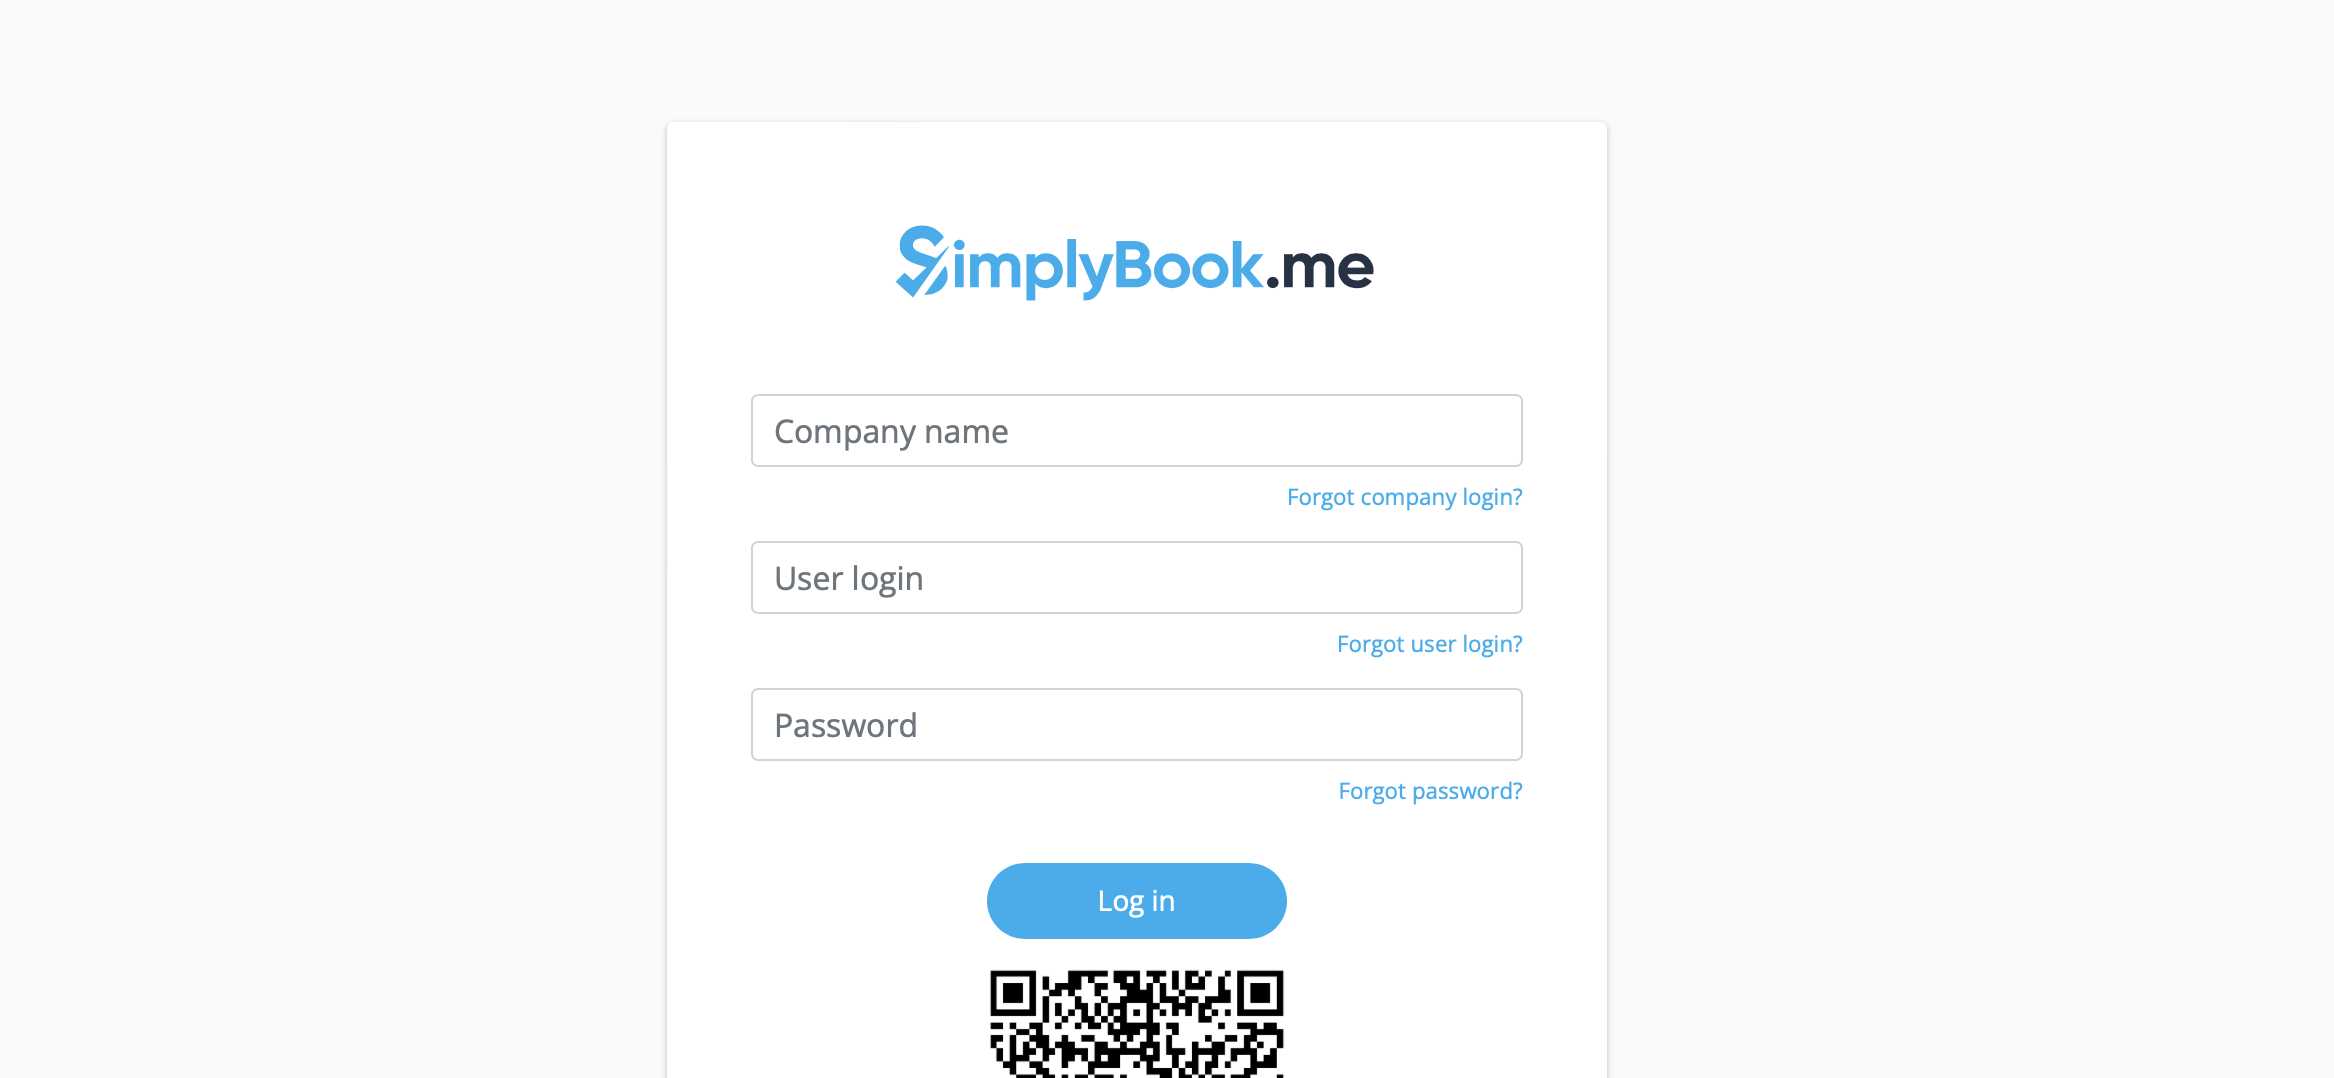
| − | + | :4. Log in providing <span style="background-color:#d4f8e5; padding:5px; border-radius:5px;">company login</span>, <span style="background-color:#d4f8e5; padding:5px; border-radius:5px;">user login</span> and <span style="background-color:#d4f8e5; padding:5px; border-radius:5px;">password.</span> | |
| − | : | + | [[File:Sb login page.png|1200px|center|link=https://help.simplybook.me/images/f/f3/Sb_login_page.png]] |
| − | |||
| − | |||
| − | |||
| − | |||
| − | |||
<br><br> | <br><br> | ||
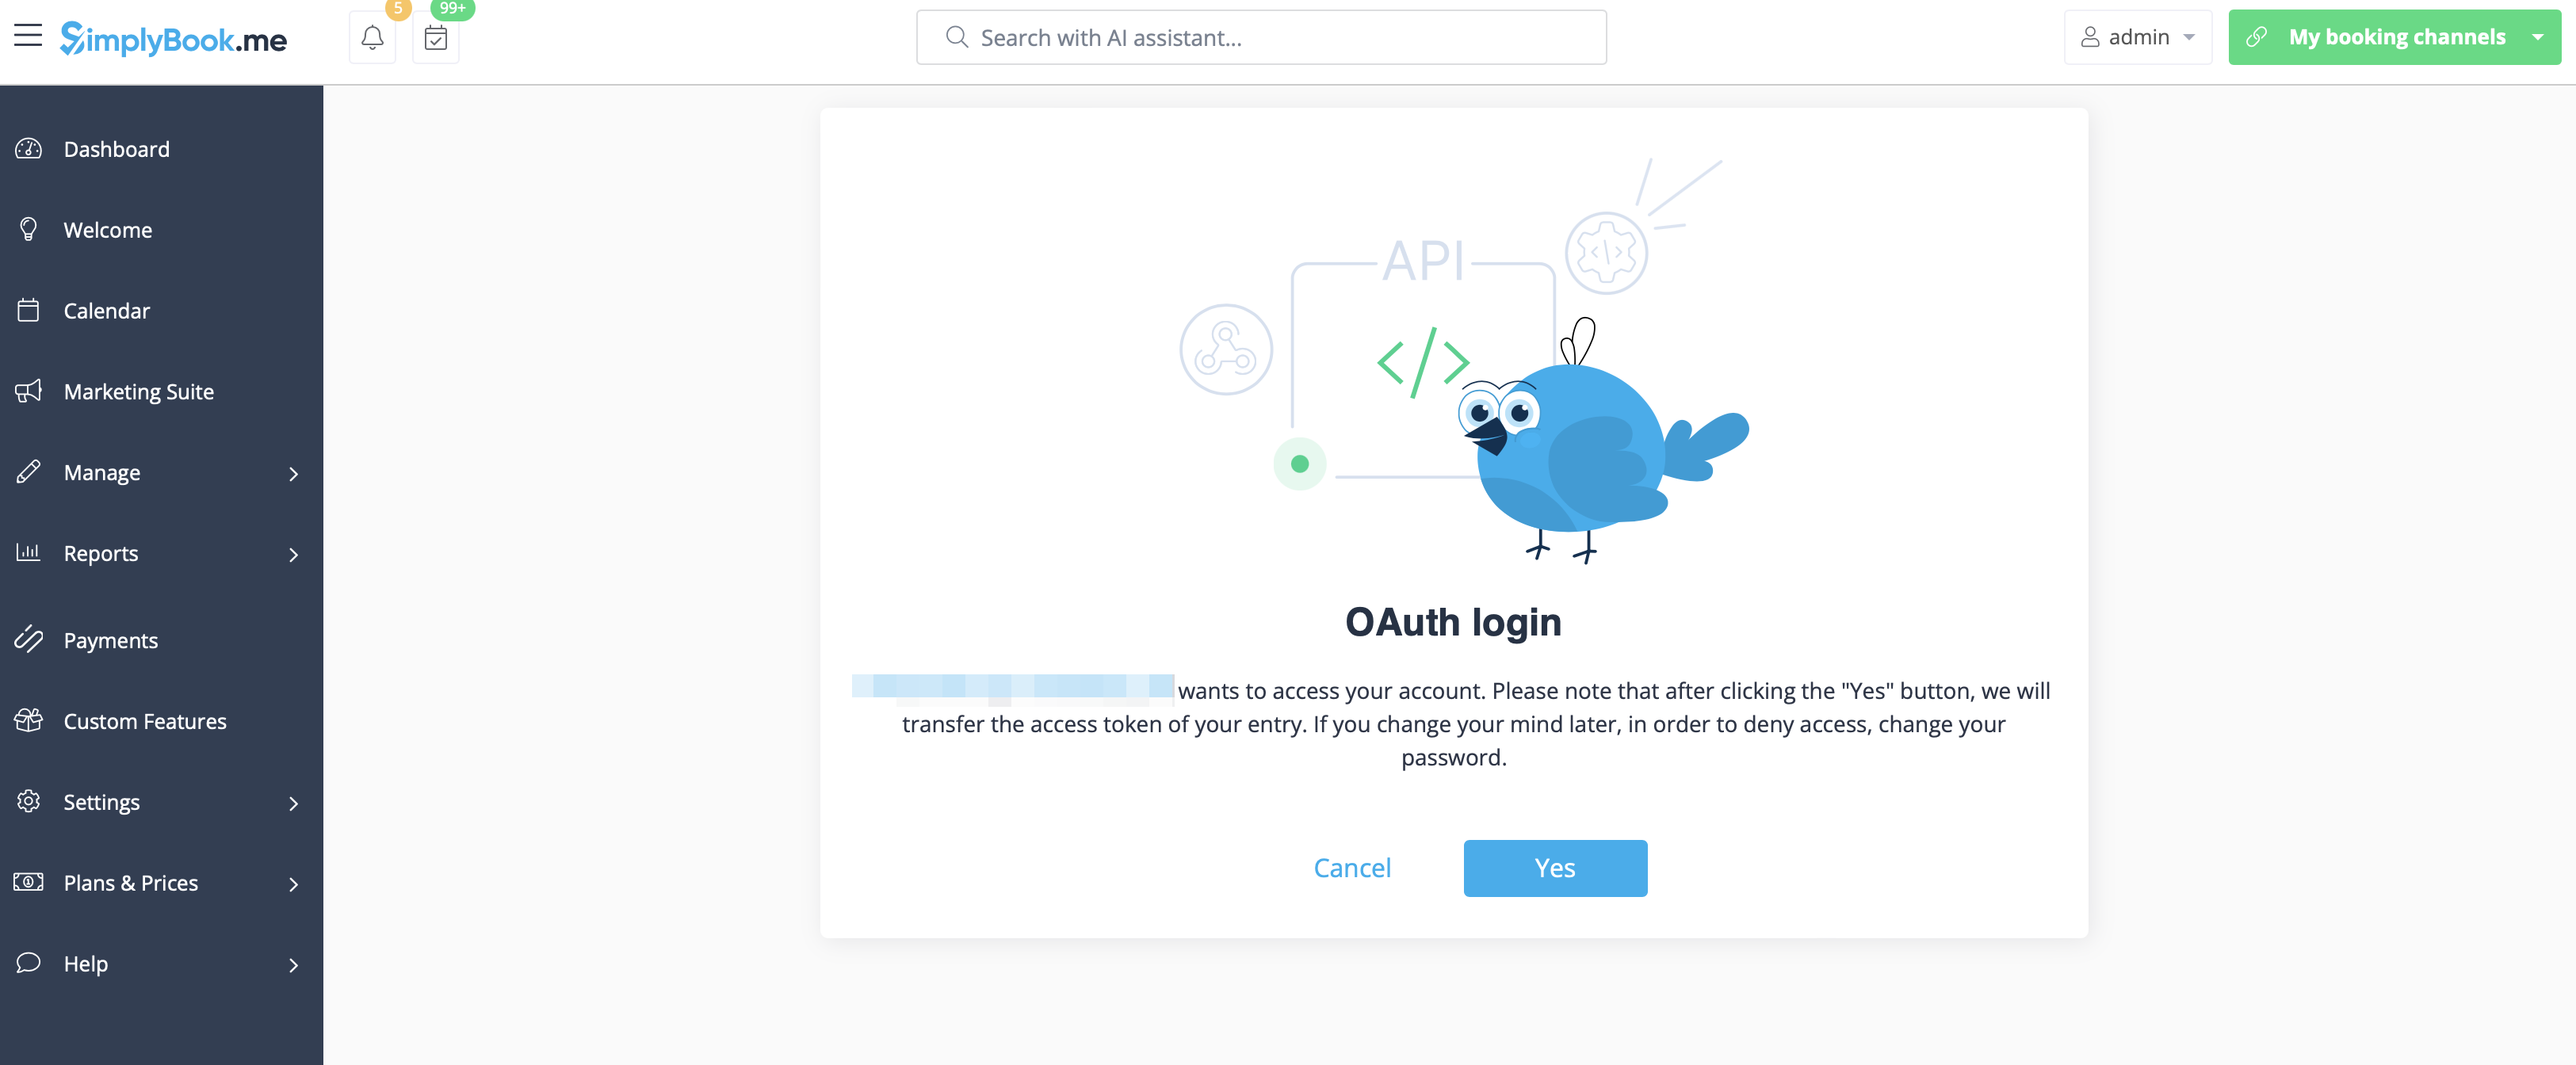
| − | : | + | :5. <span style="background-color:#d4f8e5; padding:5px; border-radius:5px;">Confirm the connection</span> between SimplyBook.me account and your WordPress system. |
| + | :You will get the one-time code to finalise the connection. | ||
| + | [[File:Sb confirm connection to wp new.png|1200px|center|link=https://help.simplybook.me/images/c/c1/Sb_confirm_connection_to_wp_new.png]] | ||
<br><br> | <br><br> | ||
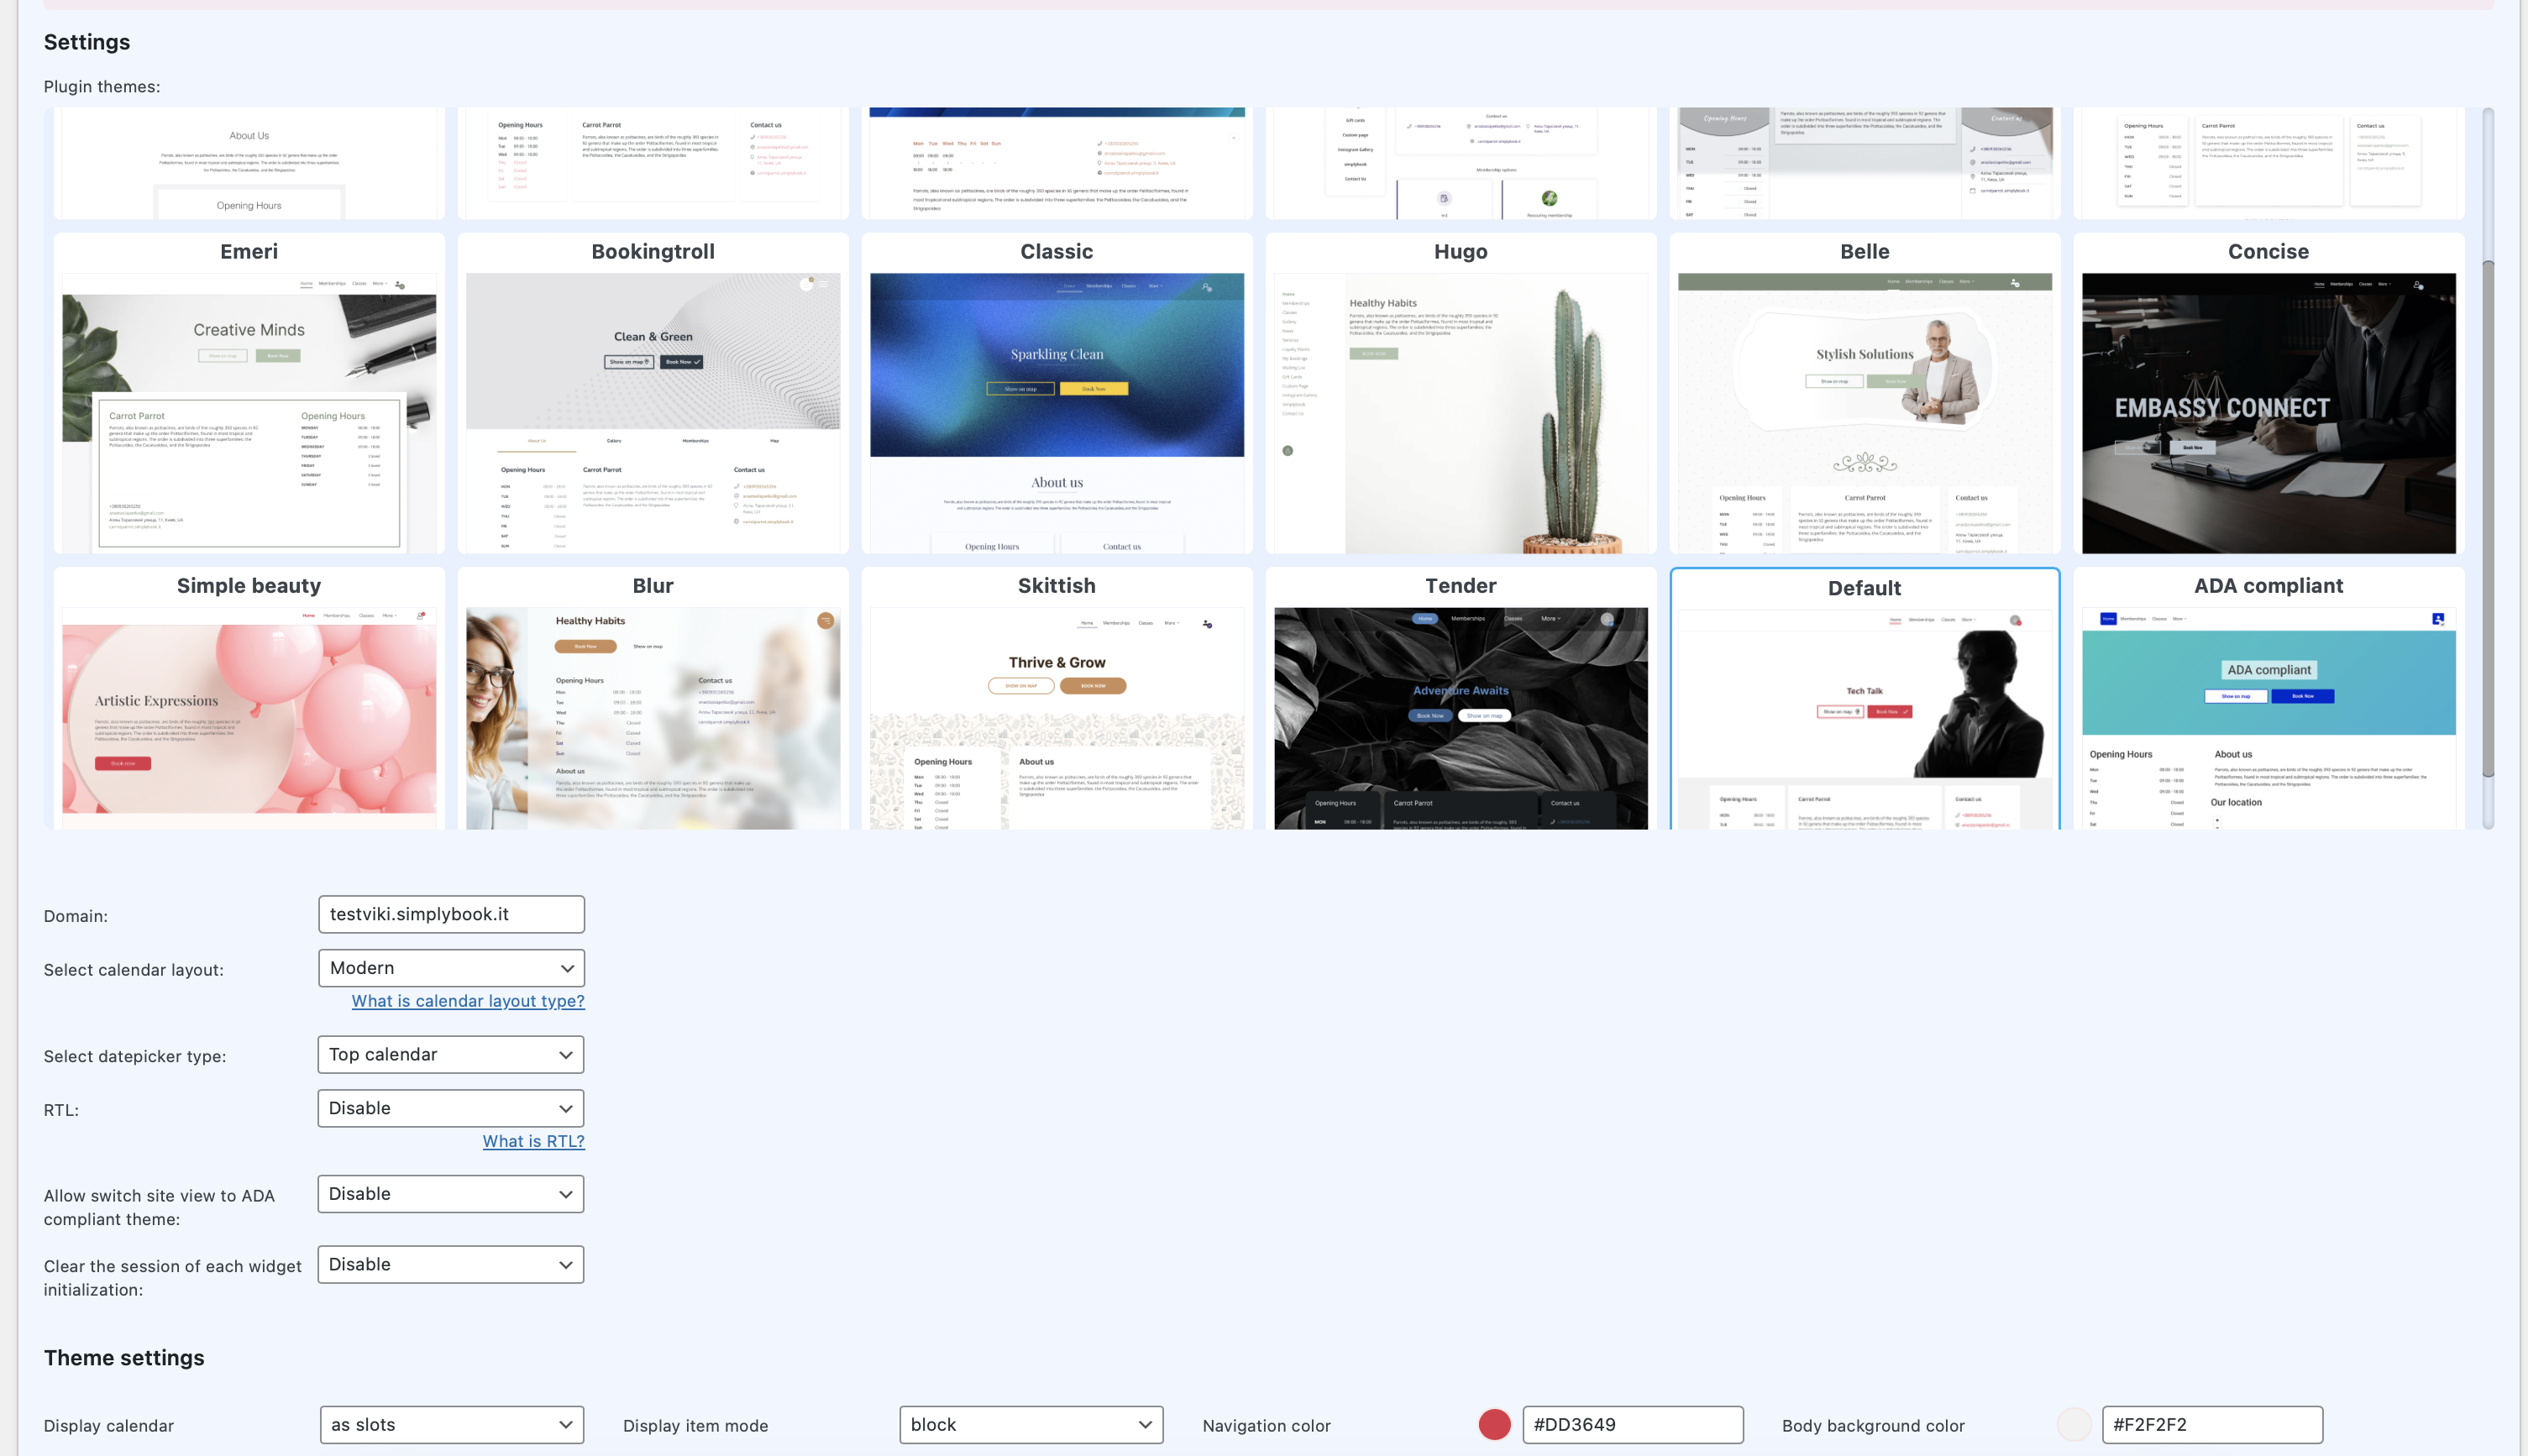
| − | : | + | :6. Adjust the <span style="background-color:#d4f8e5; padding:5px; border-radius:5px;">design</span> settings for your widget.<br> |
| − | + | :You can also select some predefined options for the plugin if necessary. | |
| − | + | [[File:Wp adjust plugin design.png|1200px|center|link=https://help.simplybook.me/images/6/6e/Wp_adjust_plugin_design.png]] | |
| − | [[File: | ||
<br><br> | <br><br> | ||
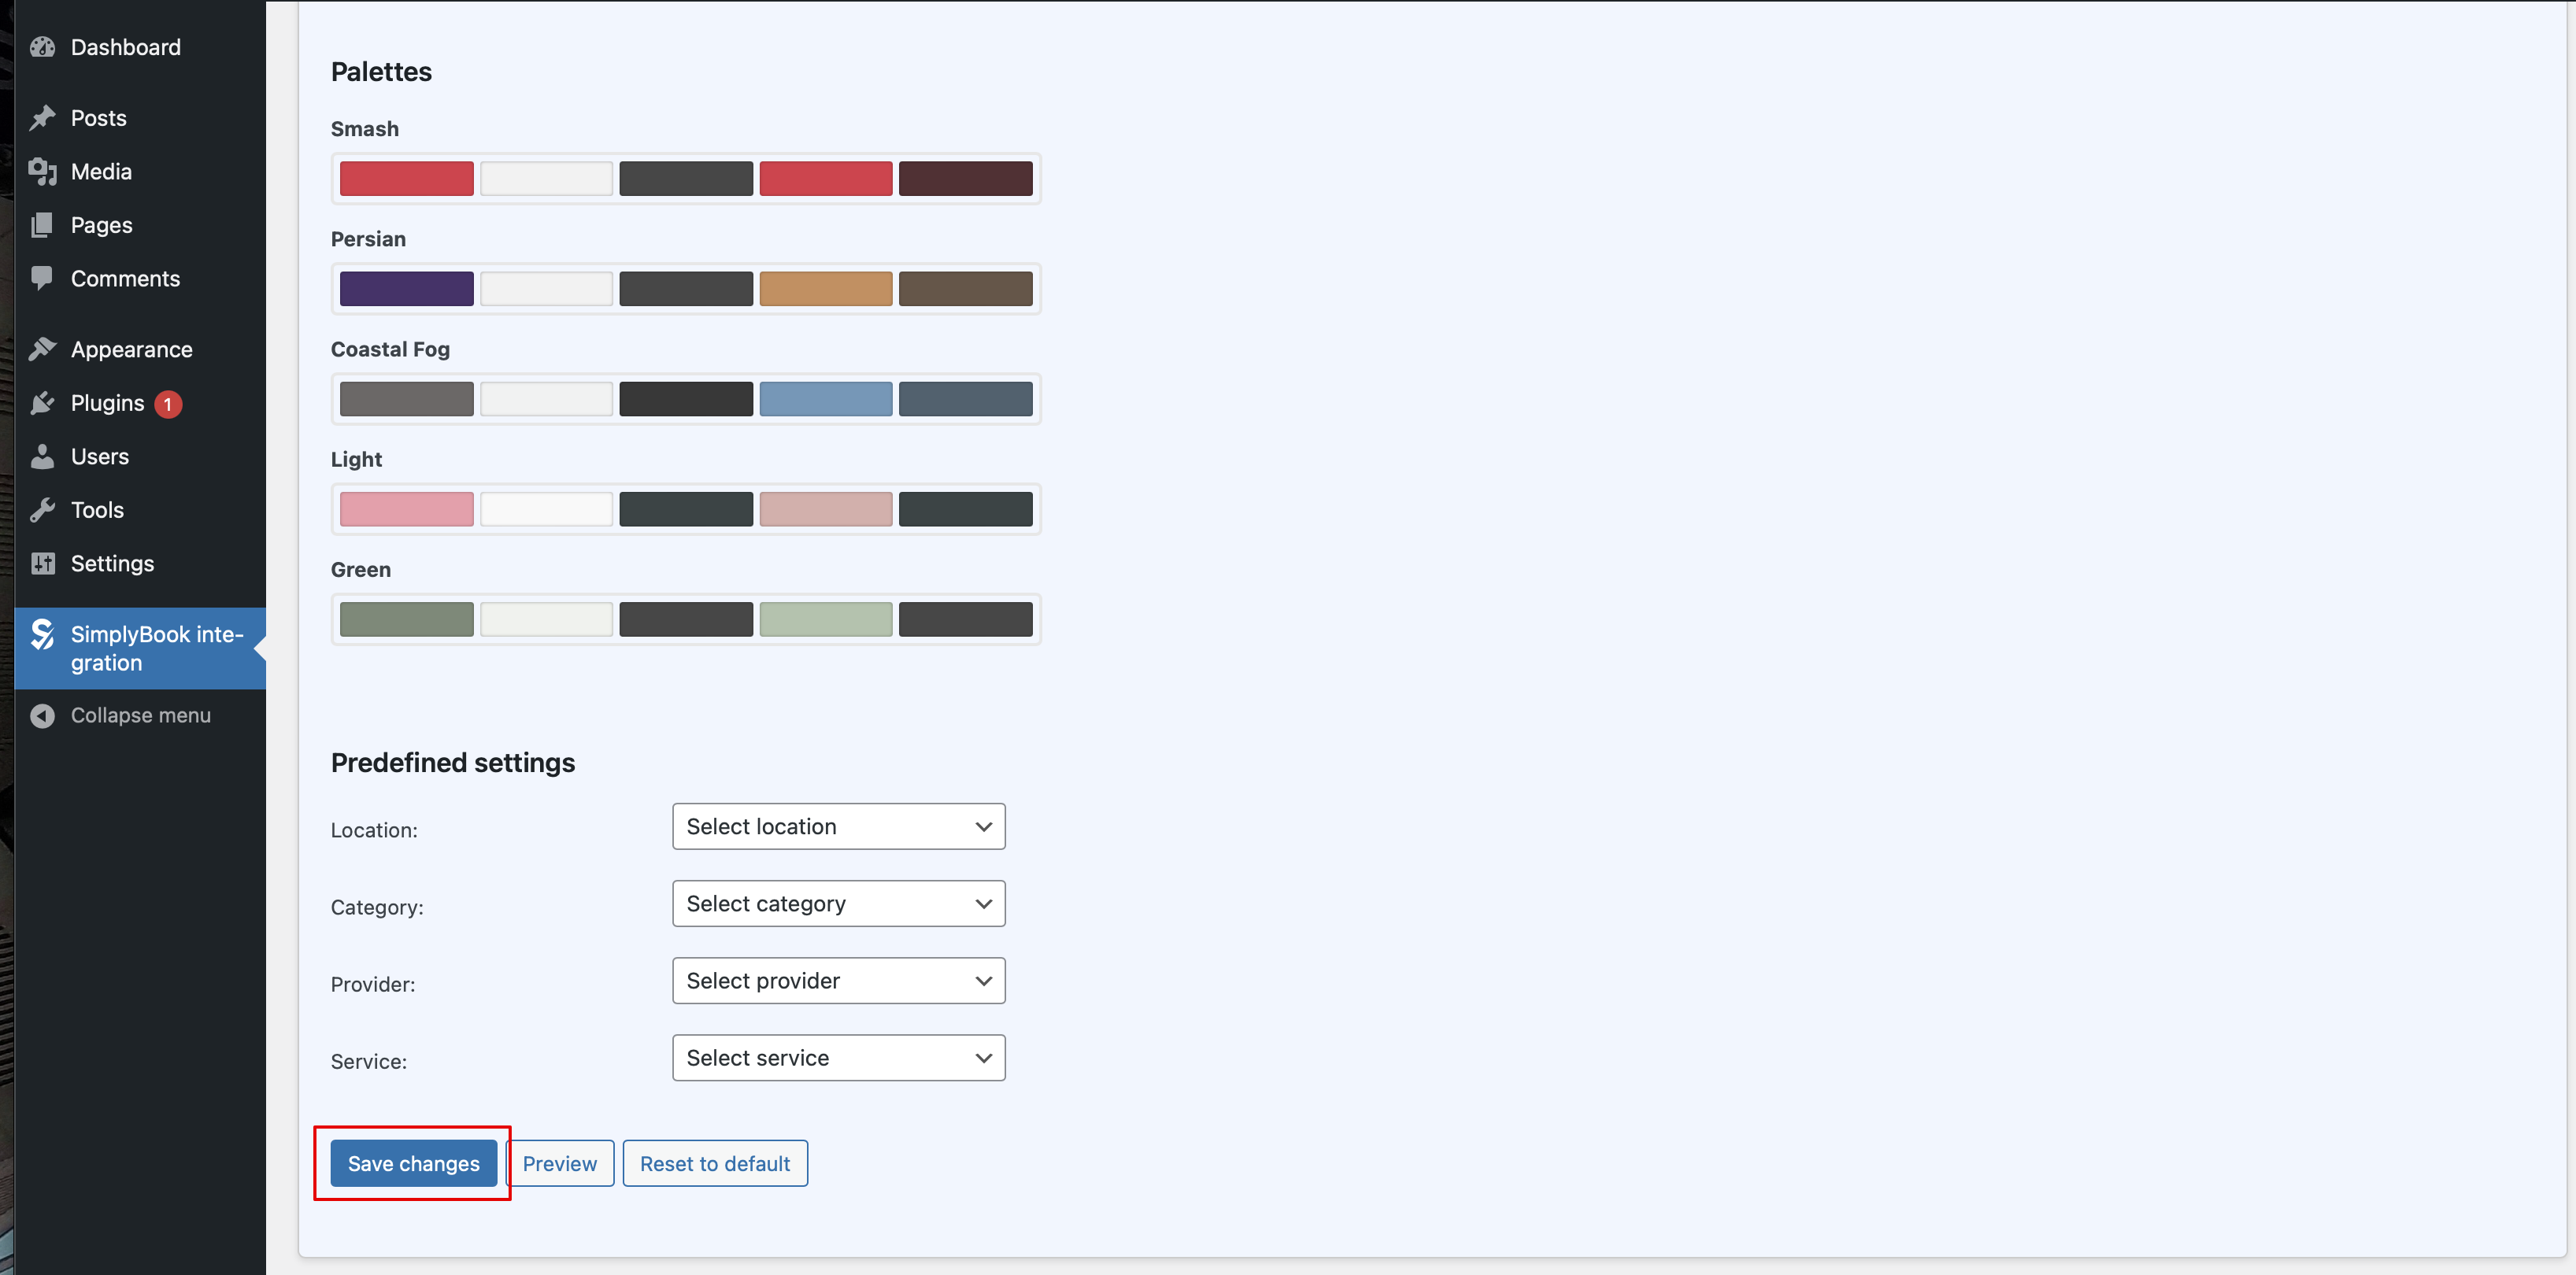
| − | : | + | :7. Scroll the page to the bottom, save settings and navigate to <span style="background-color:#d4f8e5; padding:5px; border-radius:5px;">Pages</span> section of your WordPress interface. |
| − | + | [[File:Save wp design.png|1200px|center|link=https://help.simplybook.me/images/0/06/Save_wp_design.png]] | |
| − | |||
| − | |||
| − | [[File: | ||
<br><br> | <br><br> | ||
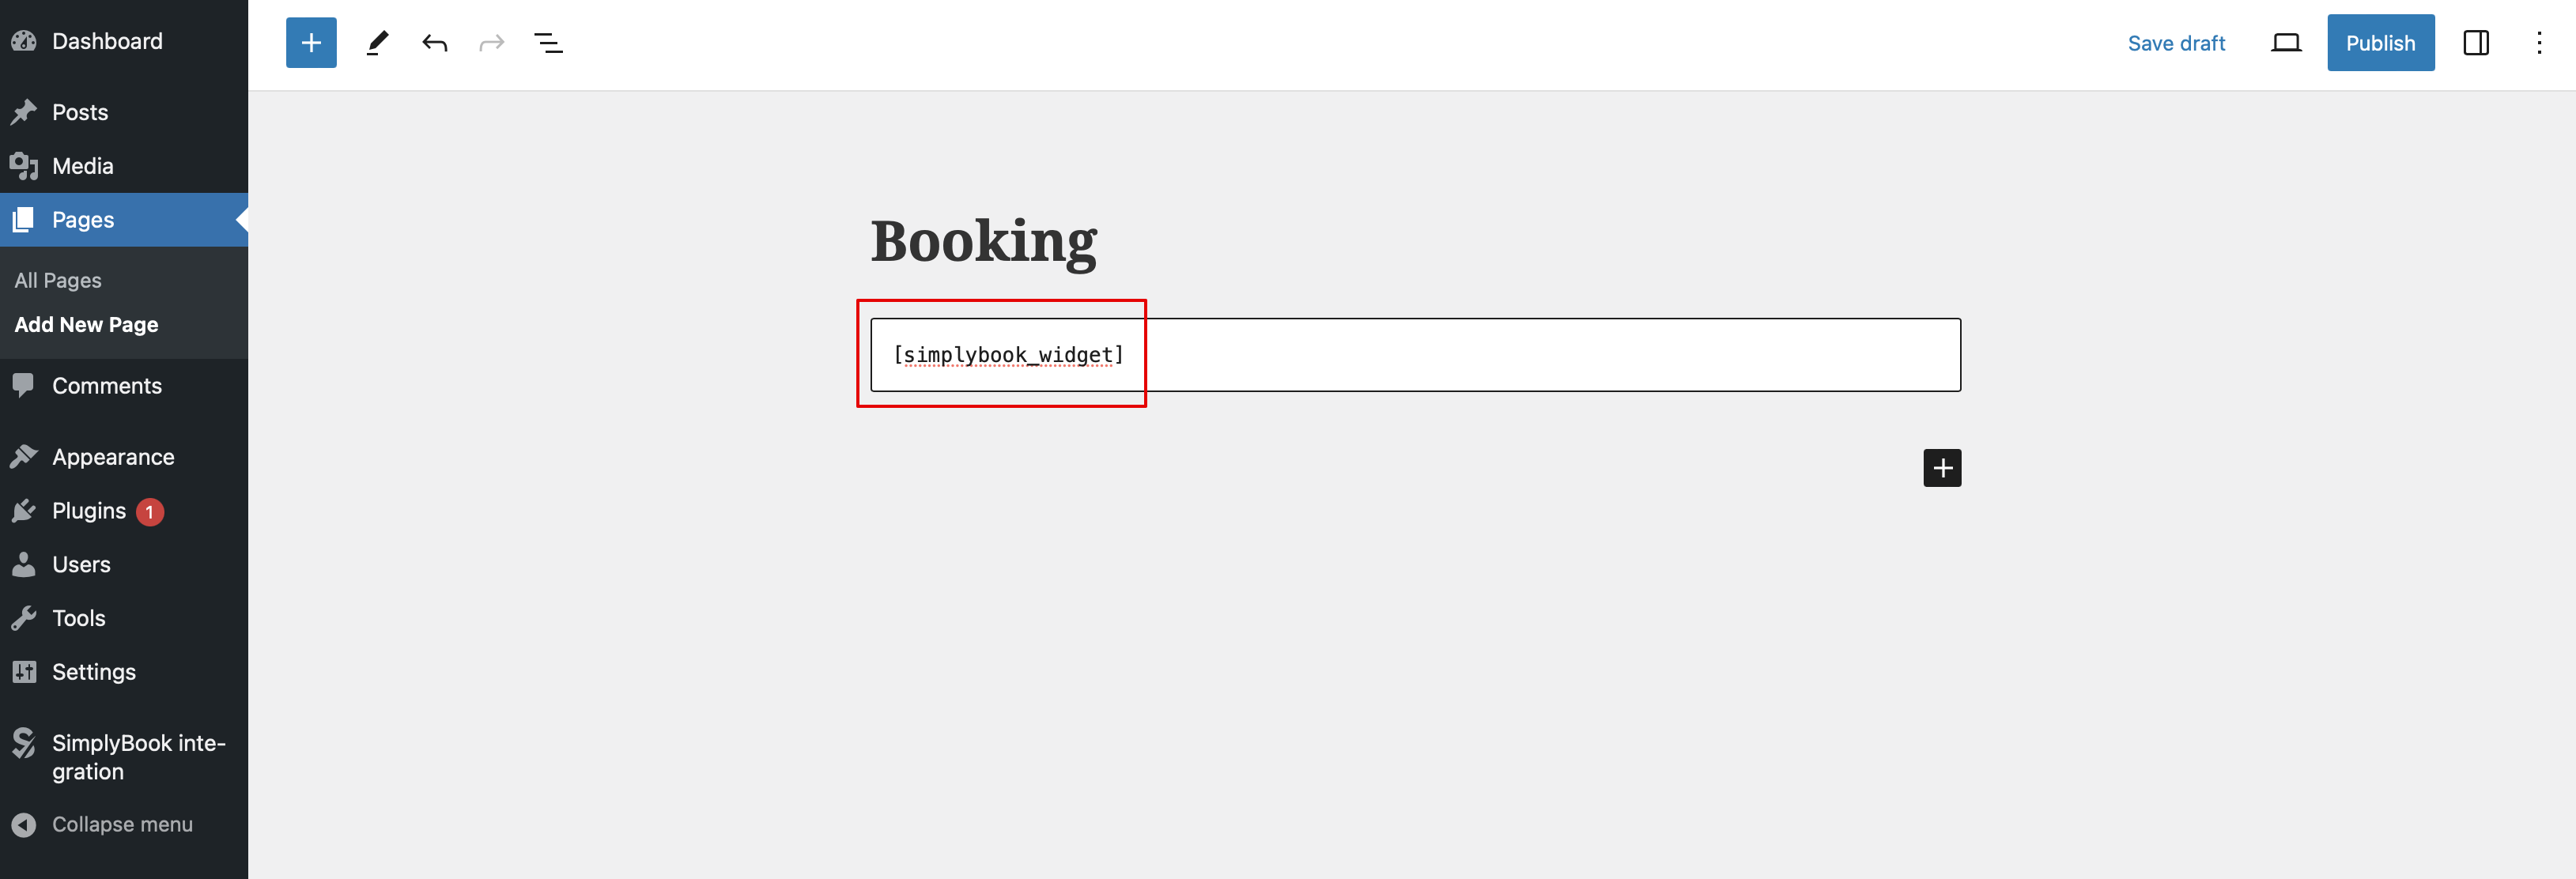
| − | + | :Create a new page and add a HTML block there. Paste <span style="background-color:#d4f8e5; padding:5px; border-radius:5px;">[simplybook_widget]</span> tag to its body and publish the page. | |
| + | [[File:Paste tag to page.png|1200px|center|link=https://help.simplybook.me/images/7/7e/Paste_tag_to_page.png]] | ||
| + | <br><br><br><br> | ||
| + | ==As a Widget== | ||
| + | :1. Please copy the code from <span style="background-color:#d4f8e5; padding:5px; border-radius:5px;">Settings</span> -> <span style="background-color:#d4f8e5; padding:5px; border-radius:5px;">Booking widgets settings</span> -> <span style="background-color:#d4f8e5; padding:5px; border-radius:5px;">iFrame widget</span> -> <span style="background-color:#d4f8e5; padding:5px; border-radius:5px;">Get widget code.</span> | ||
| − | [[File: | + | [[File:Booking widgets path new navigation.png|1200px| center]] |
<br><br> | <br><br> | ||
| − | + | [[File:Iframe widget creation new navigation.png|1200px| center]] | |
| − | |||
| − | [[File: | ||
| − | |||
| − | |||
| − | |||
| − | |||
| − | |||
| − | |||
| − | |||
| − | |||
| − | |||
| − | |||
| − | |||
| − | |||
| − | |||
| − | |||
| − | |||
| − | |||
| − | |||
| − | |||
| − | |||
| − | |||
| − | |||
| − | |||
| − | |||
<br><br> | <br><br> | ||
[[File:Widget code copy.png | center]] | [[File:Widget code copy.png | center]] | ||
<br><br> | <br><br> | ||
| − | :2. Go to your WordPress admn side and create a new page or navigate to already created one, where you plan to add the widget. Click on "+ | + | :2. Go to your WordPress admn side and create a new page or navigate to already created one, where you plan to add the widget. Click on <span style="background-color:#d4f8e5; padding:5px; border-radius:5px;">+</span> icon. |
[[File:Creating new page wp.png | center]] | [[File:Creating new page wp.png | center]] | ||
| − | <br><br> | + | <br><br> |
| − | :3. Search for HTML option. | + | :3. Search for <span style="background-color:#d4f8e5; padding:5px; border-radius:5px;">HTML</span> option. |
[[File:Add html editor.png | center]] | [[File:Add html editor.png | center]] | ||
<br><br> | <br><br> | ||
| Line 79: | Line 55: | ||
[[File:Paste the code.png | center]] | [[File:Paste the code.png | center]] | ||
<br><br> | <br><br> | ||
| − | :5. Publish your changes | + | :5. Publish your changes. |
<br><br> | <br><br> | ||
| − | + | :<span style="background-color:#fef3de; padding:5px; border-radius:5px;">Example</span> (may look different depending on your WP theme and [https://simplybook.me/ SimplyBook.me] theme and settings). | |
| − | [[File:Wp | + | [[File:Wp select location.png| center]] |
| − | |||
| − | |||
<br><br> | <br><br> | ||
| − | |||
| − | |||
| − | |||
| − | |||
| − | |||
| − | |||
| − | |||
| − | |||
| − | |||
<br><br> | <br><br> | ||
Latest revision as of 07:33, 9 April 2024
With the help of WordPress plugin
- 1. In your WordPress admin interface navigate to Plugins -> Add new Plugin and search for Simplybook.
- Install it and Activate.

- 2. Navigate to plugin Settings.
- 3. If you already have an account with SimplyBook.me please choose the login option there.
- If you have not created it yet, simply click on registration option and sign up following the suggested steps.
- 4. Log in providing company login, user login and password.
- 5. Confirm the connection between SimplyBook.me account and your WordPress system.
- You will get the one-time code to finalise the connection.
- 6. Adjust the design settings for your widget.
- You can also select some predefined options for the plugin if necessary.
- 7. Scroll the page to the bottom, save settings and navigate to Pages section of your WordPress interface.
- Create a new page and add a HTML block there. Paste [simplybook_widget] tag to its body and publish the page.
As a Widget
- 1. Please copy the code from Settings -> Booking widgets settings -> iFrame widget -> Get widget code.


- 2. Go to your WordPress admn side and create a new page or navigate to already created one, where you plan to add the widget. Click on + icon.

- 3. Search for HTML option.

- 4. Paste the previously copied code.

- 5. Publish your changes.
- Example (may look different depending on your WP theme and SimplyBook.me theme and settings).
