Translations:Custom Features/182/en
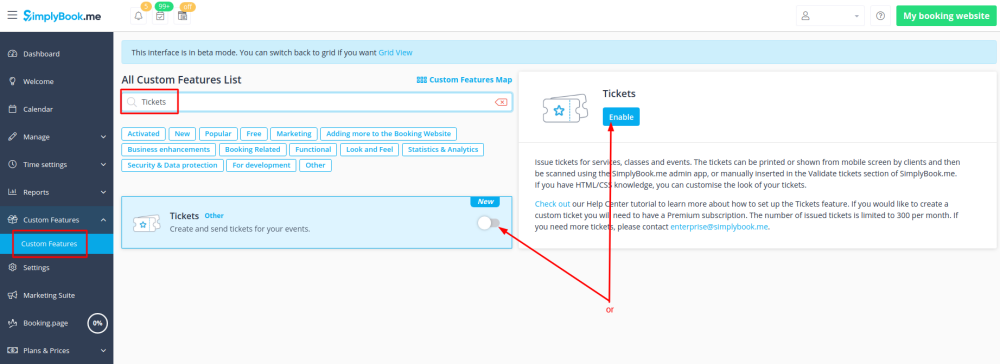
- 1. Enable this feature on your Custom Features page.
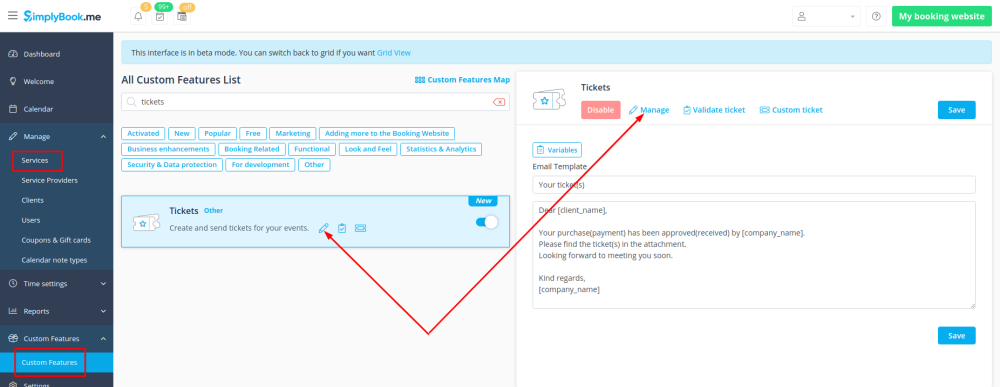
- 2. Navigate to Manage using the link near the enabled feature or go to Manage -> Services section.
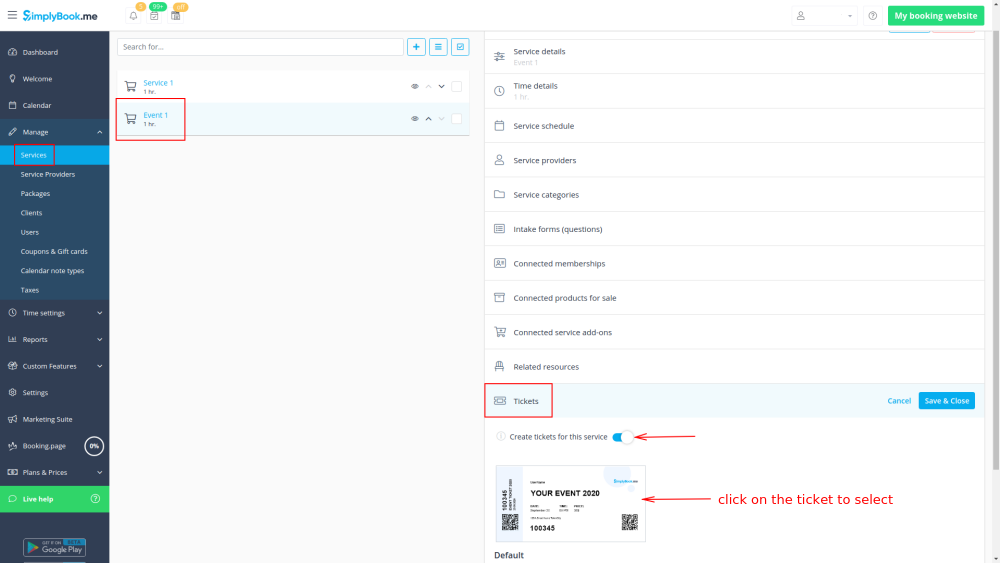
- 3. Select the service you would like to sell the tickets for with a click and go to Tickets tab.
- 4. Enable tickets issuing and connect the template by clicking on it. Save settings.
- (There is one default template, but with Premium plan you can create your own one).
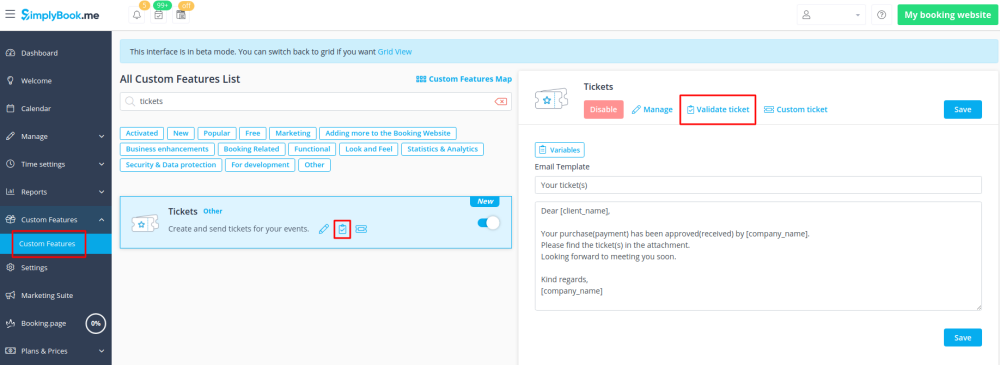
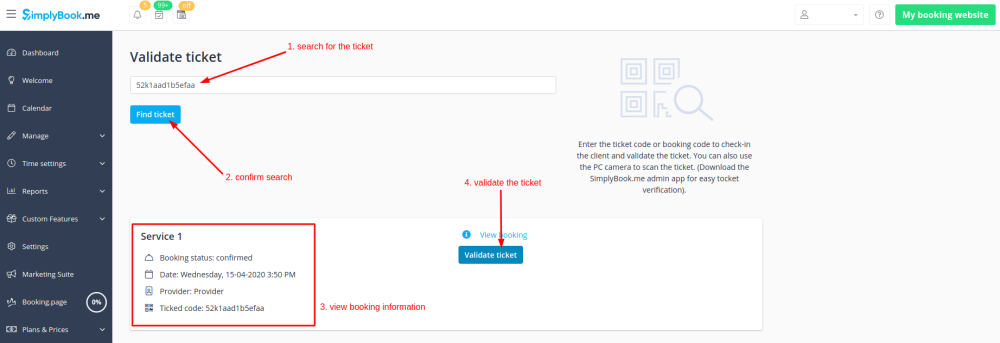
- 5. When the event time comes and you need to validate tickets please go to Custom Features -> Tickets -> Validate ticket.
(or access it from Calendar page)
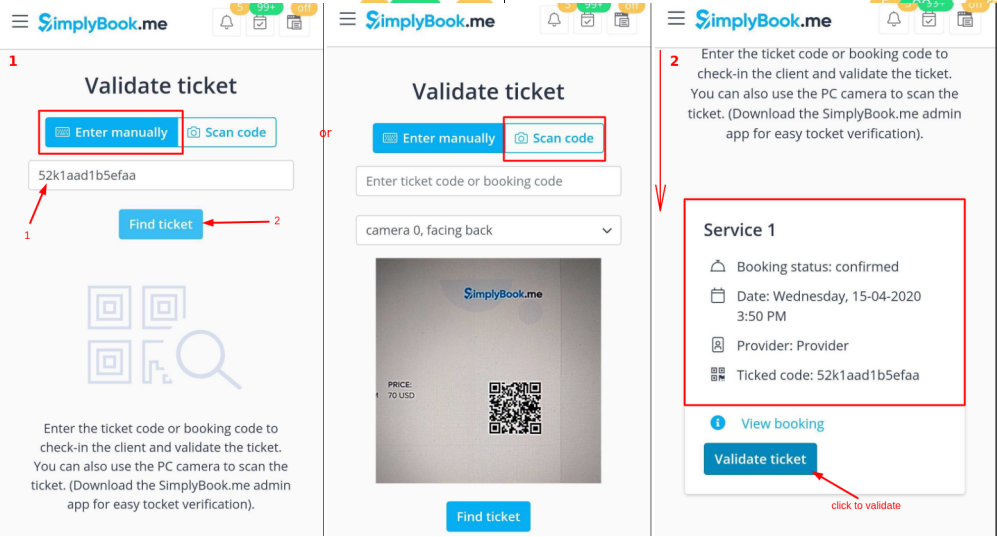
- 6. Look for the ticket by its unique number(can be used on desktop and mobile) or scan the QR code(open that page from mobile device).
- Check the booking information if necessary and click on Validate ticket
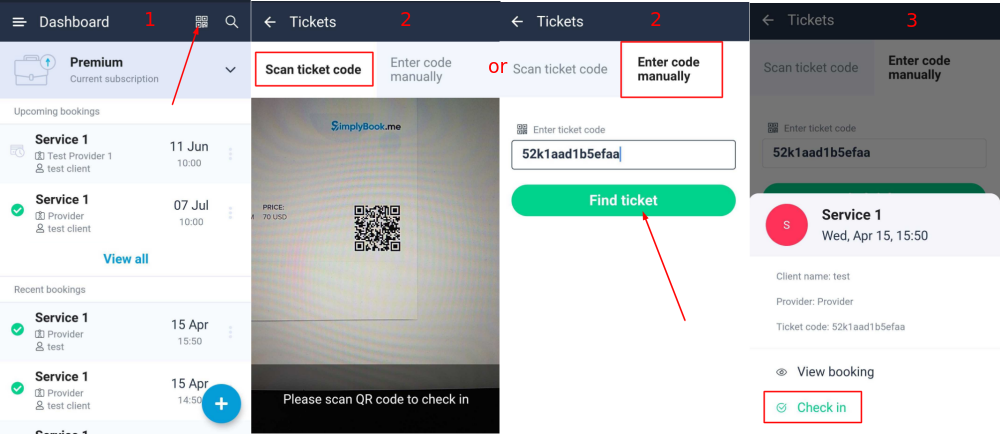
- 7. If you have SimplyBook.me admin application you can easily scan and check-in tickets there from Dashboard.
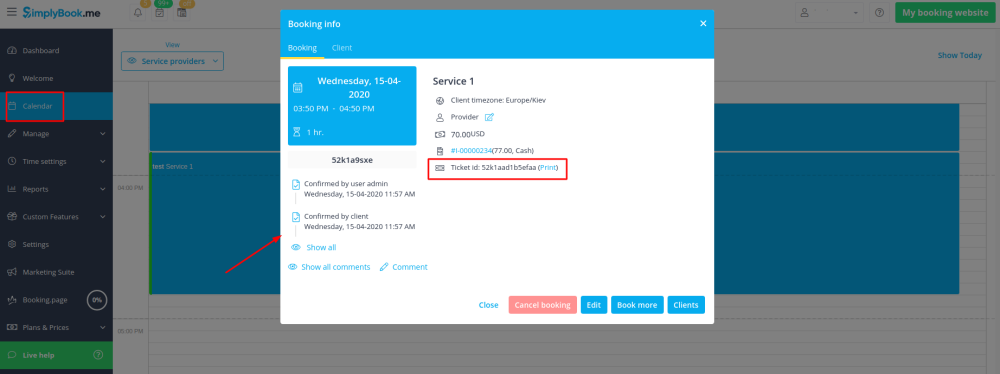
- 8. Ticket codes can be found in the related bookings on Calendar page or in Booking details report.
- You can also print tickets from there.
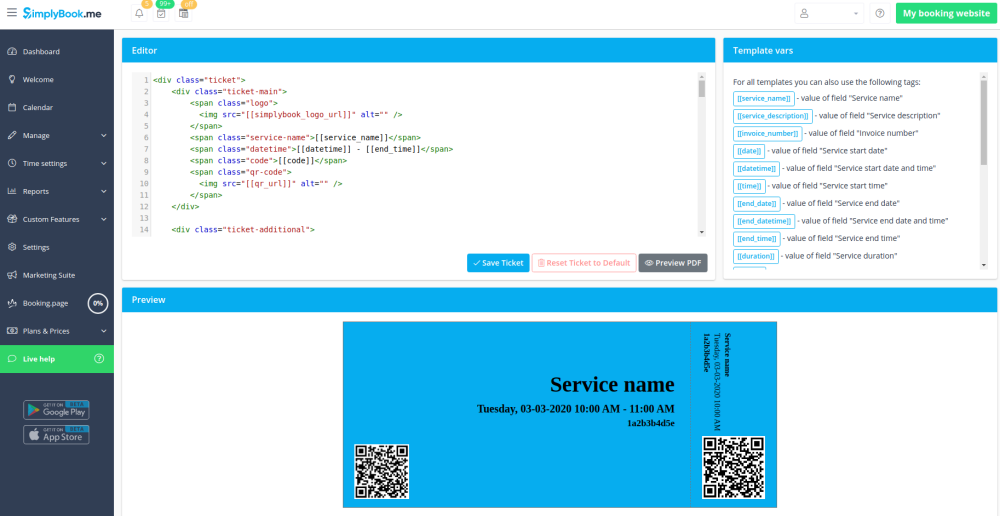
- 9. (optional) If you have Premium plan and know HTML/CSS or have someone who can help with it you can create a custom ticket template in Custom features -> Tickets -> Custom ticket.
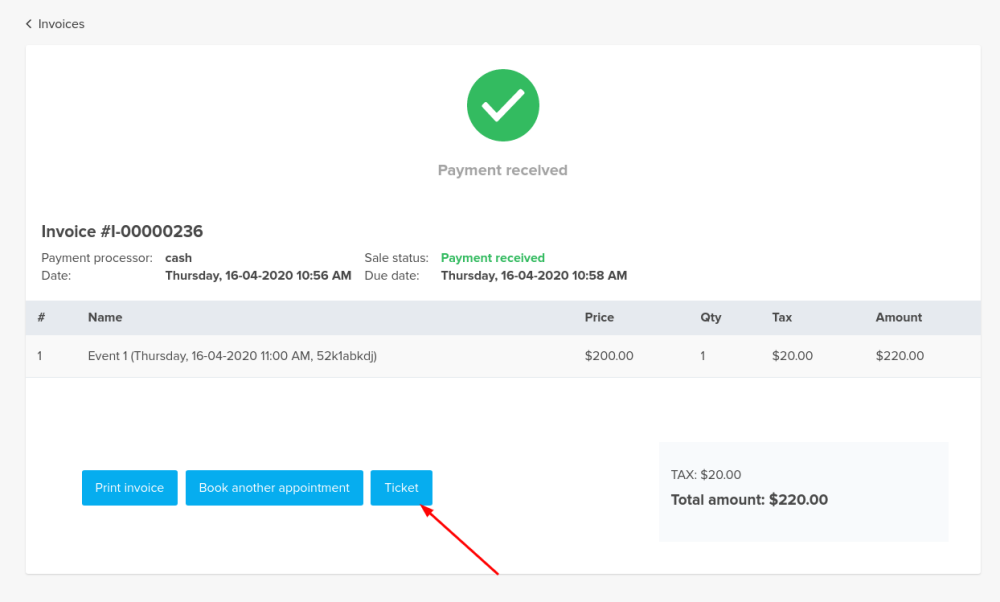
- 10. From the client side they can get tickets on the appointment/payment confirmation page when the booking process is completed.
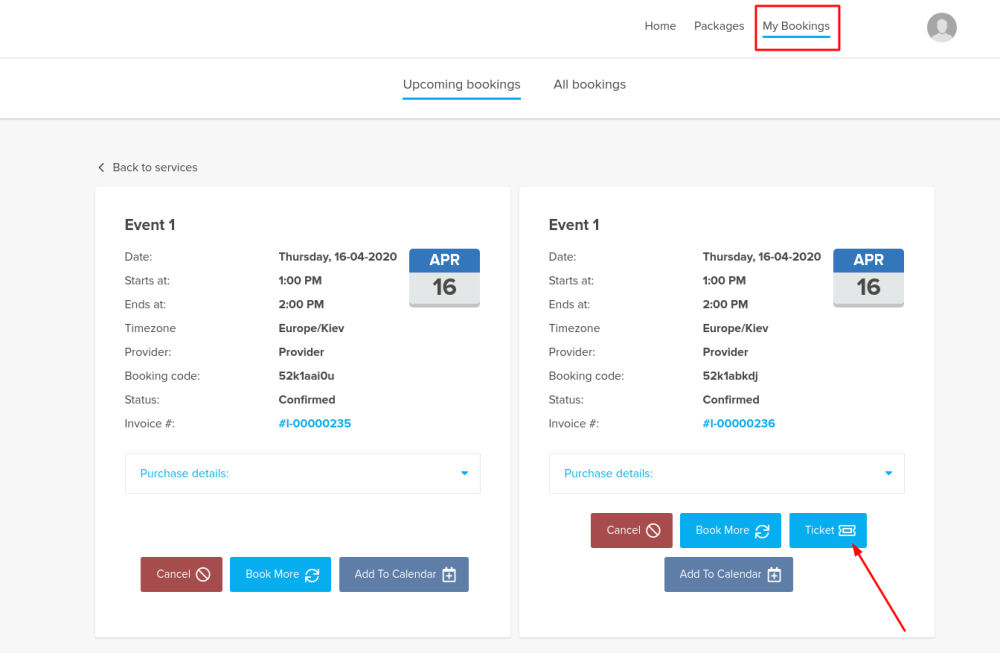
- Or they can go to My bookings tab and use the corresponding button there to download ticket PDF and print.
Vaccination report
Vaccination custom feature gives a quick overview of the booked and available slots in your system thus allowing to see the load generally per day/week/month or some date range(up to 90 days) as well as per certain provider or service. You can easily see the overloaded and most free ones to manage them accordingly. Another option that helps you in successful vaccination process planning is "Second appointment" tab: it shows whether a certain patient has already made an appointment for a second vaccine dose as well as his/her contact details, date and time of the appointments enabling you to quickly contact the ones who still need another appointment organization. Both report tabs give a great way to manage and organize the time resources and vaccination teams in most effective way to have as many people vaccinated as possible.
