Translations:Packages custom feature/4/en
From SimplyBook.me
Video tutorial available ![]()
How to use
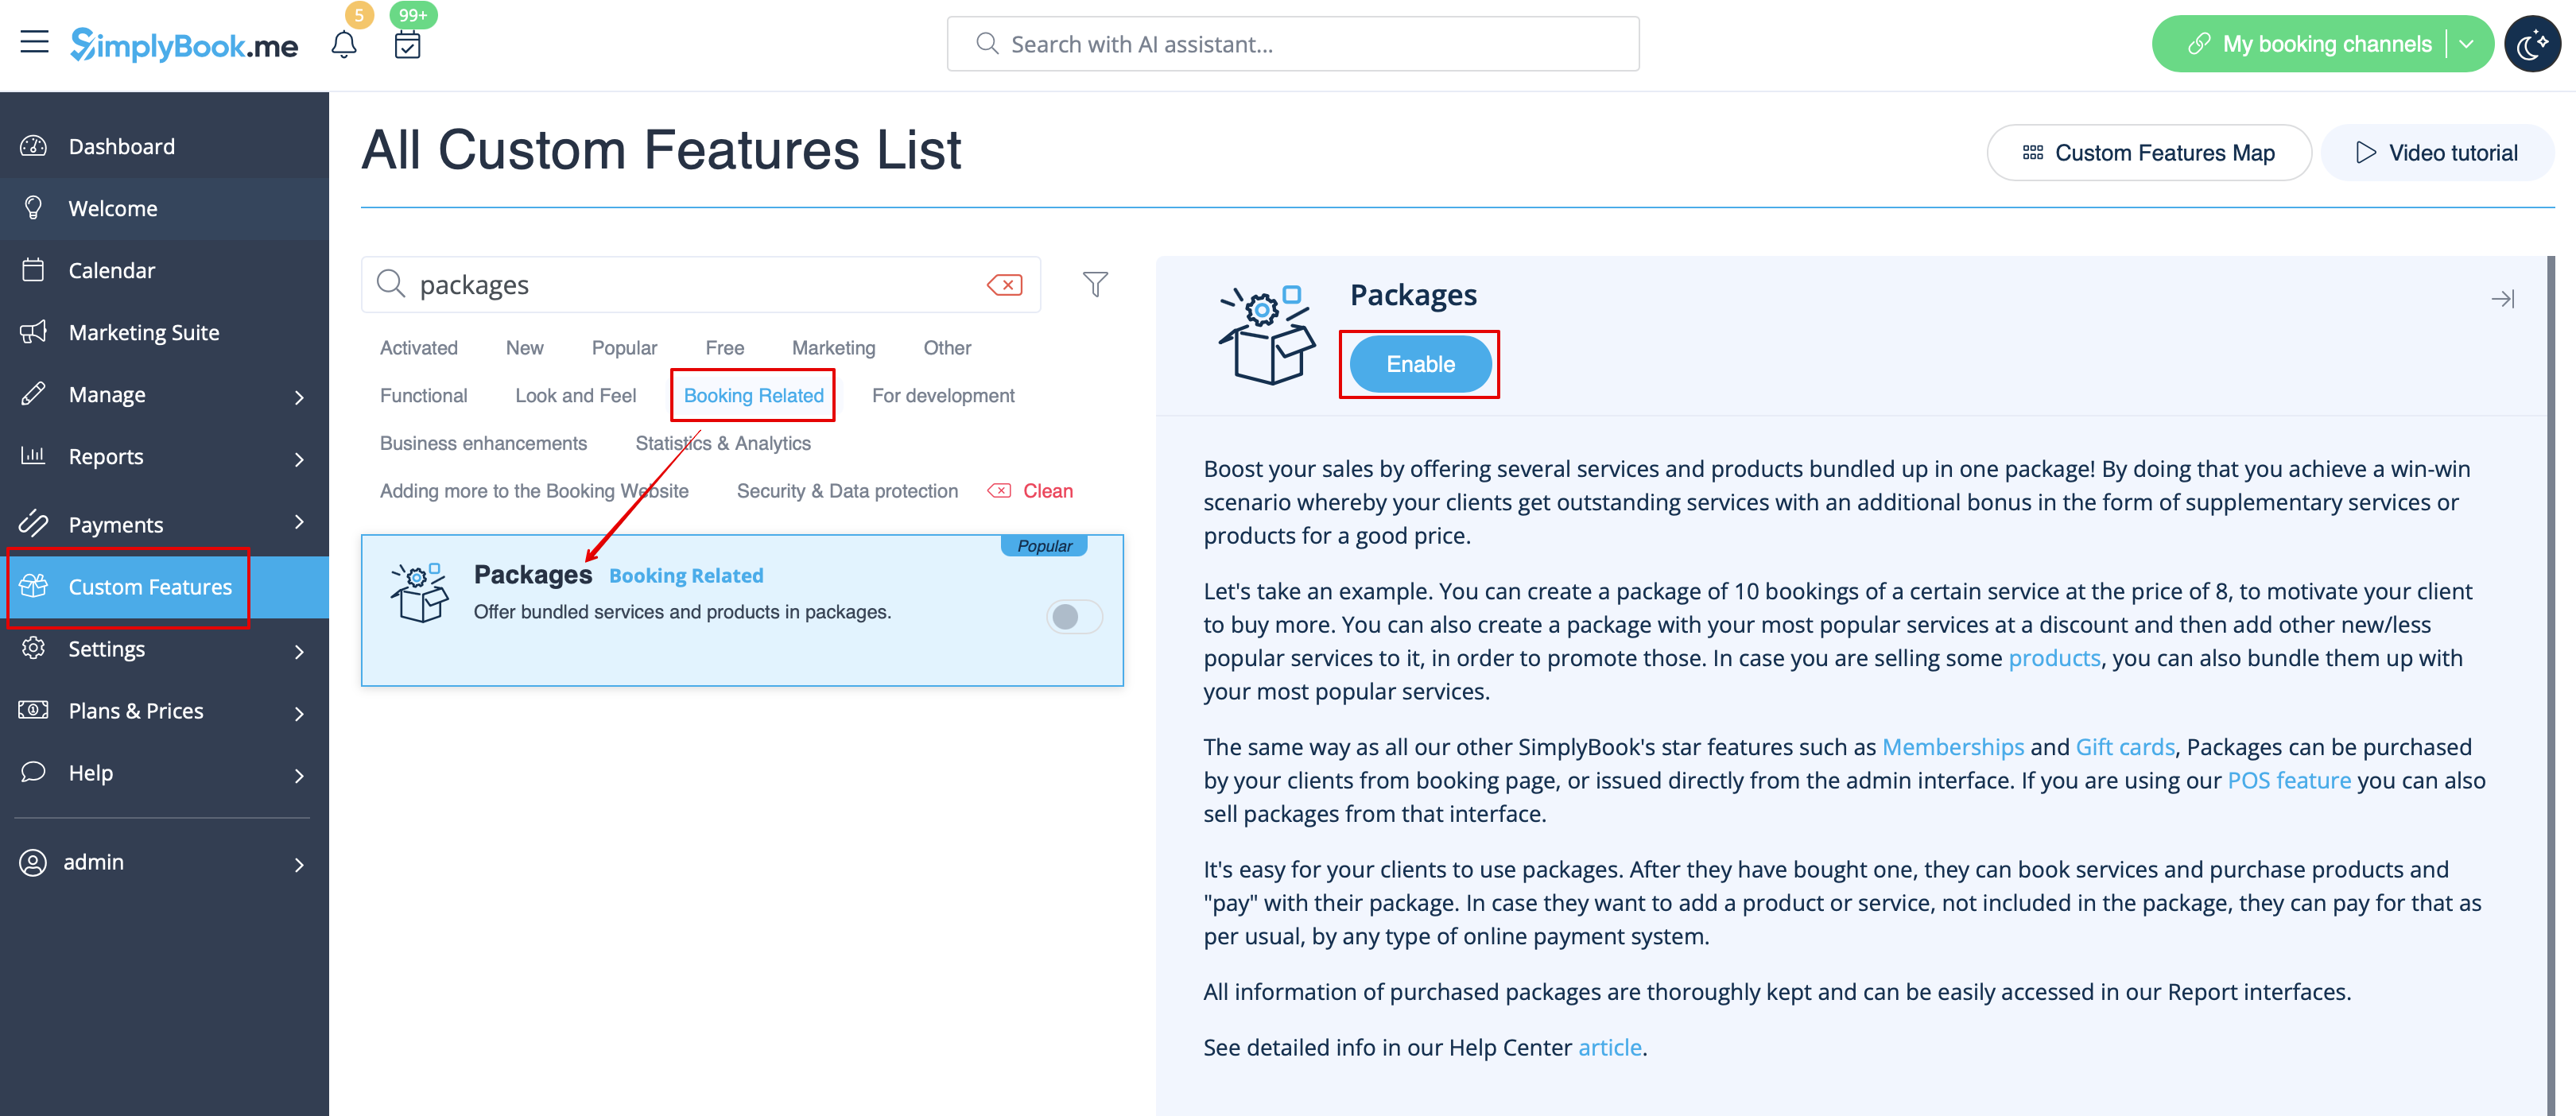
- 1. To switch this custom feature on, please navigate to your Custom Features page, go to “Booking related” section and click on “Enable”
- 2. Then choose “Manage” option either near the custom feature or navigate to Packages in Manage section of the left-side menu.

- 3. Just click on “+” button to create a new package. The form will appear on the right side of the page.
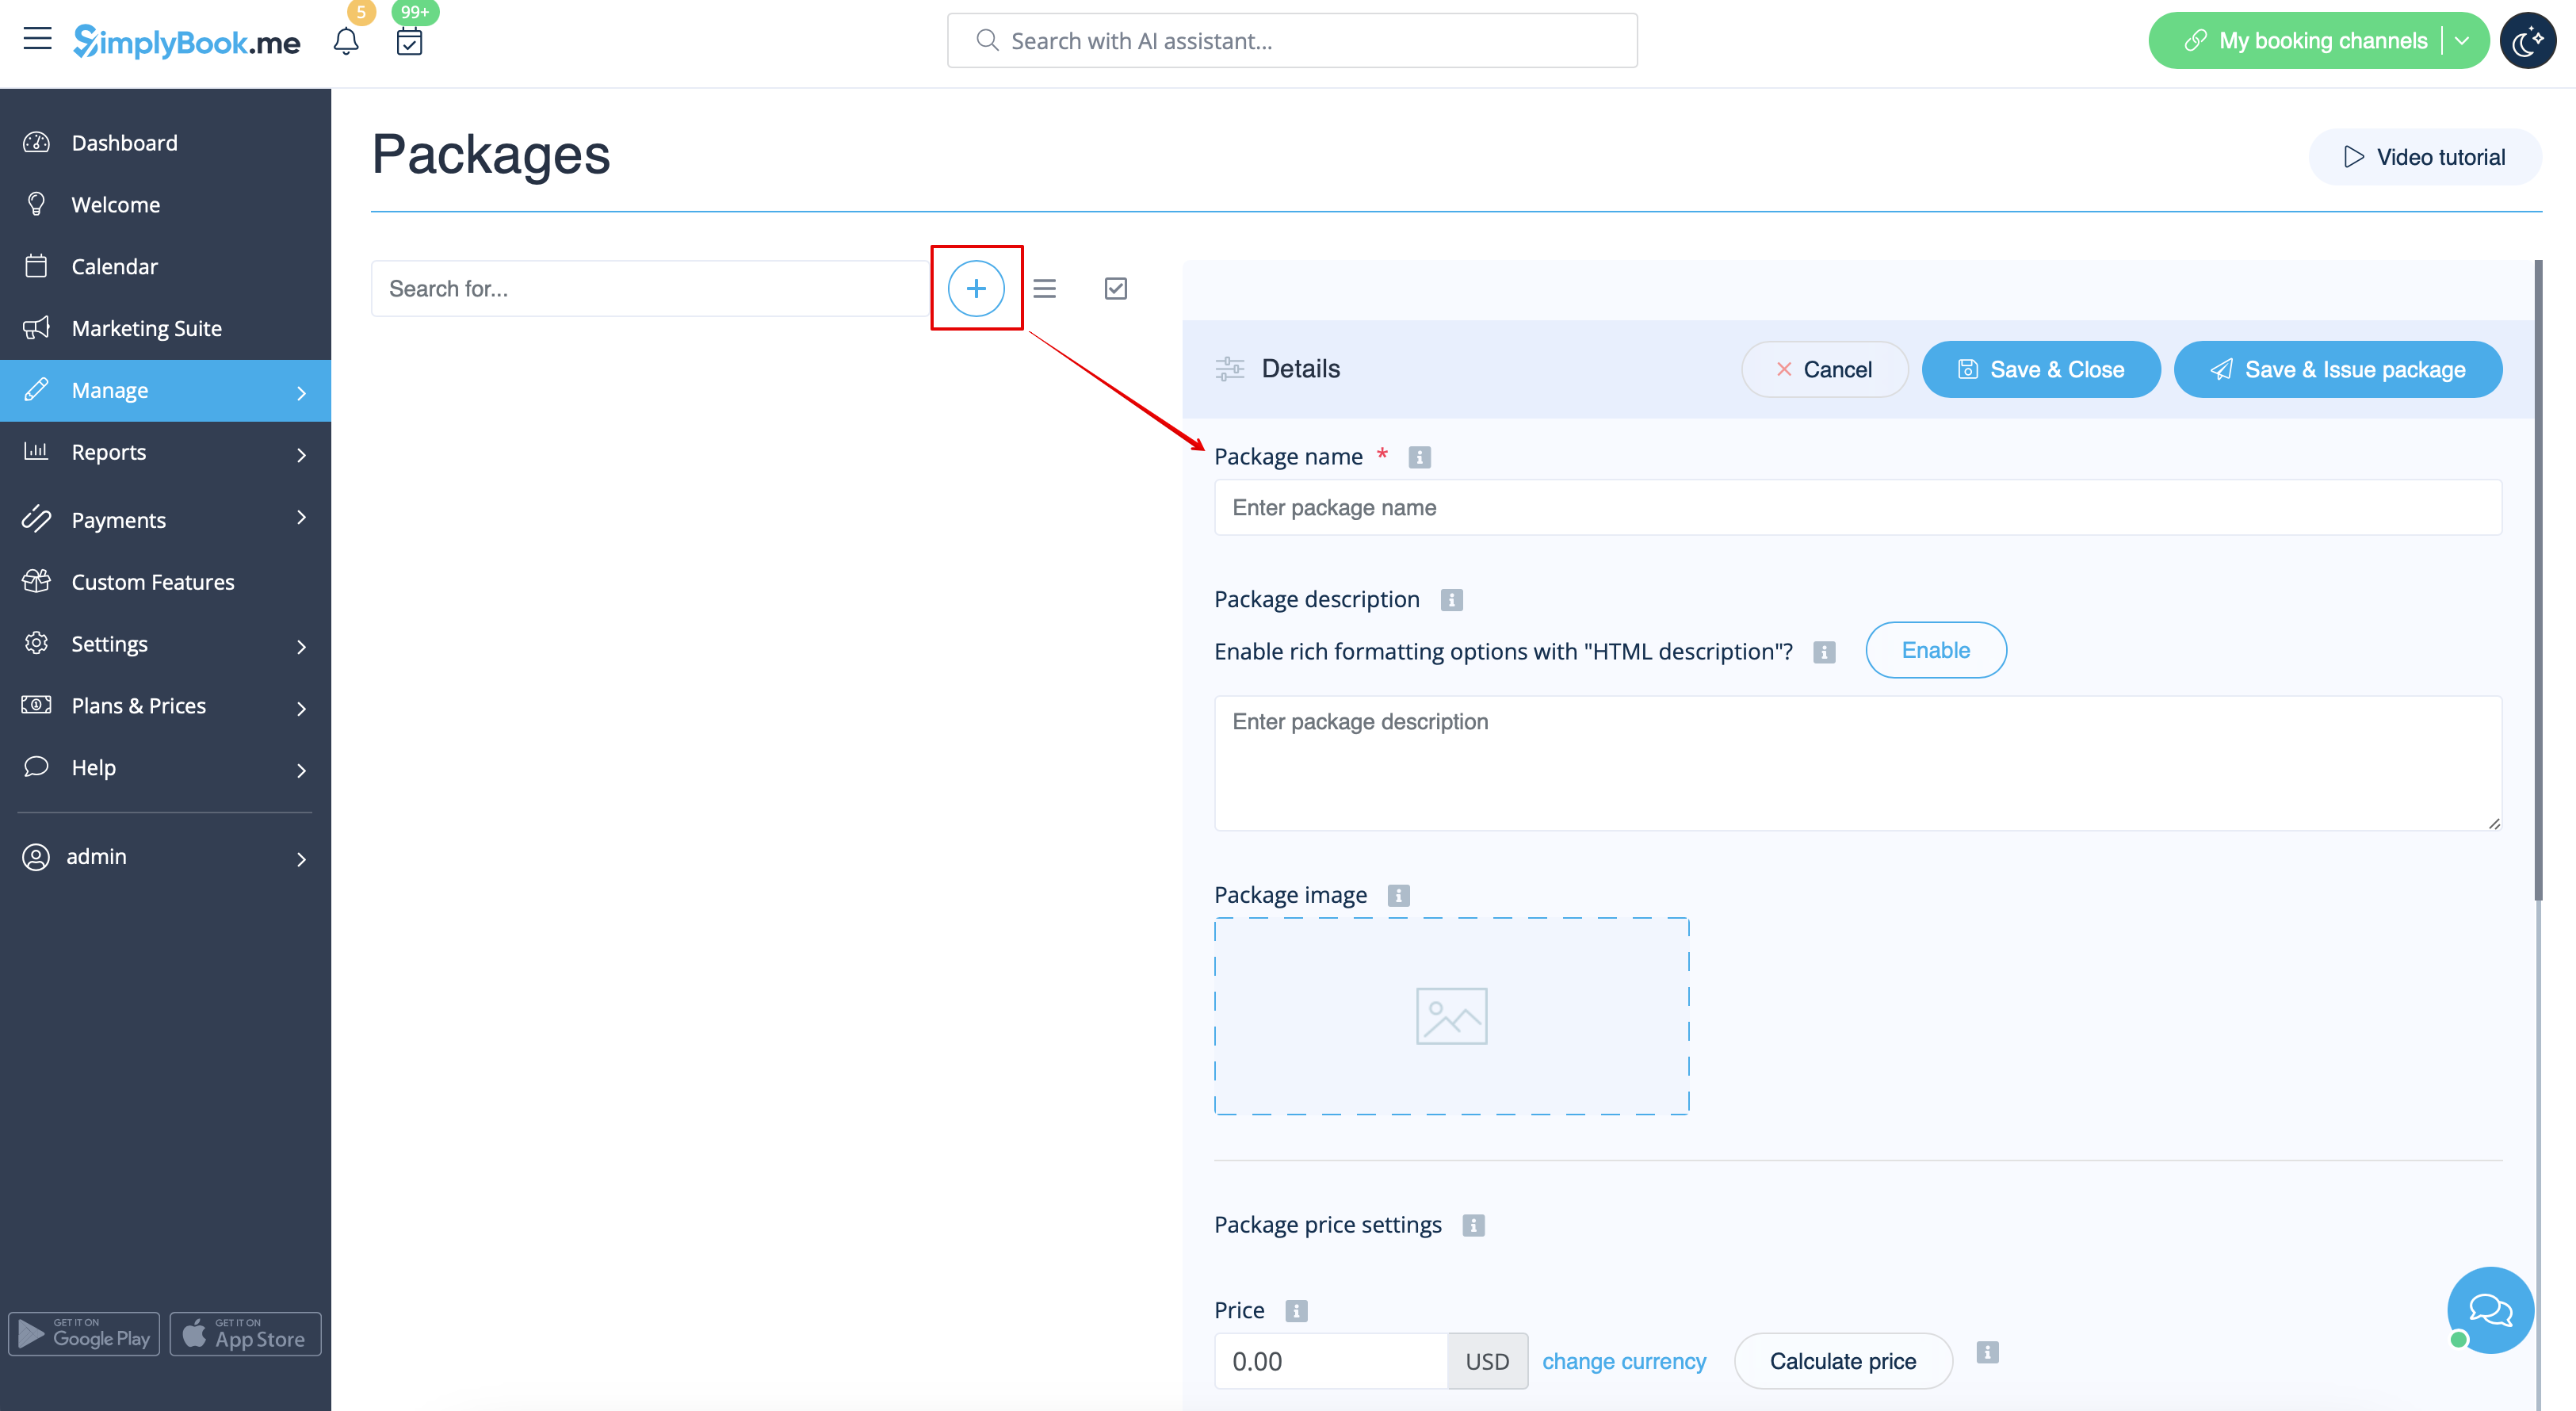
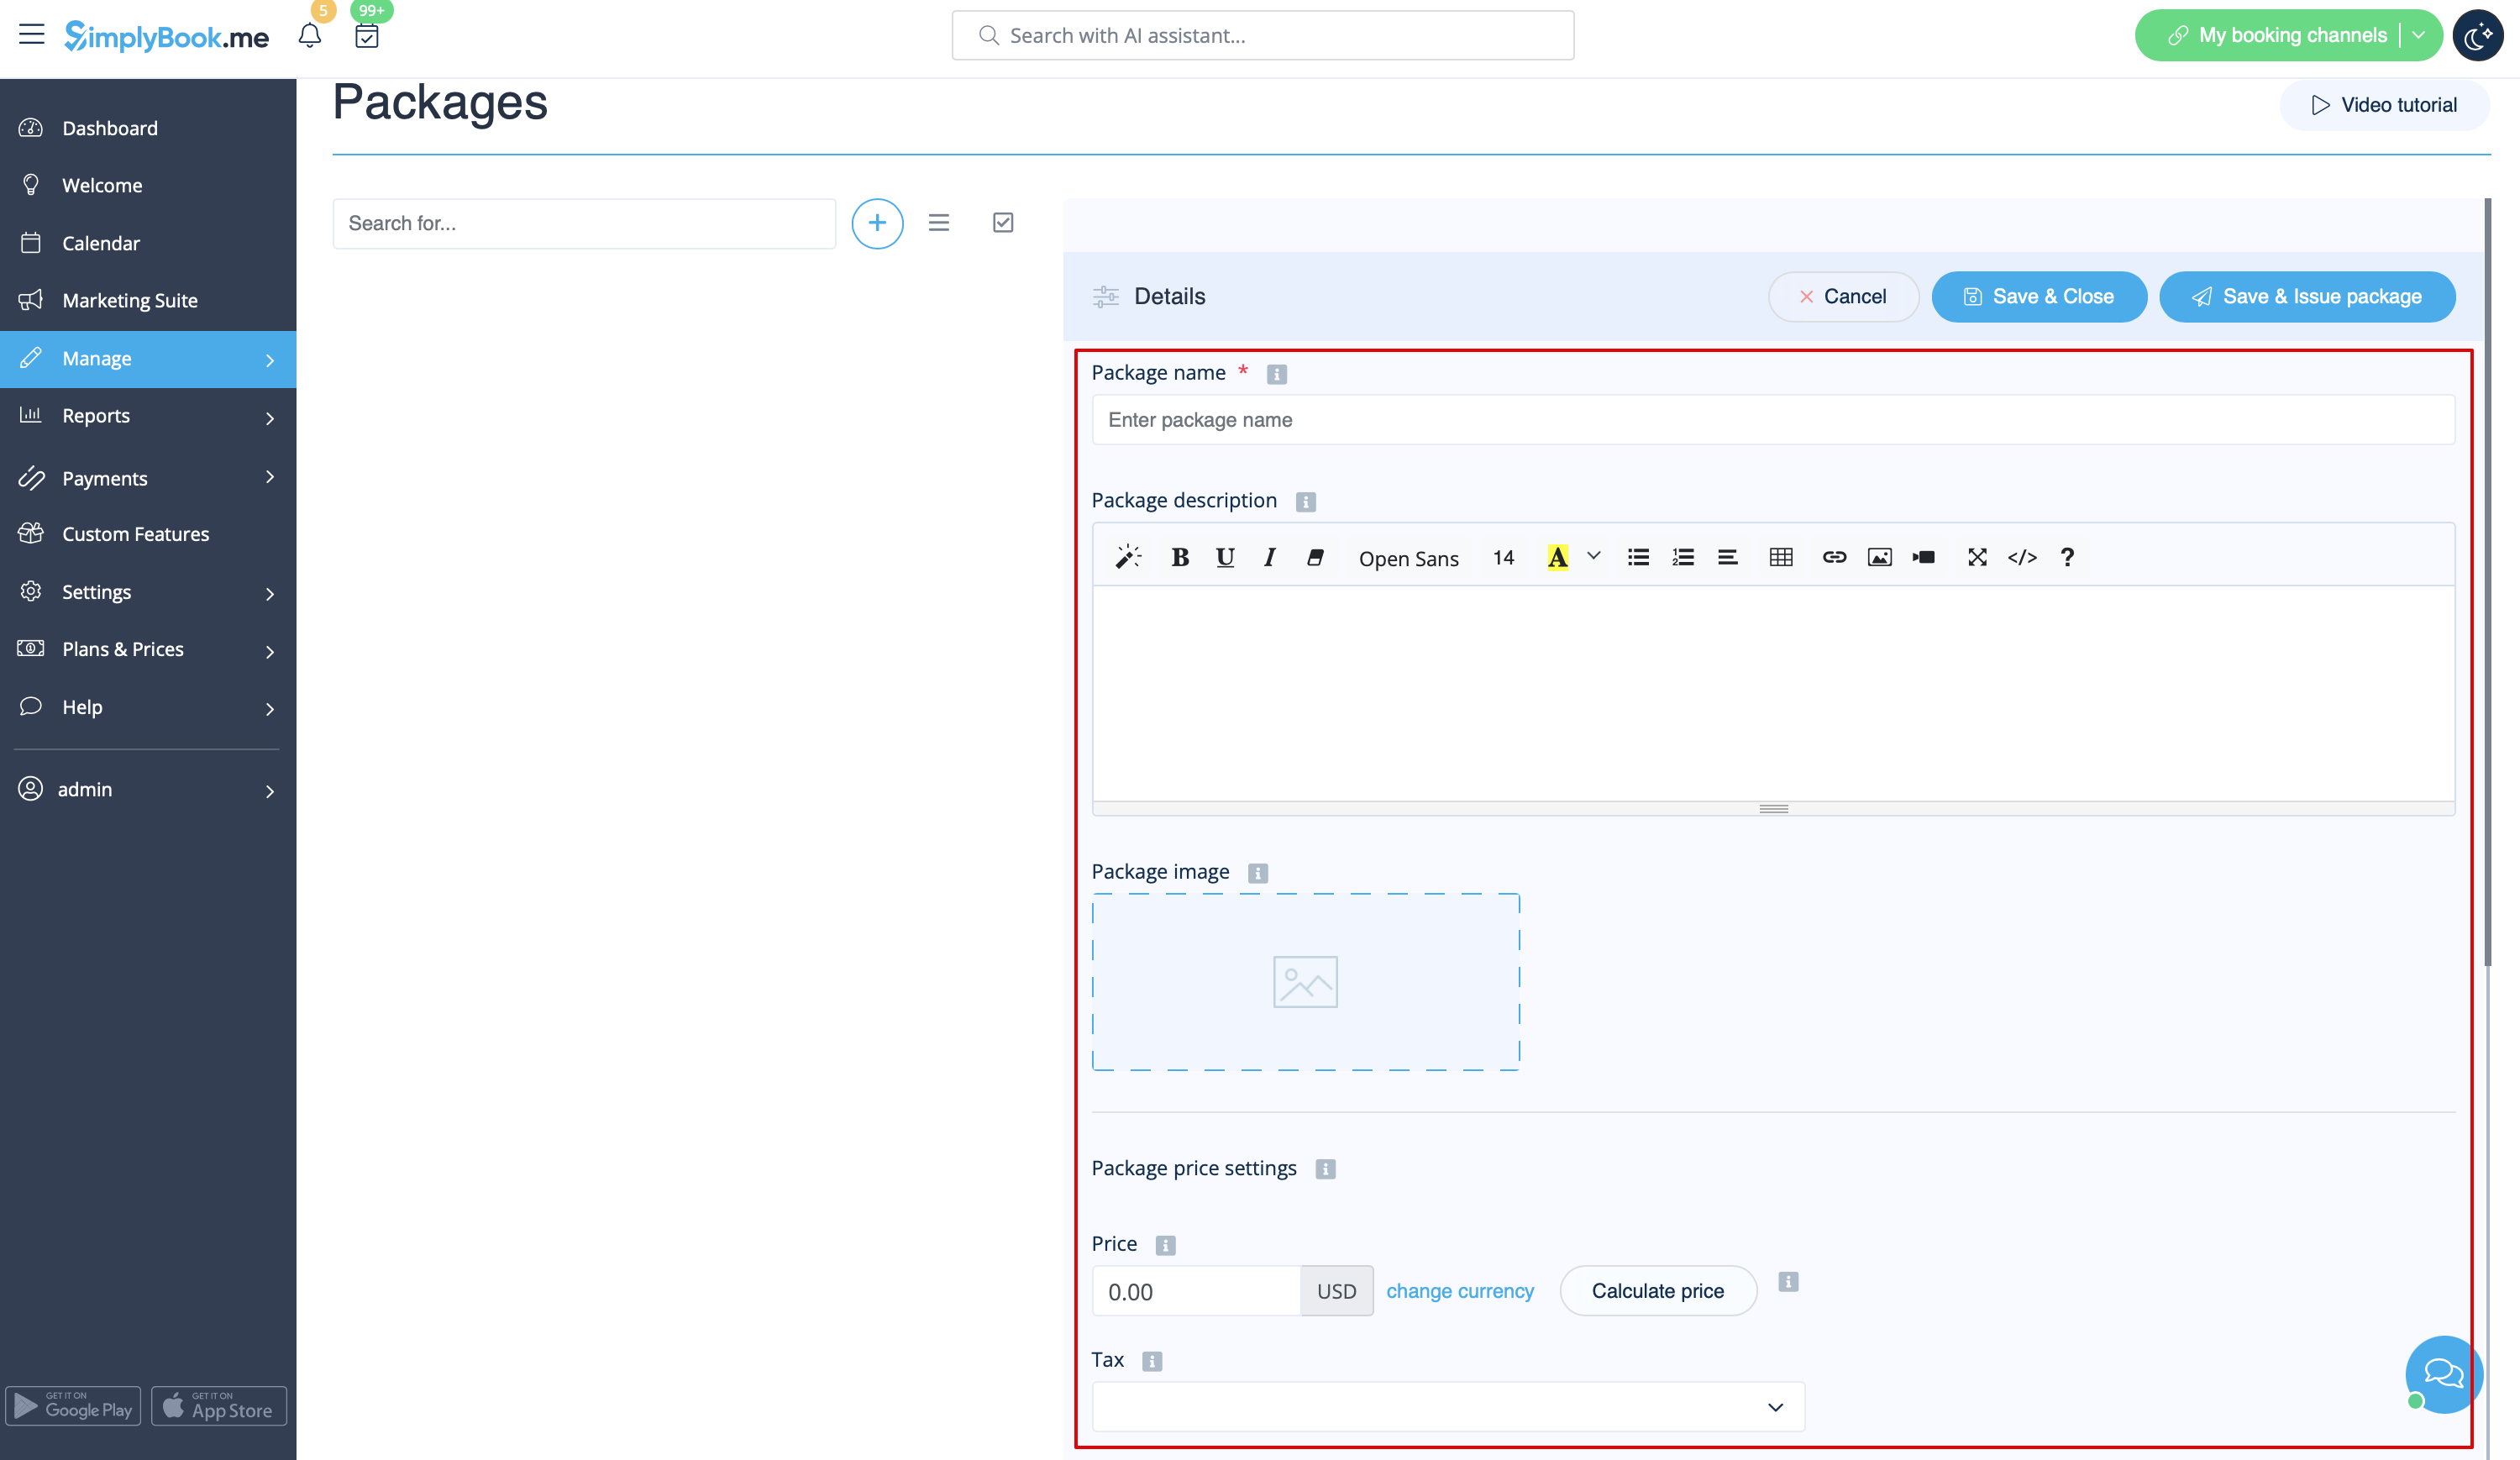
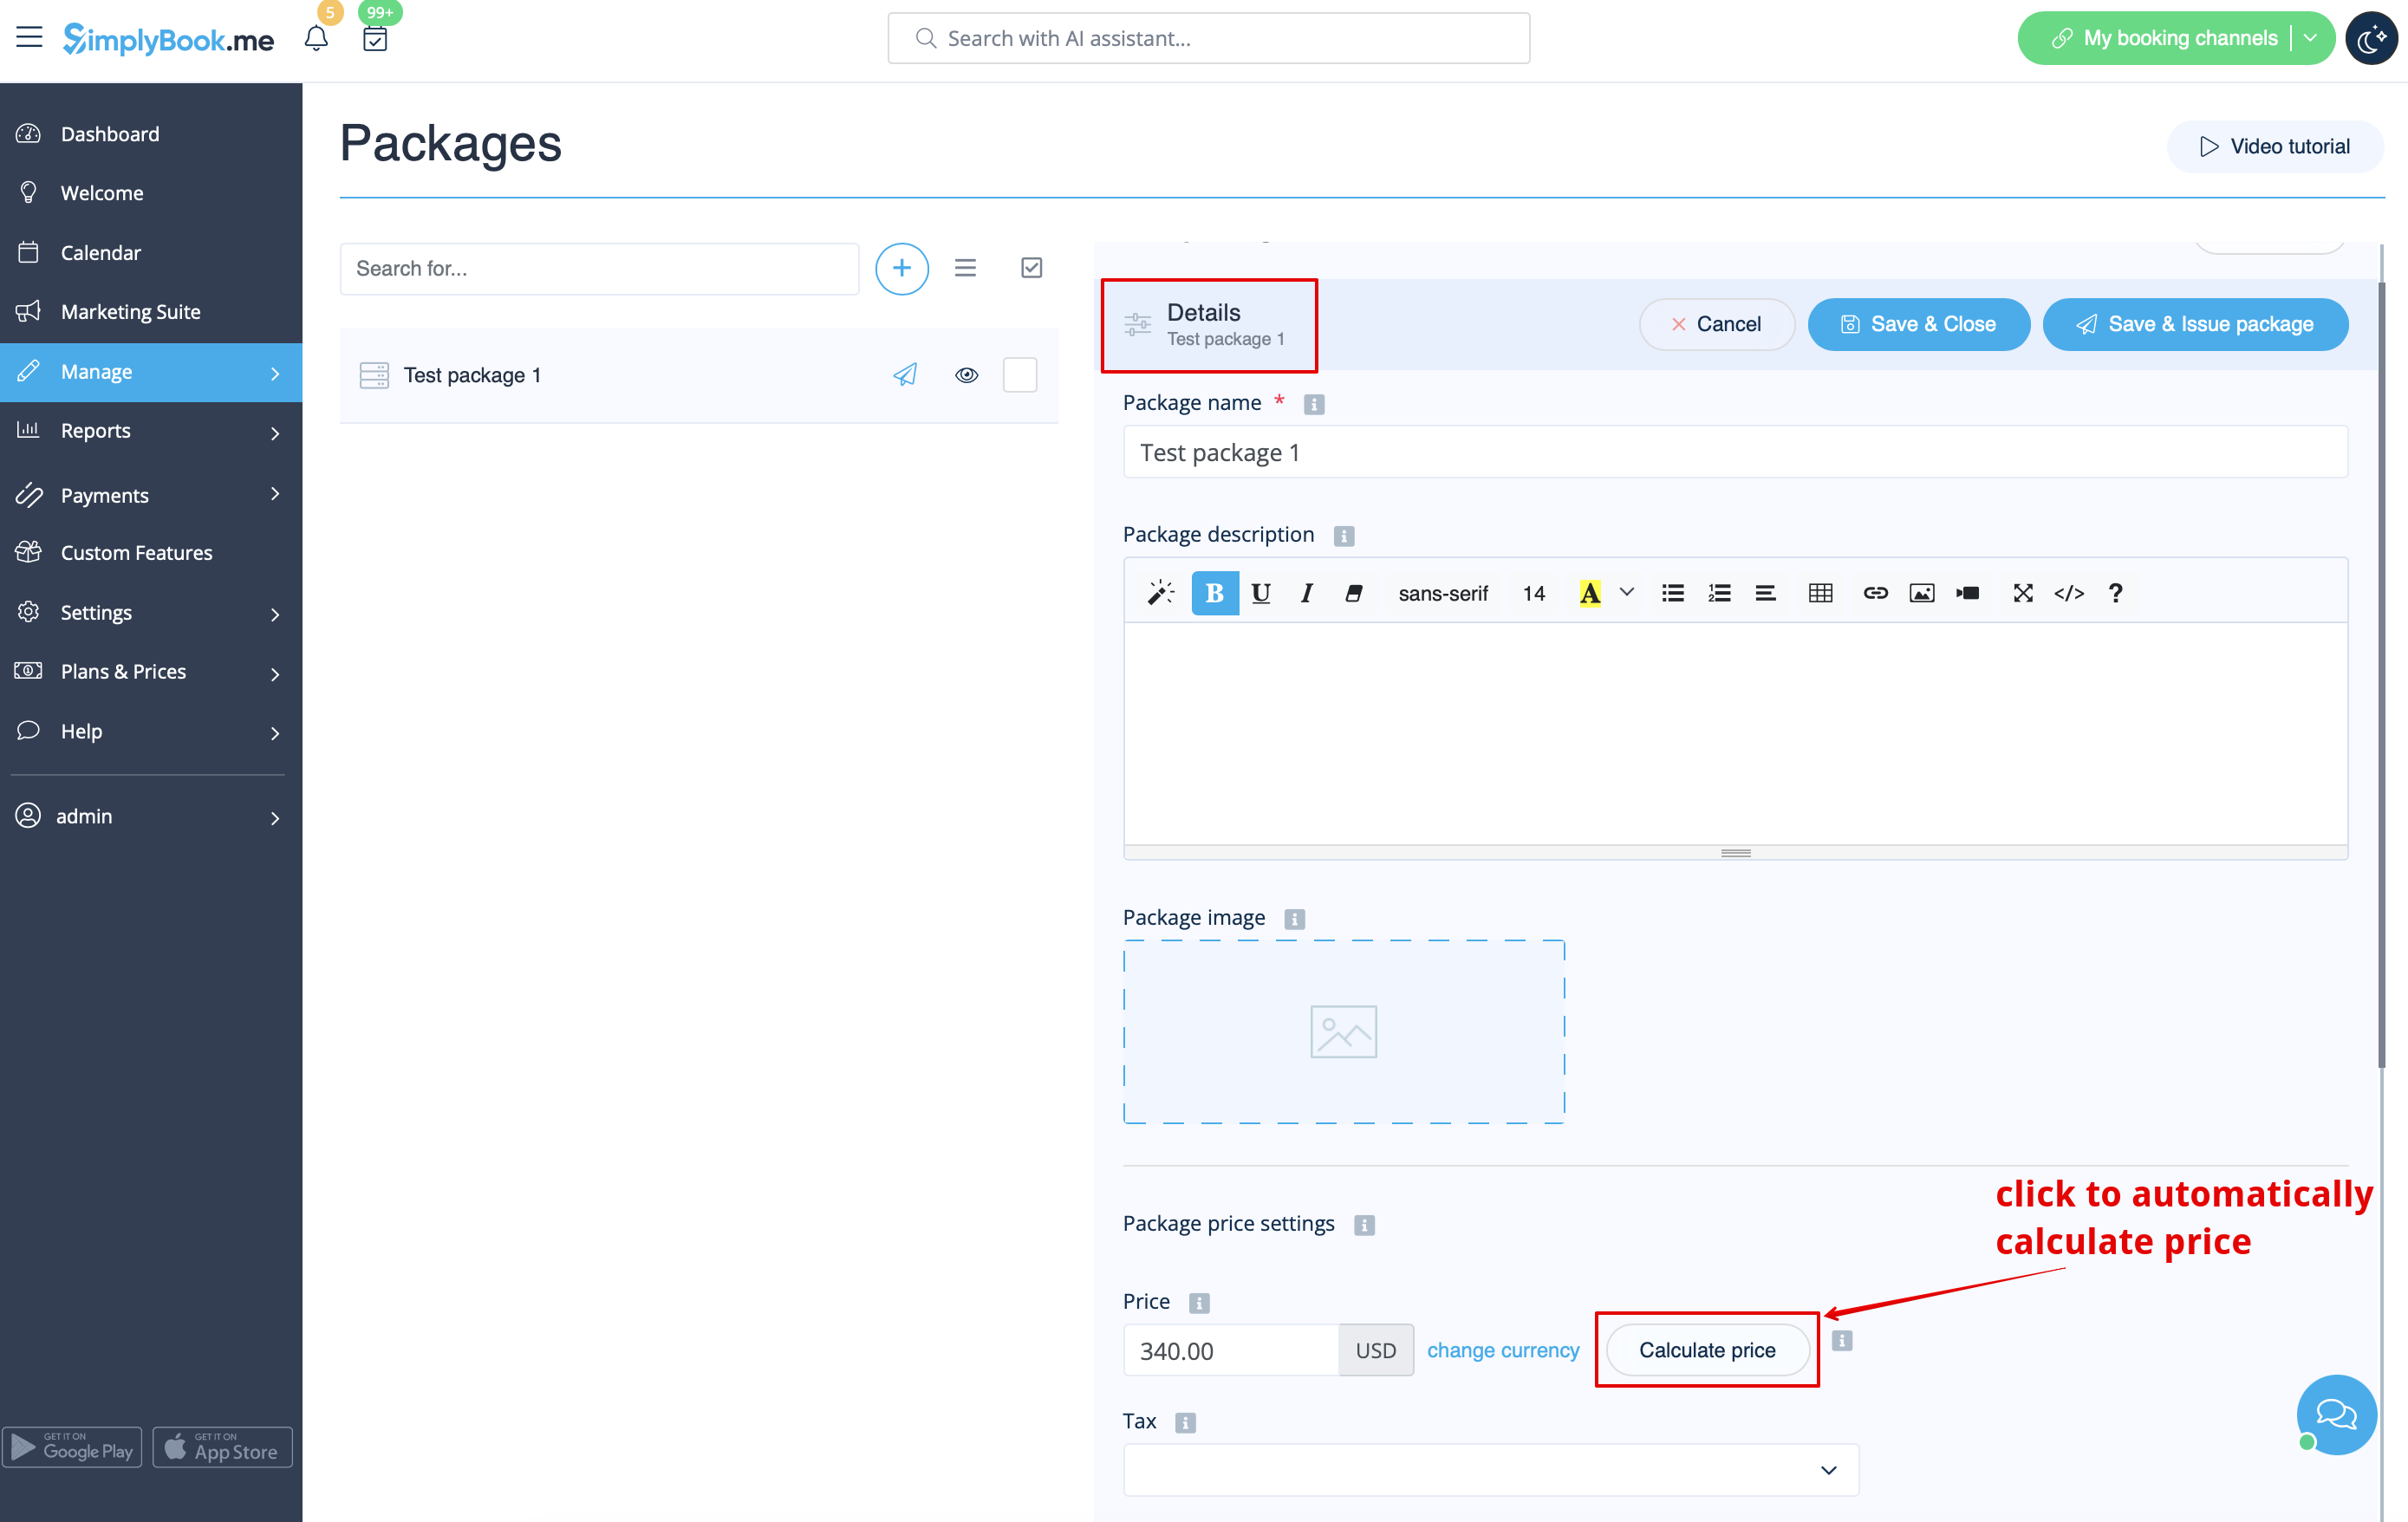
- 4. Insert package name, add a description (you can even use HTML formatting for a better look) and image.
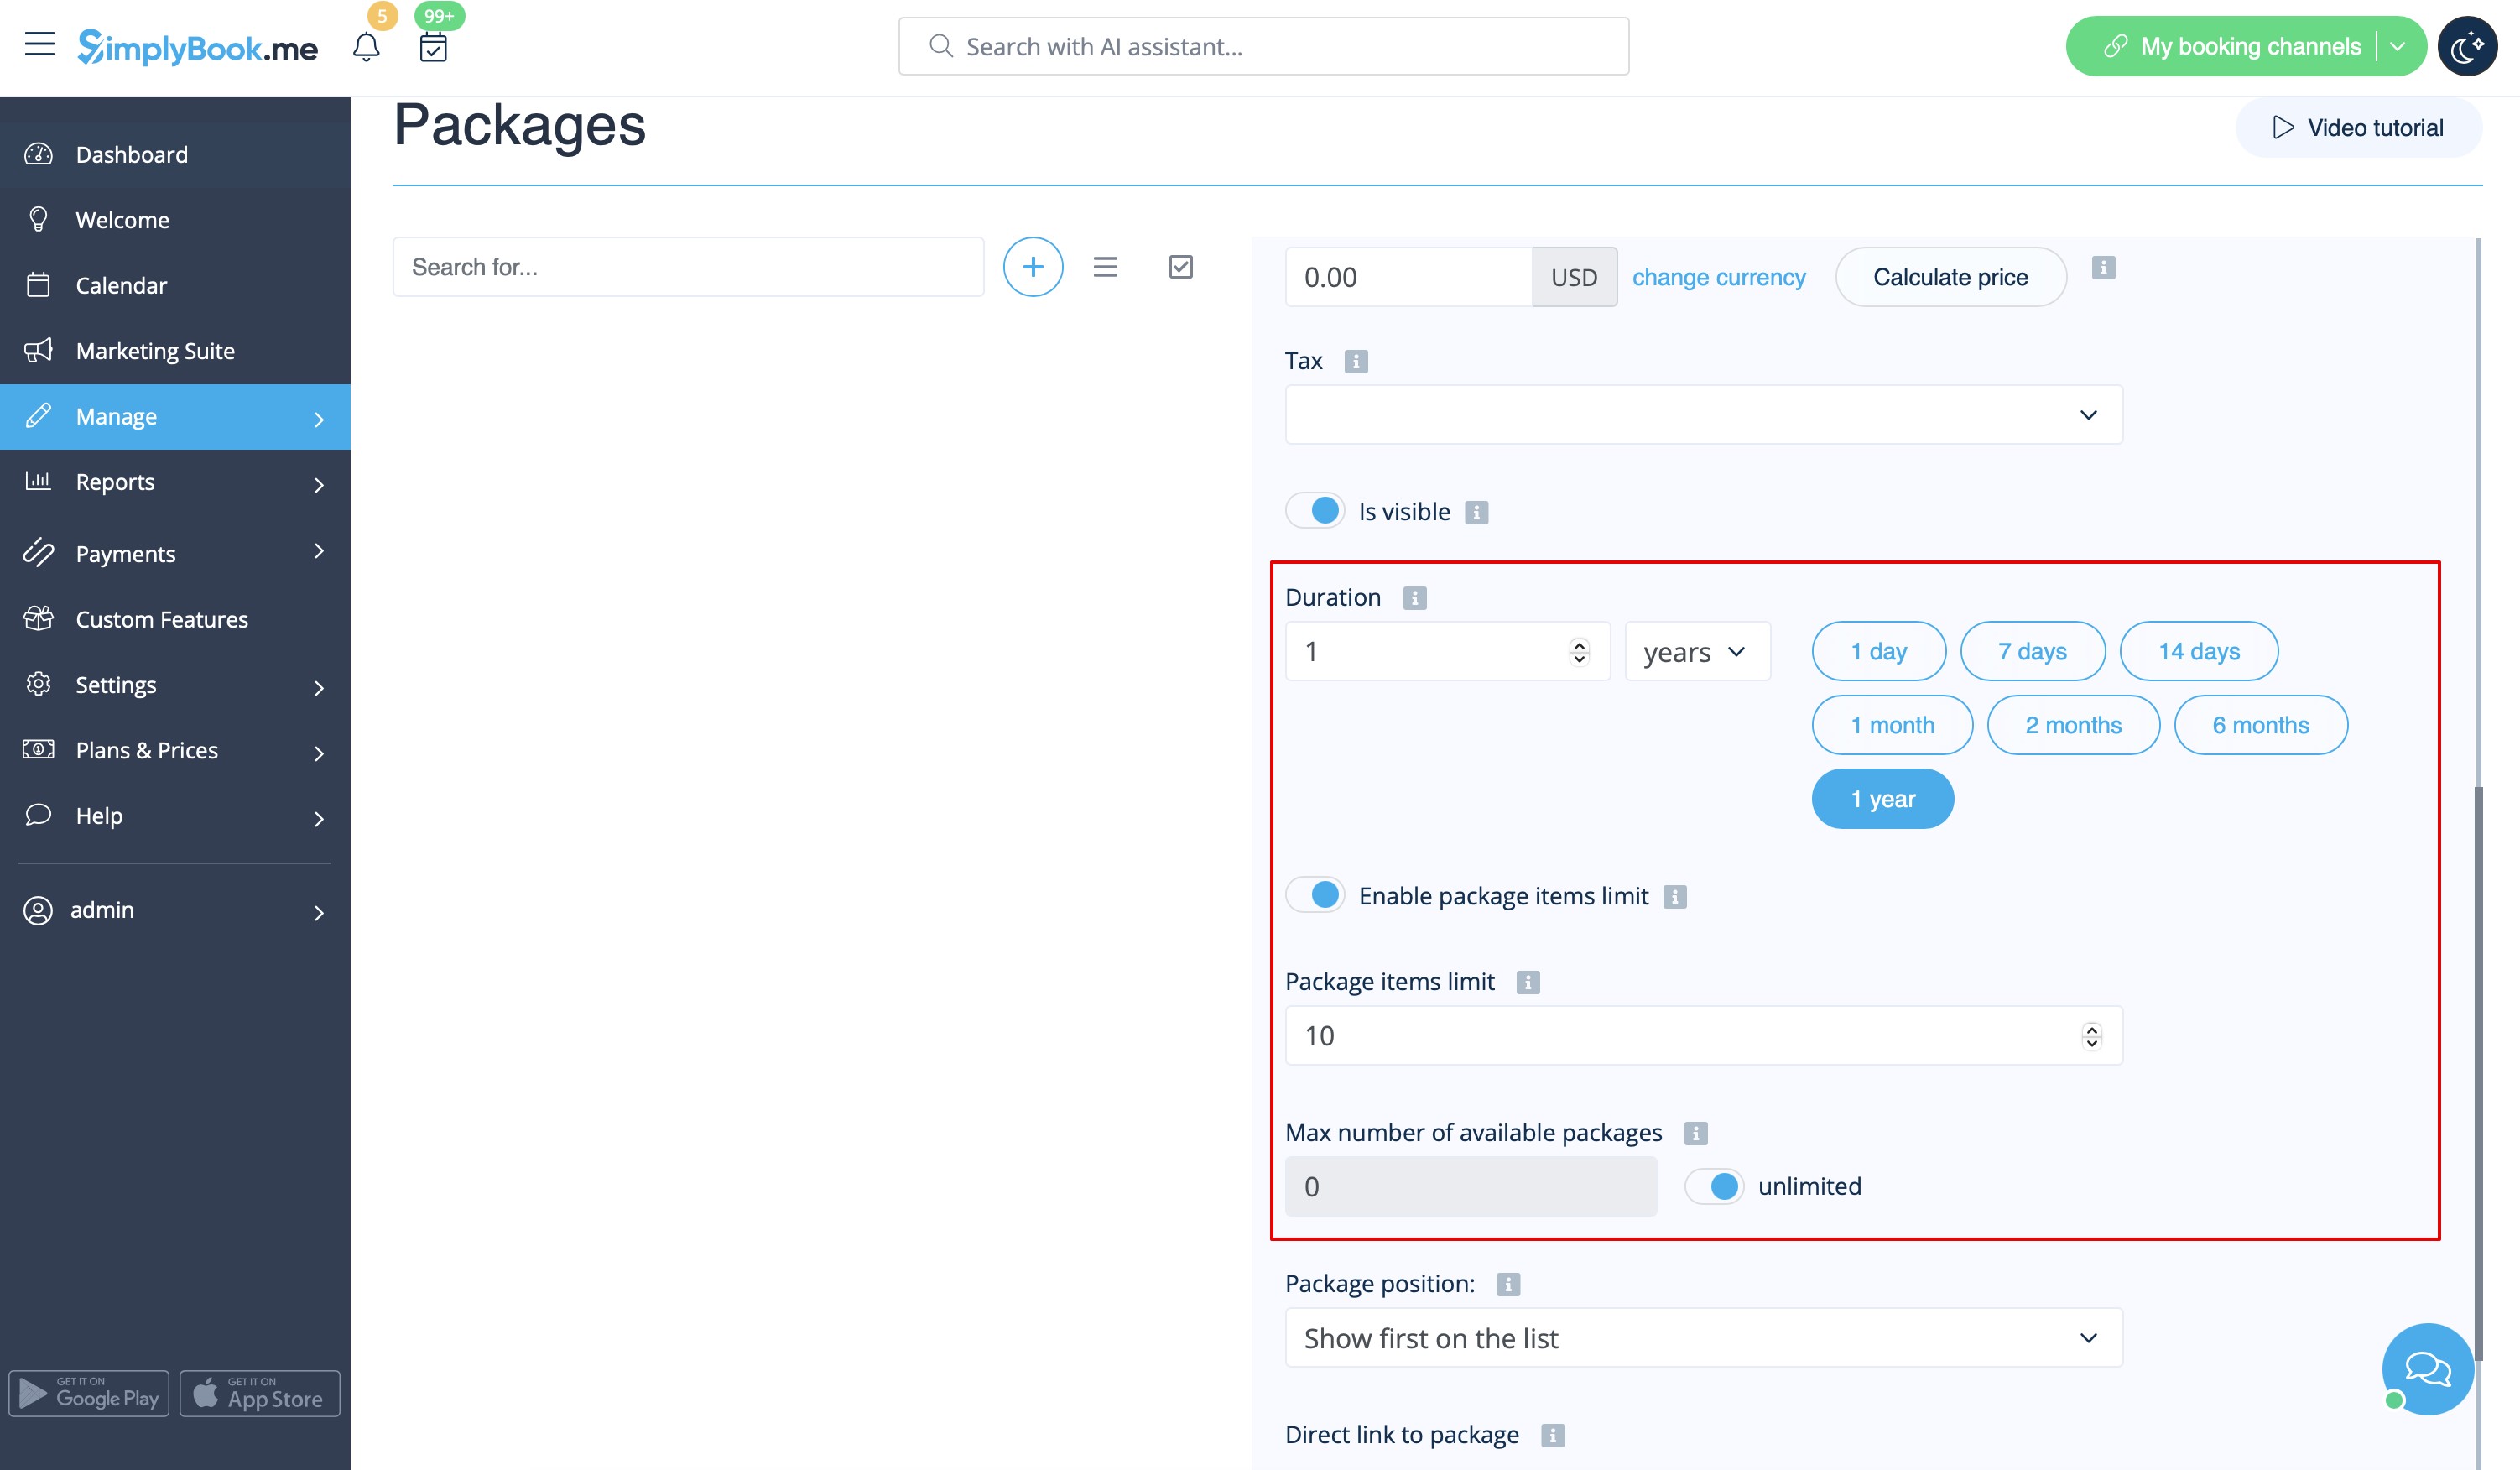
- At this point you can also set the package price: you can specify the defined pack cost (if you want to make a discount, for example) or
- skip price box to later calculate the total amount of all the elements included into the package.
- Please note, it is not possible to create a package without a price.
- 5. Define the validity period of the package,
- enable and set the general limit for the included items(optional, will be applied to services, add-ons and products connected to the package)
- and set the number of sets available for sale (unlimited by default).
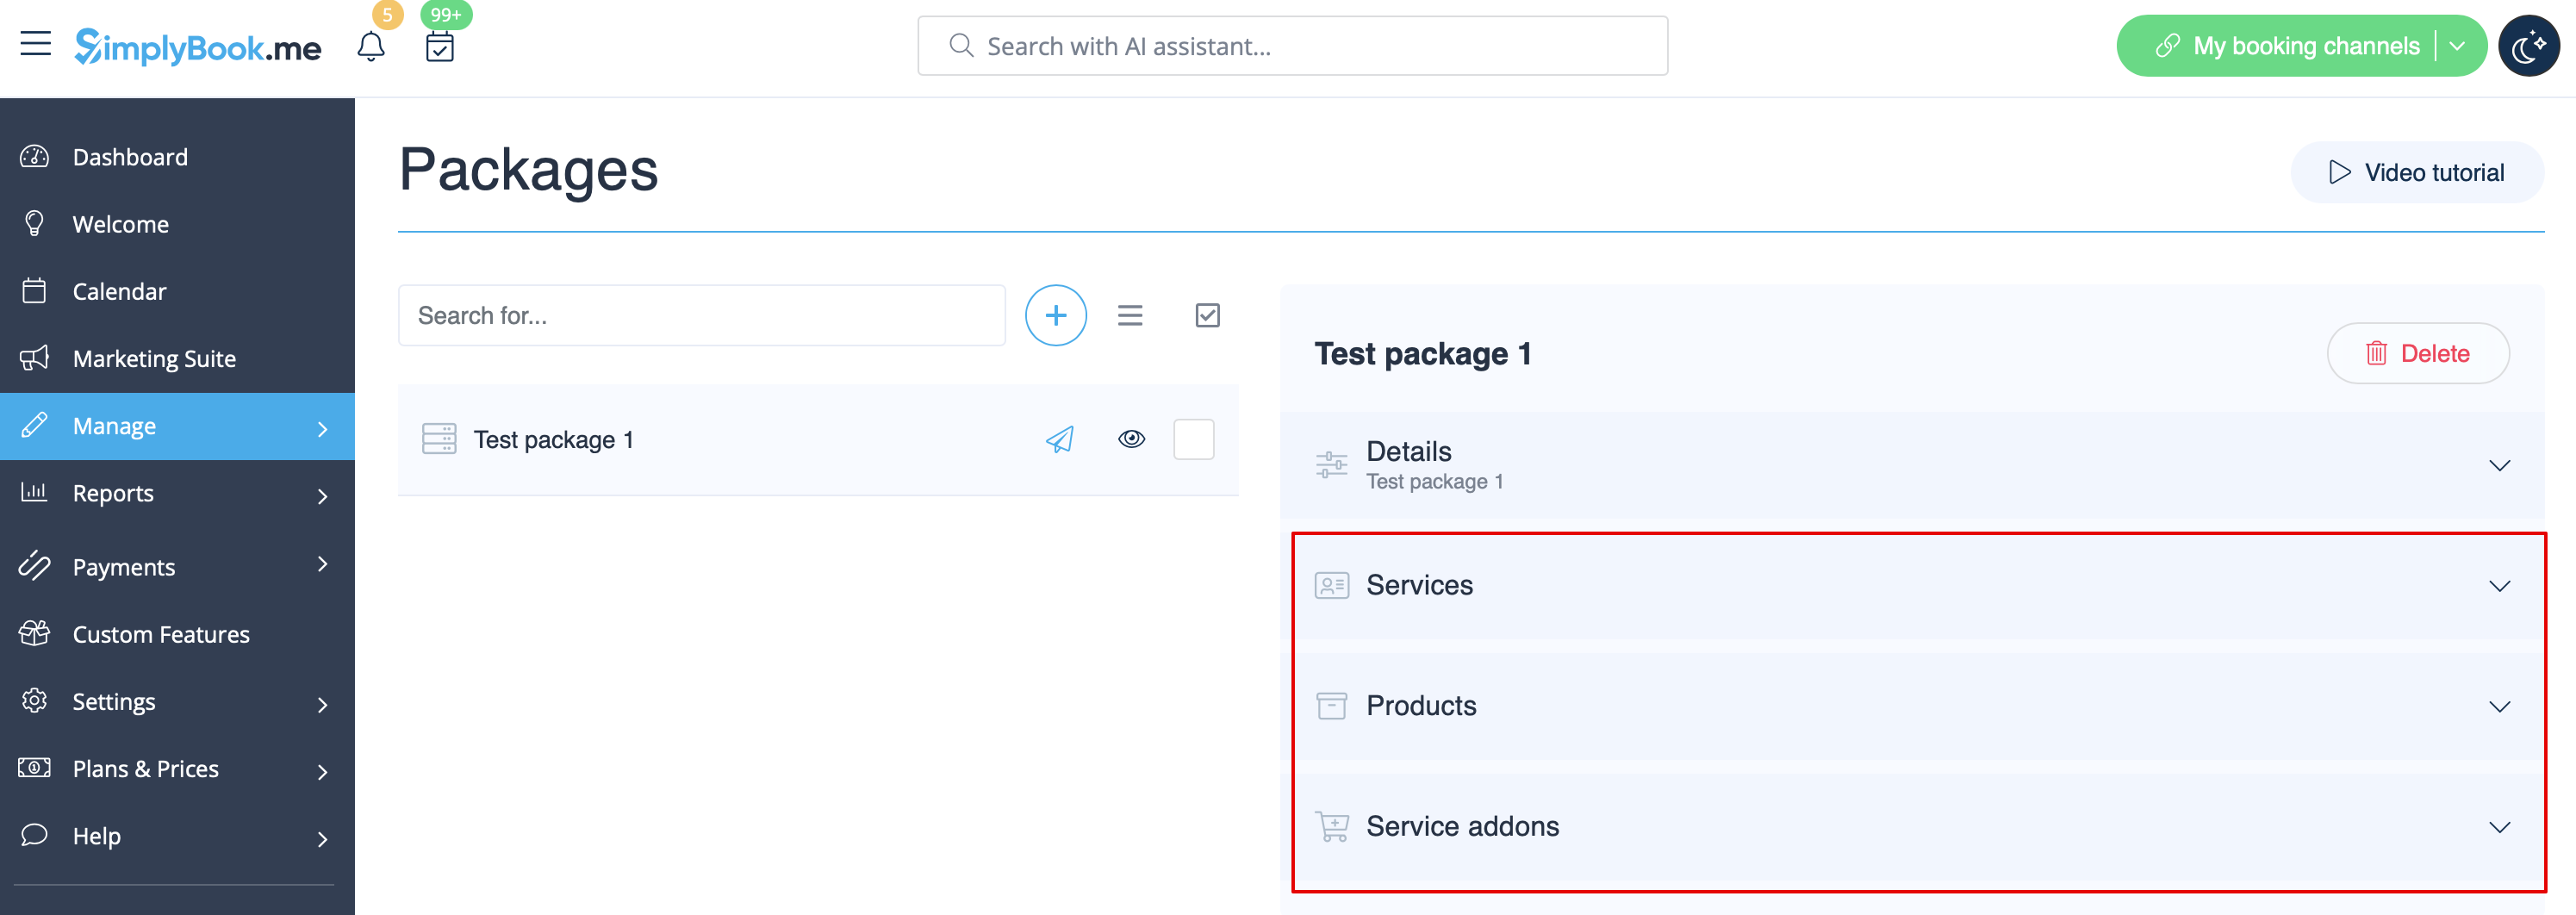
- 6. Proceed to adding services, products and add-ons to the package
- (you still need to set them in addition to the general limit if you use it to include the desired items into the pack, otherwise it will not be possible to use the package during the service/class booking process).
- You will see three corresponding sections below.
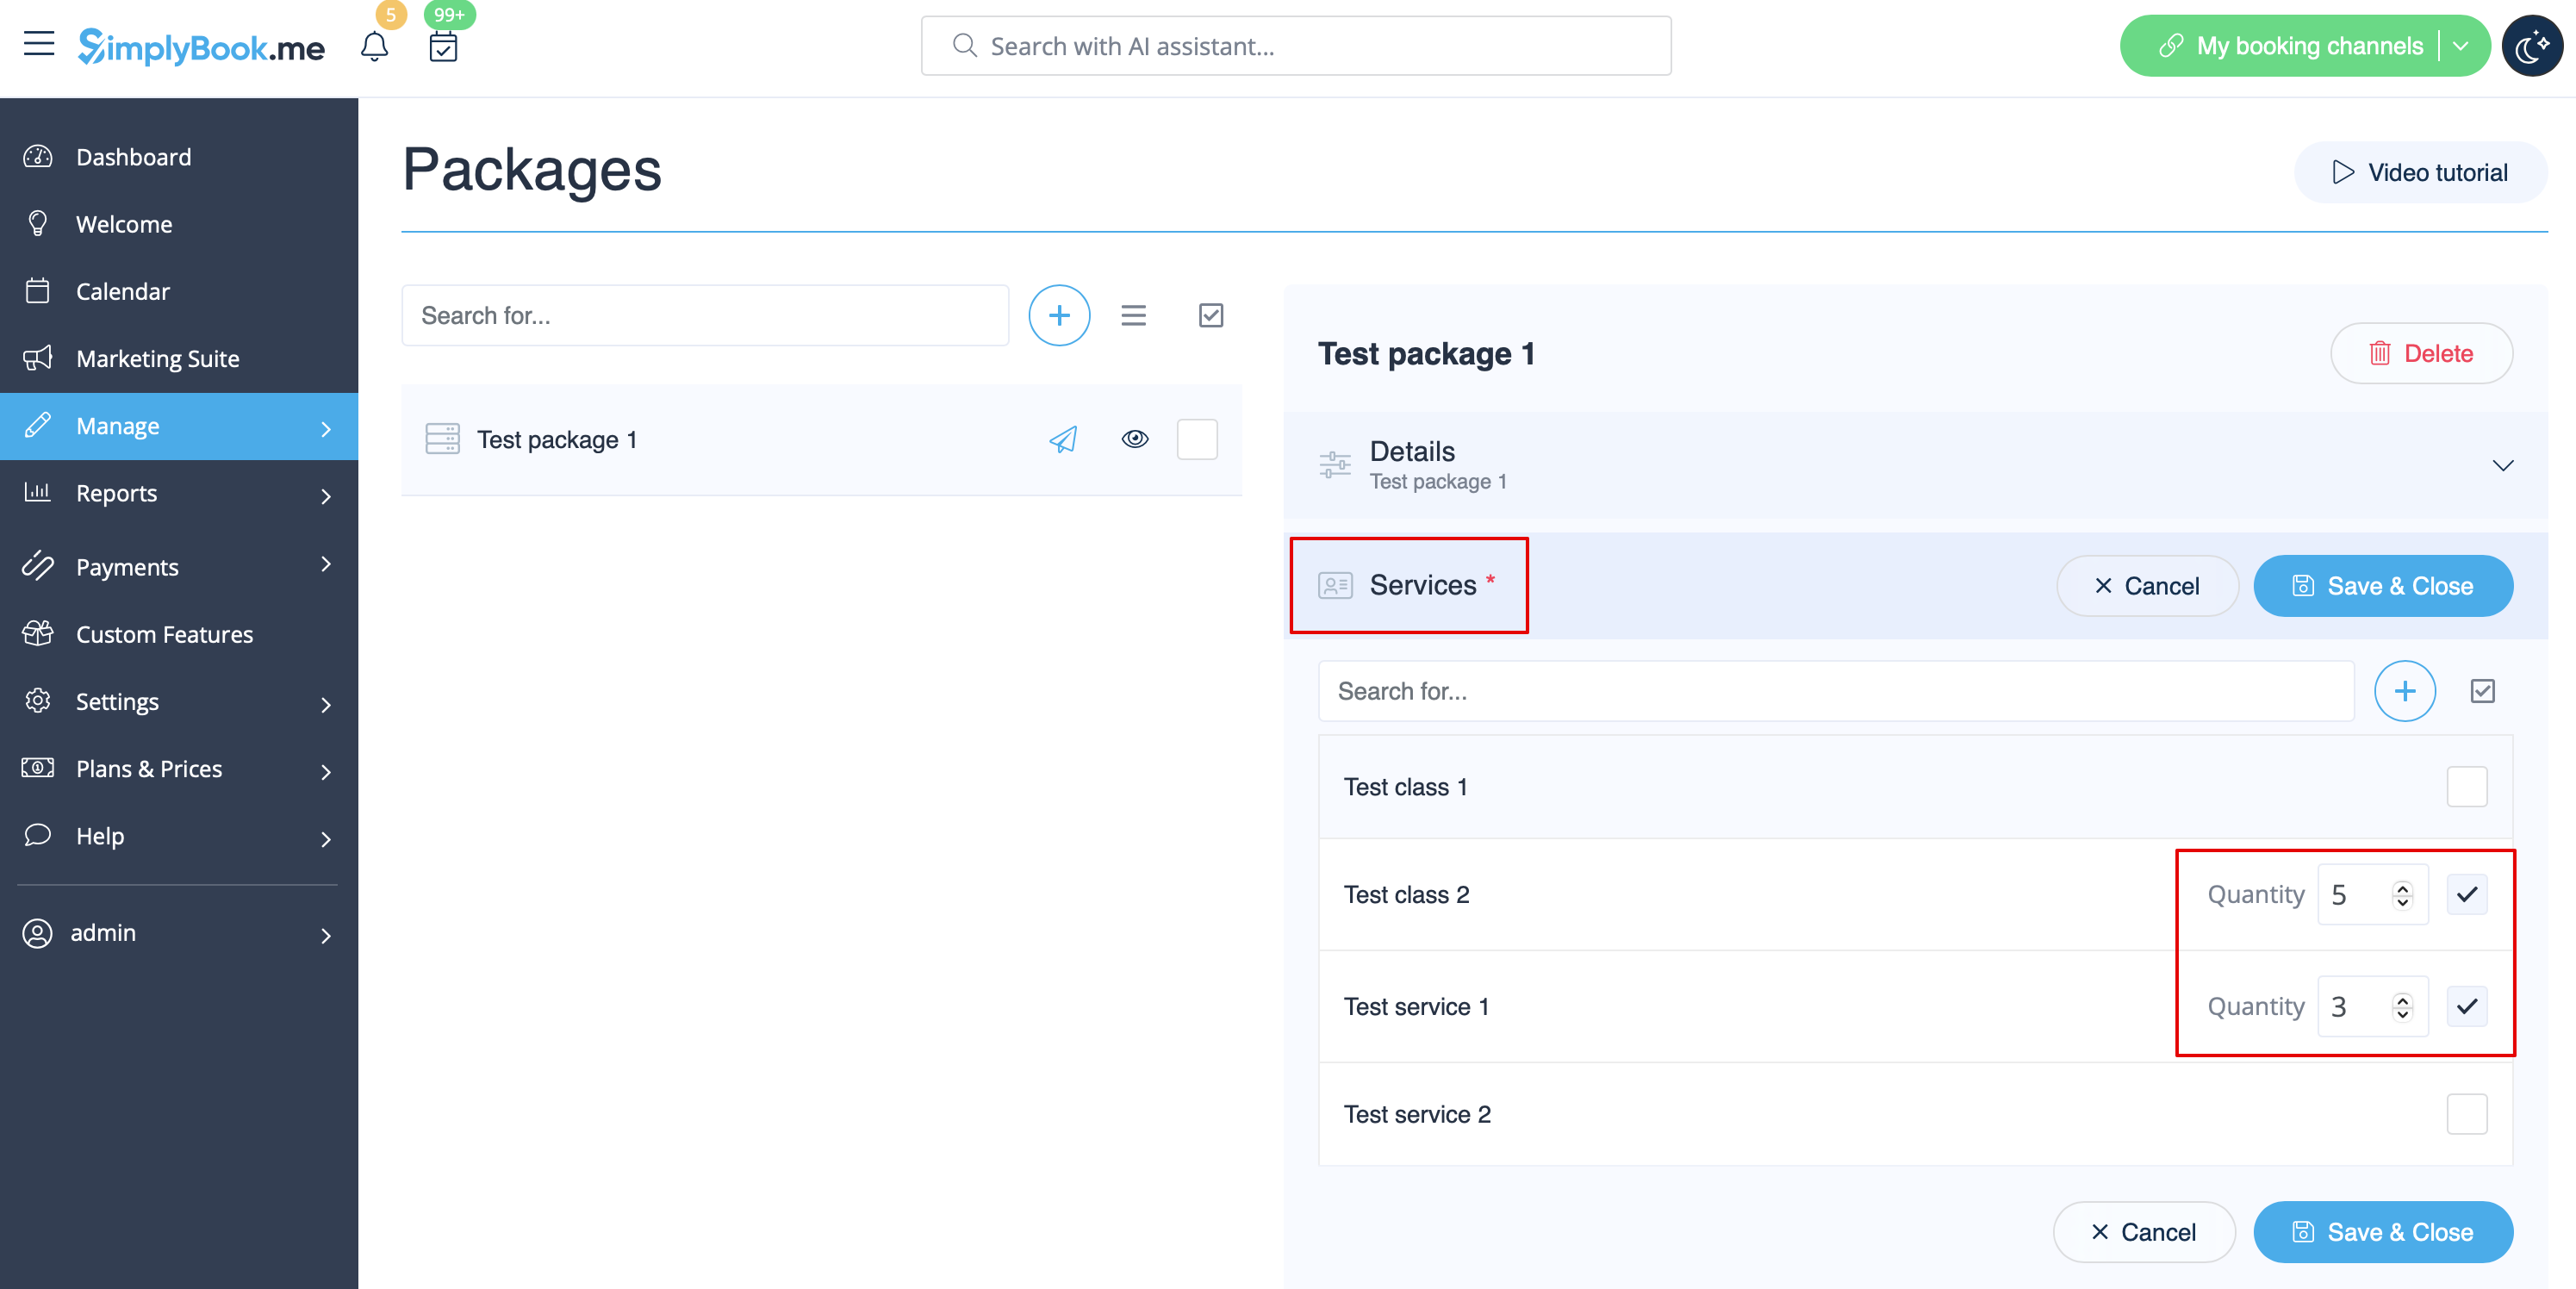
- 7. Please select “Services” section, check the boxes with the necessary items and set the quantity that will be available for booking within the package.
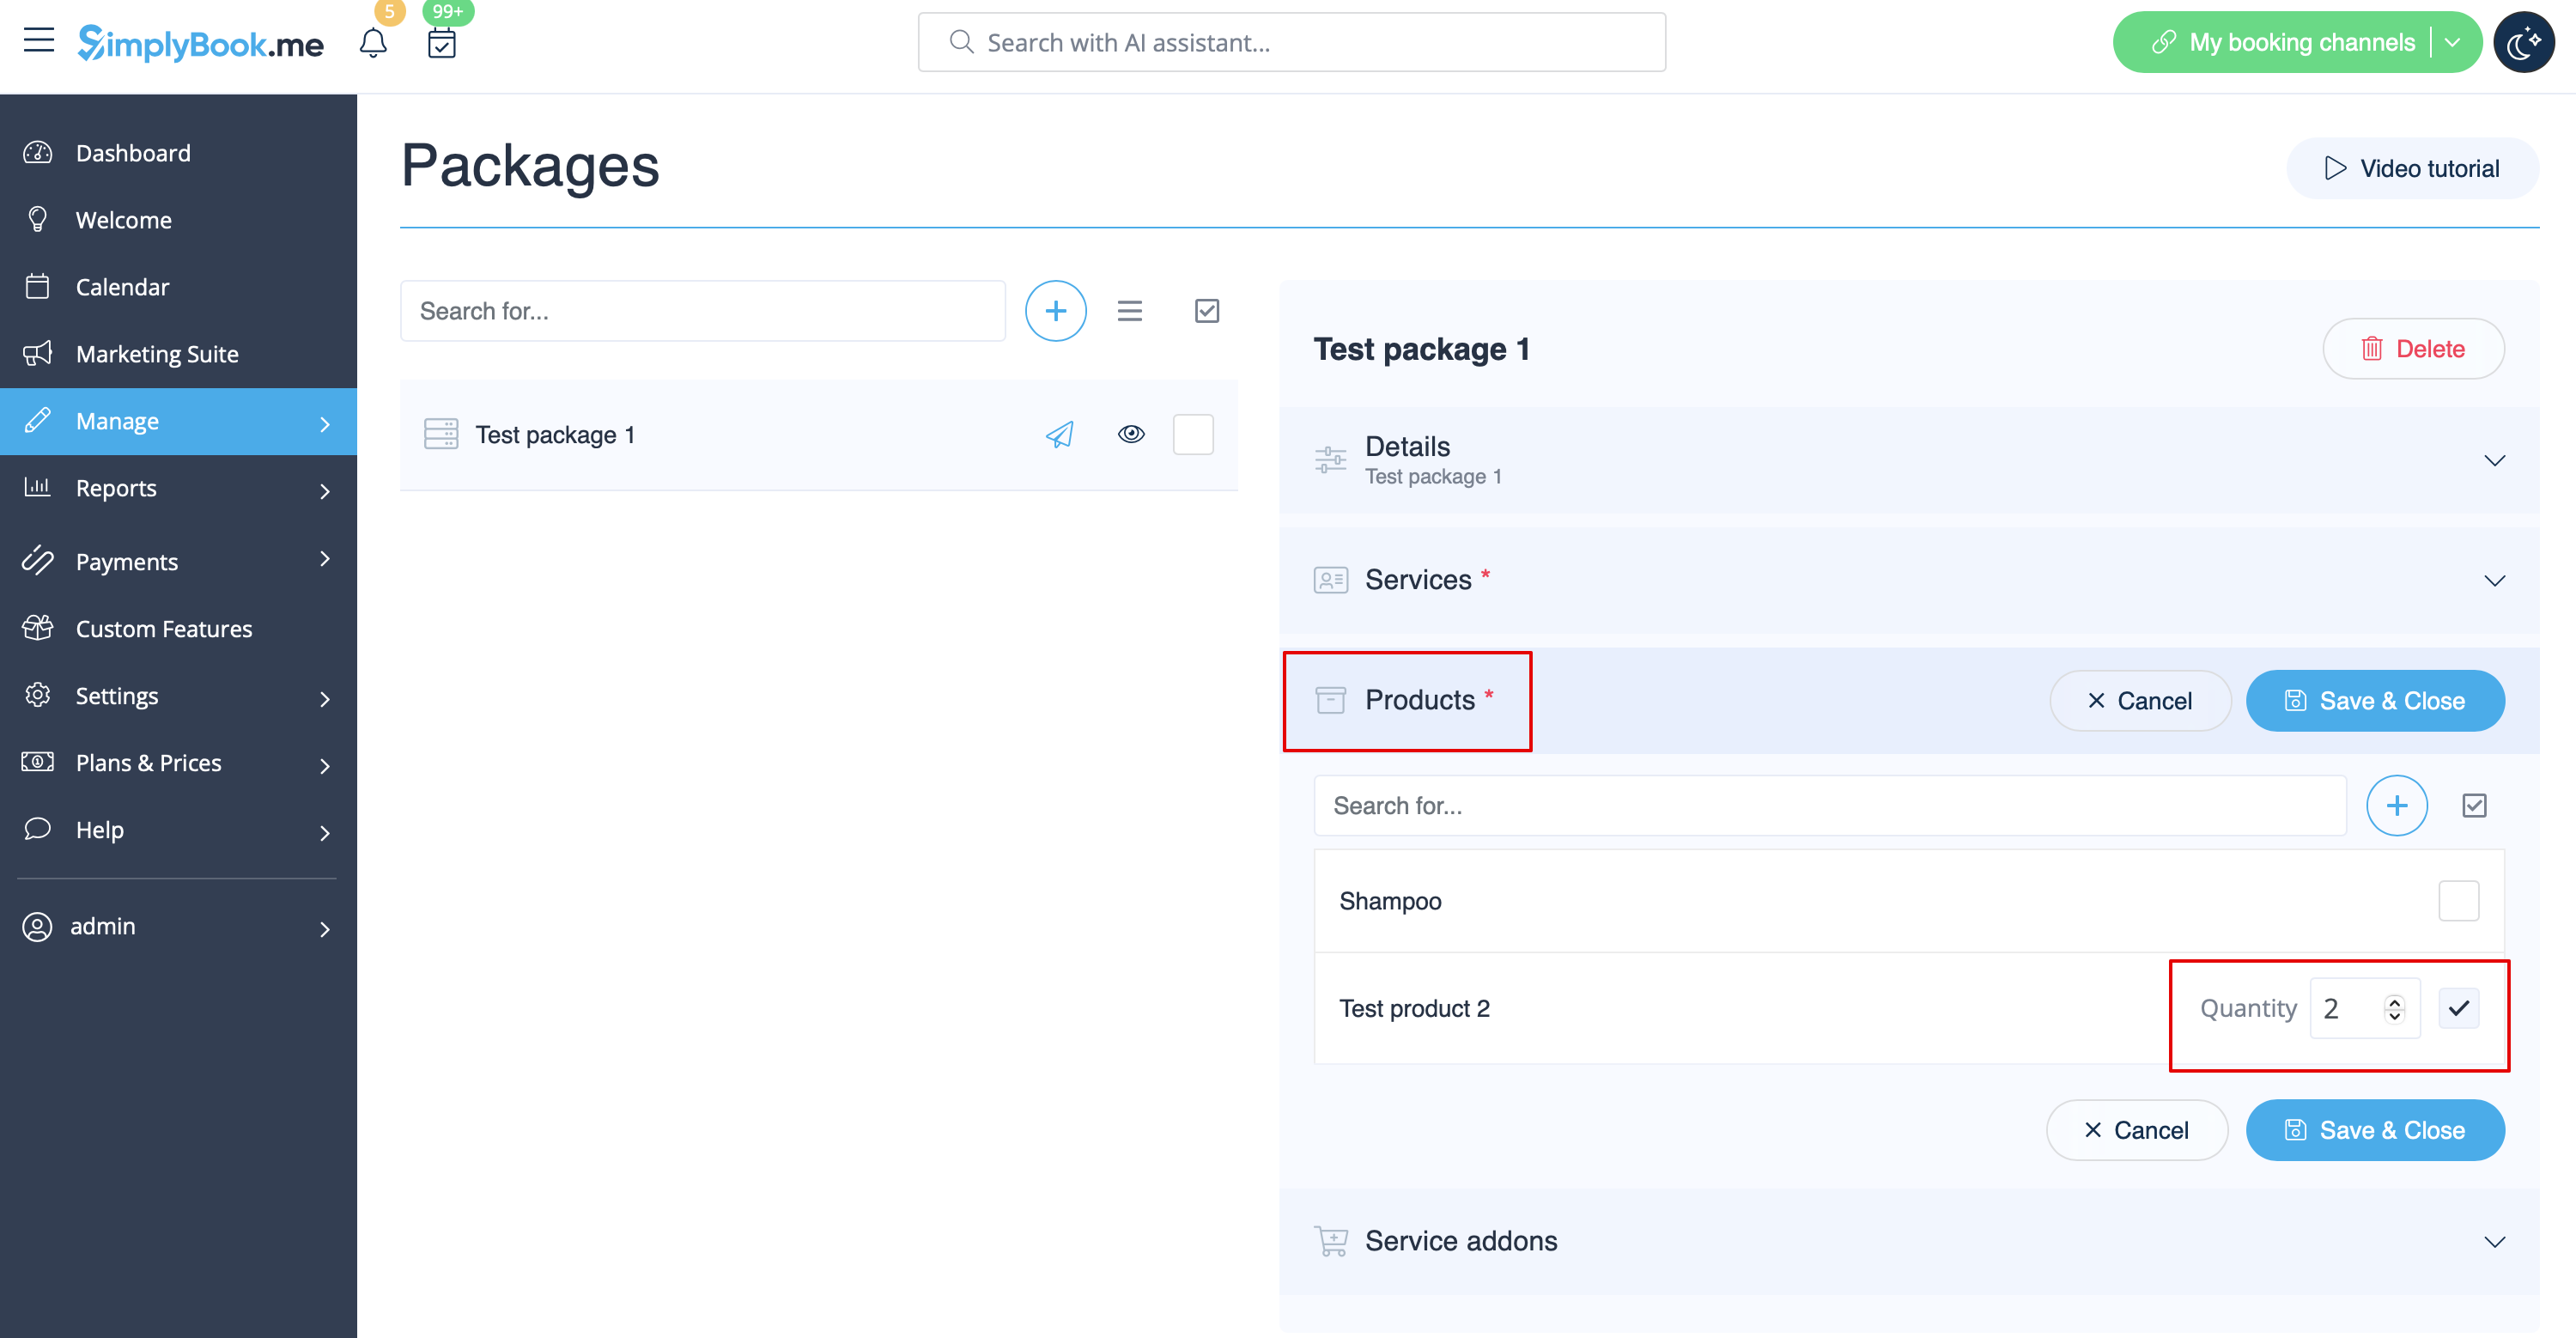
- 8. If you are using Products for sale and/or Service Add-ons features simply select the corresponding tabs and add elements the same way.
- 9. After you have added all the options and if you have not set a package price yet, get back to the “Details” tab and use “Calculate price” button to make the system automatically sum up all the elements prices for you.
- 10. Now you can click on “Save and issue package” to issue it to certain customers or simply save everything and allow your clients to buy this package on your booking site.
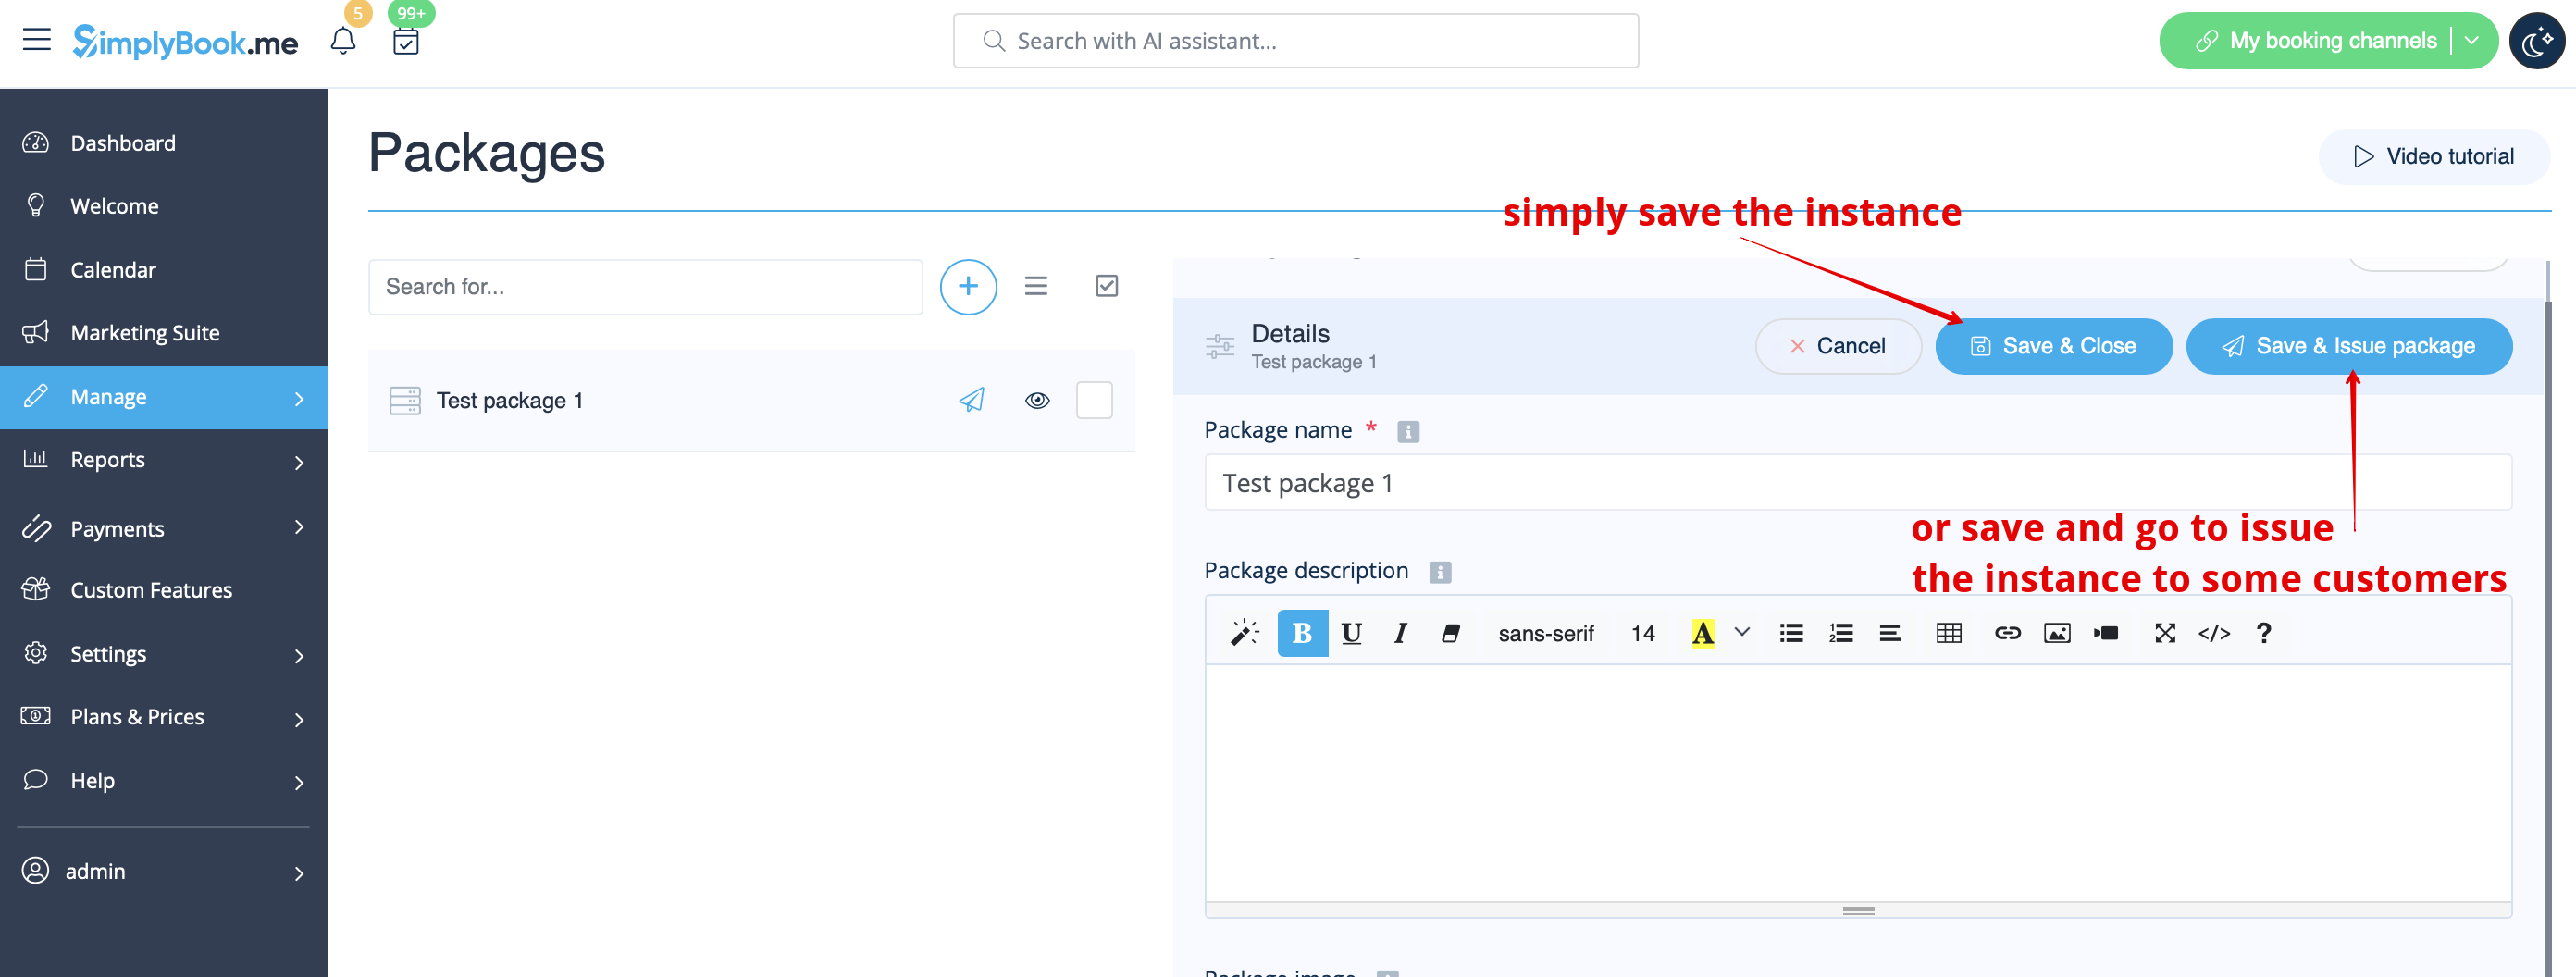
- If you assign a package from admin side or the client buys a package on the booking site he/she will receive package activation notification
- The invoice will be sent only in the case of the purchase and payment made from the client side.
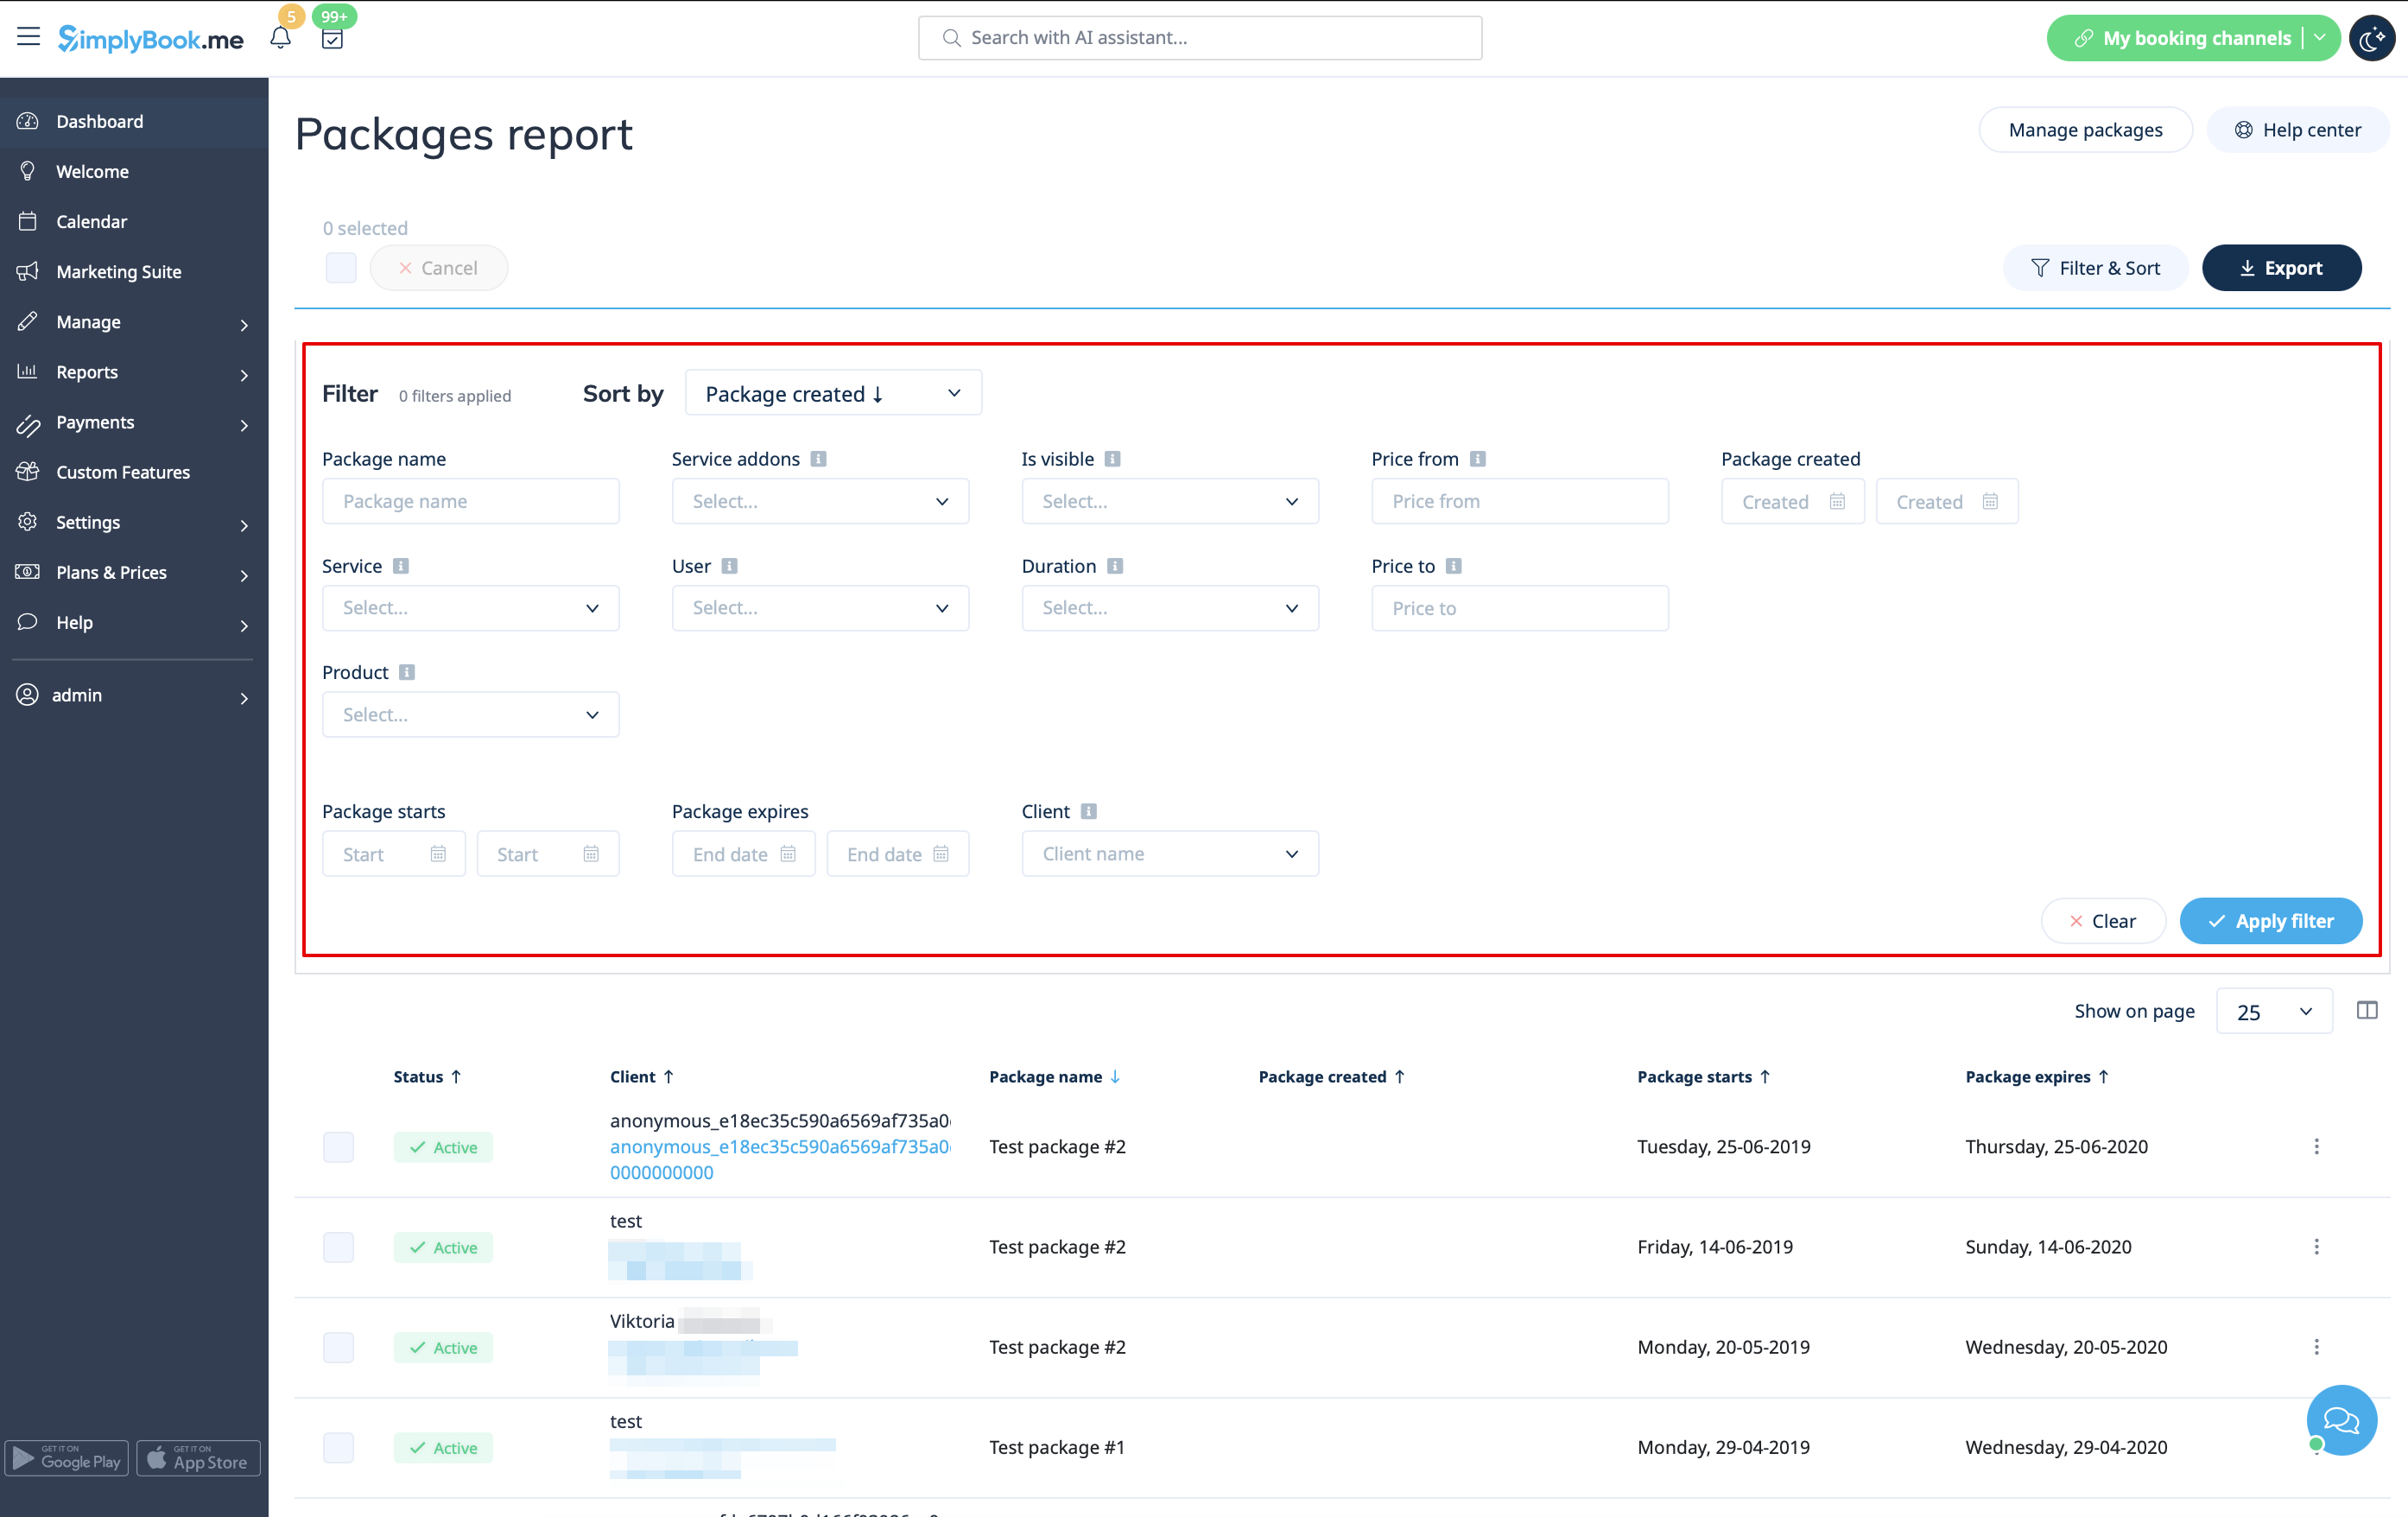
- 11. Go to Reports//Issued packages to check packages order history, customer data, as well as the number of remaining items.
- Use filters for more extensive analysis.
- Here you can also cancel the package for the specific client if needed.