Zapier integration wit SBPay.me
Connect SBPay.me to 2,000+ other web services with the help of Zapier integration. Set up the connections in minutes with no coding to automate your day-to-day tasks and build workflows between important apps. Choose SBPay.me as a trigger app and set the transactions and invoices data to the systems that you frequently use.
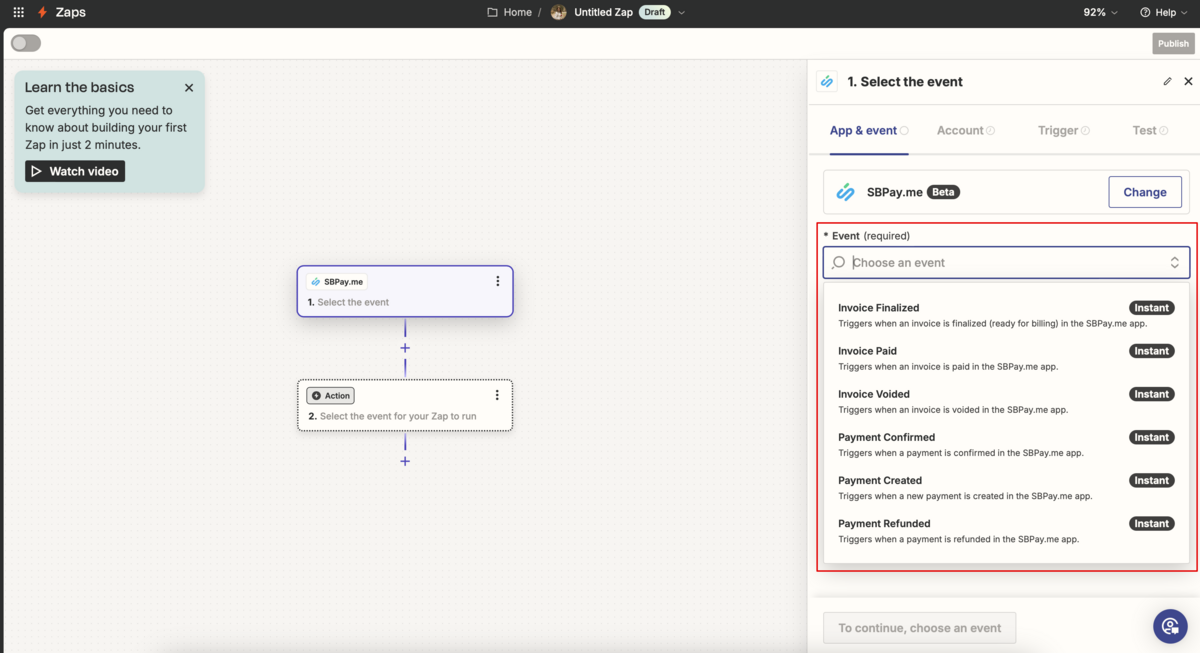
Available triggers:
- Payment Created;
- Payment Confirmed (paid);
- Payment Refunded;
- Invoice Finalized (prepared for payment);
- Invoice Paid;
- Invoice Voided.
Available data (payment triggers):
- transaction id;
- transaction description;
- customer information (id, name, email, phone, address, custom fields);
- transaction lines (item name, description, price, quantity, discounts, taxes);
- currency;
- amount;
- payment system;
- payment method;
- date and time when the document was created;
- date and time when the document was changed last time;
- payment status;
- payment type;
- whether the payment was refunded by payment system;
- whether the payment was confirmed manually by SBPay.me user;
- taxes information;
- tags.
Available data (invoice triggers):
- invoice number;
- invoice description;
- customer information (id, name, email, phone, address, custom fields);
- invoice lines (item name, description, price, quantity, discounts, taxes);
- currency;
- amount;
- date and time when the document was created;
- date and time when the document was changed last time;
- invoice due date;
- invoice status;
- invoice type;
- whether there are any has credit notes related to that invoice;
- total amount without taxes;
- total discount amount;
- taxes information;
- tags.
How to set:
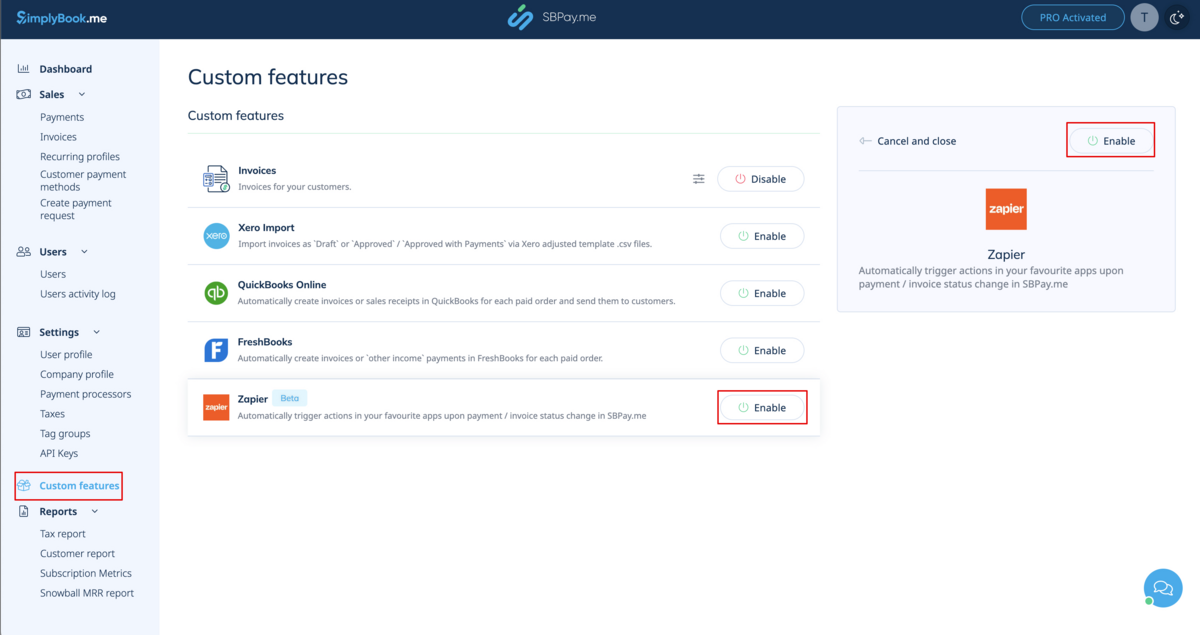
1. Enable Zapier custom feature in your SBPay.me interface.
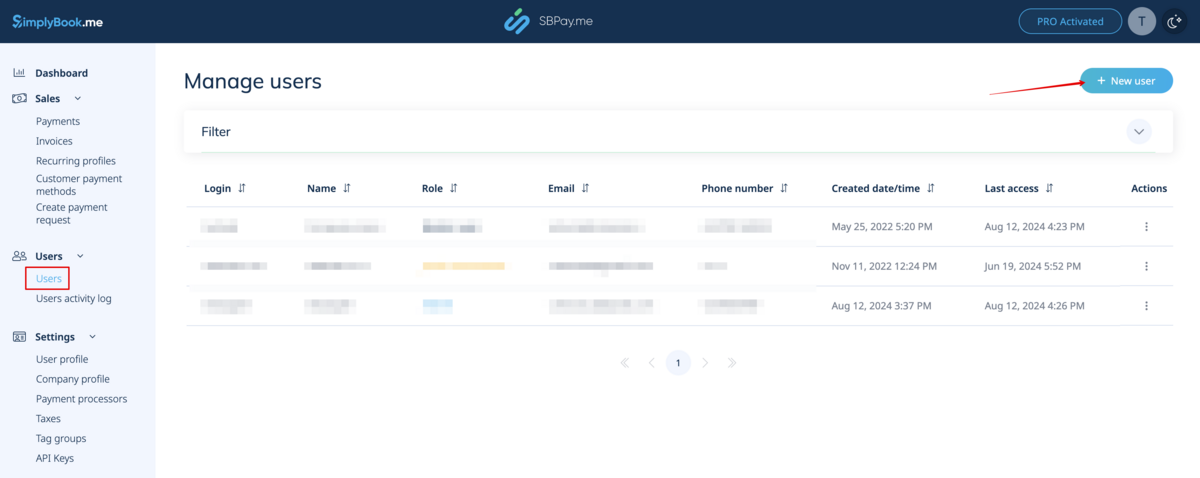
2. Navigate to Users page and click on New user.
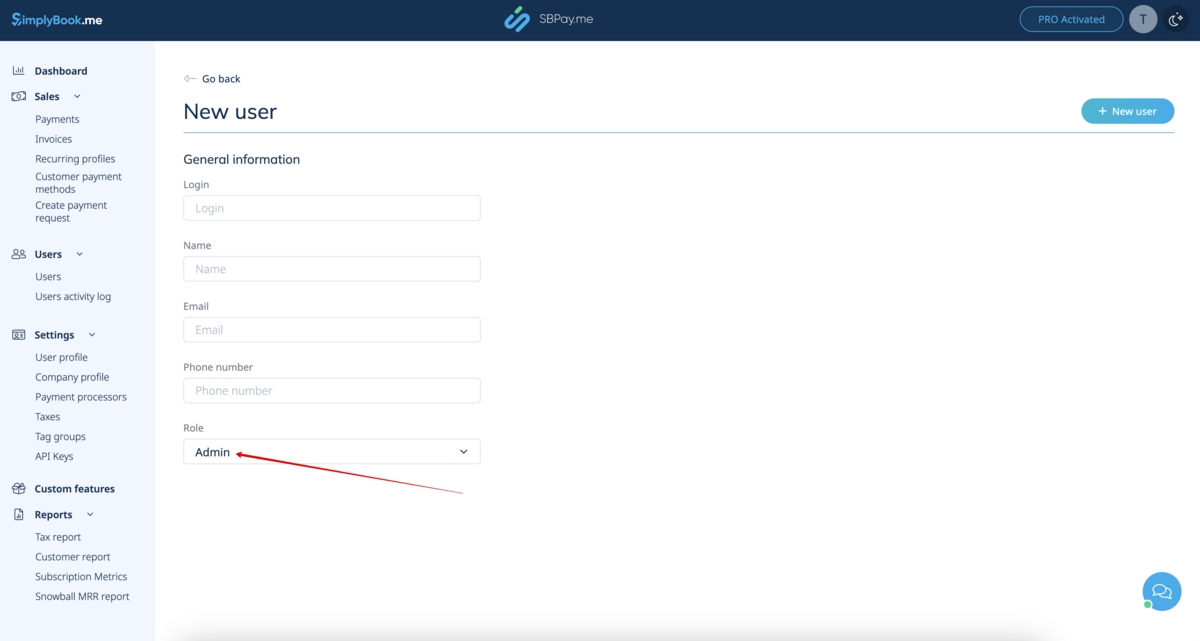
3. Create one more users with Admin access level. (use New user button to save the new user).
4. Log in as this admin user to your SBPay.me account.
5. Log in to your Zapier account or create a new one.
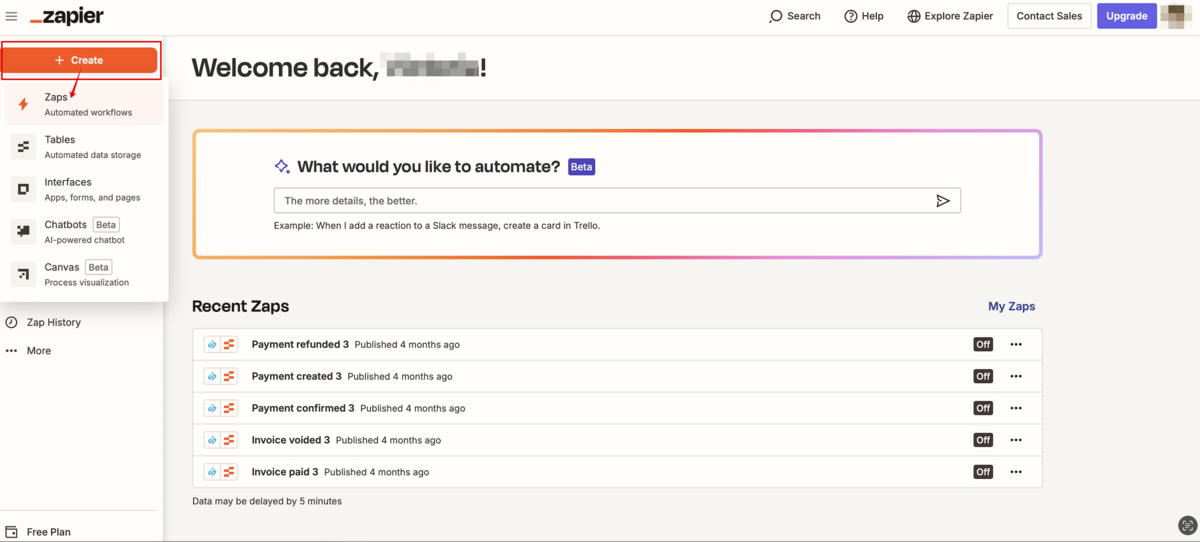
6. Create new Zap by clicking on Create and then Zaps button in Zapier interface.
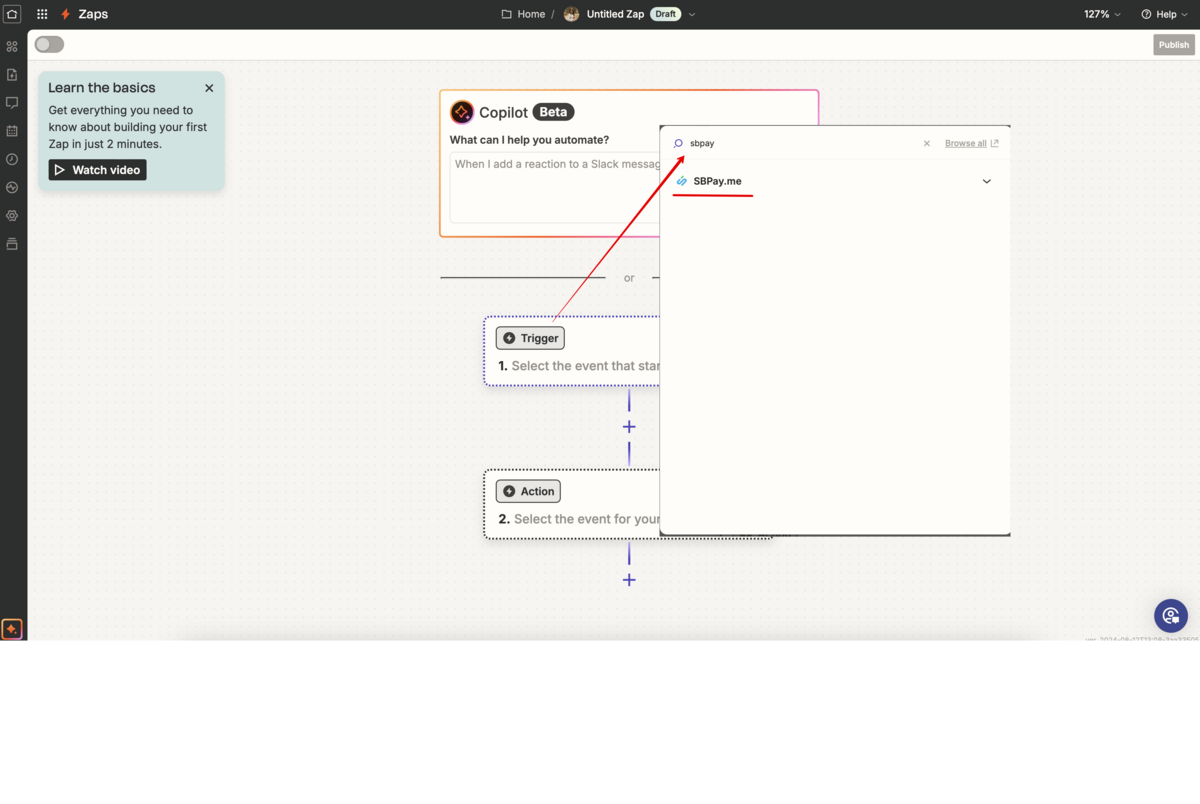
7. Look for SBPay.me in Trigger step or use this link.
8. Select the desirable trigger.
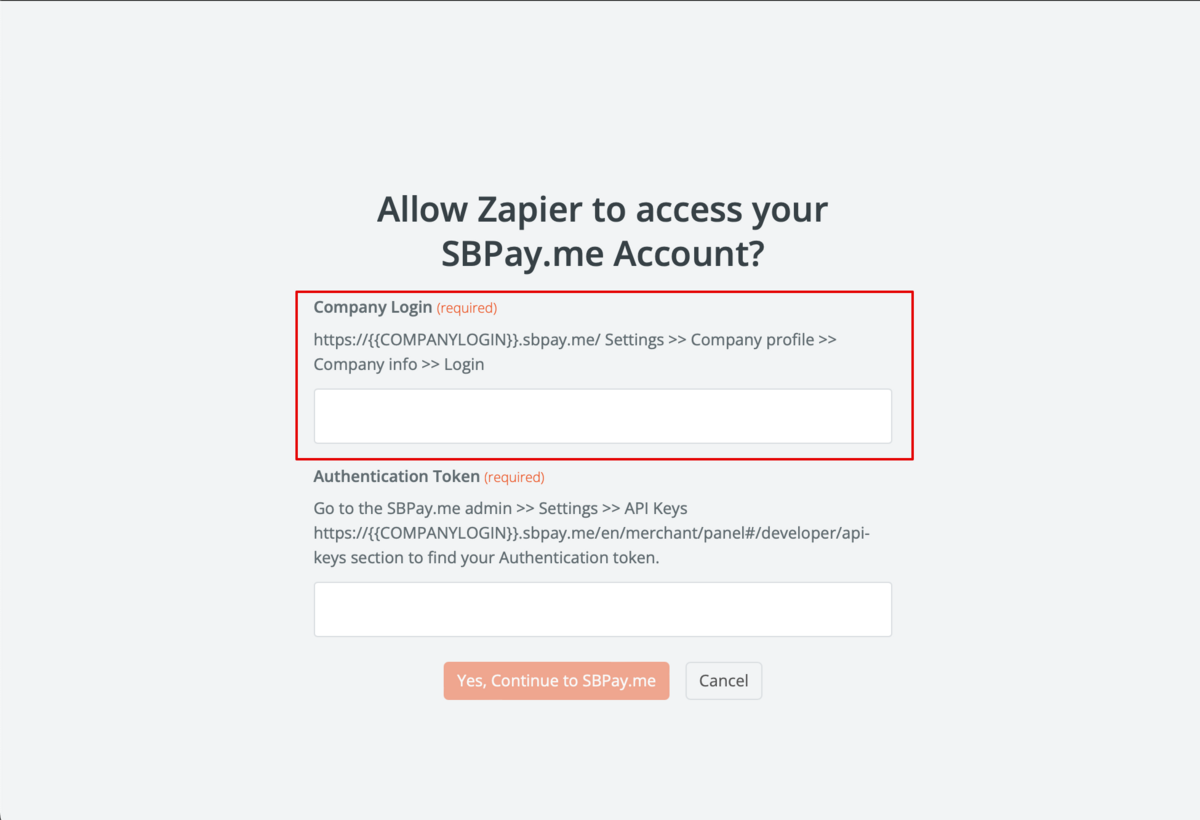
9. Proceed to connecting SBPay.me account.
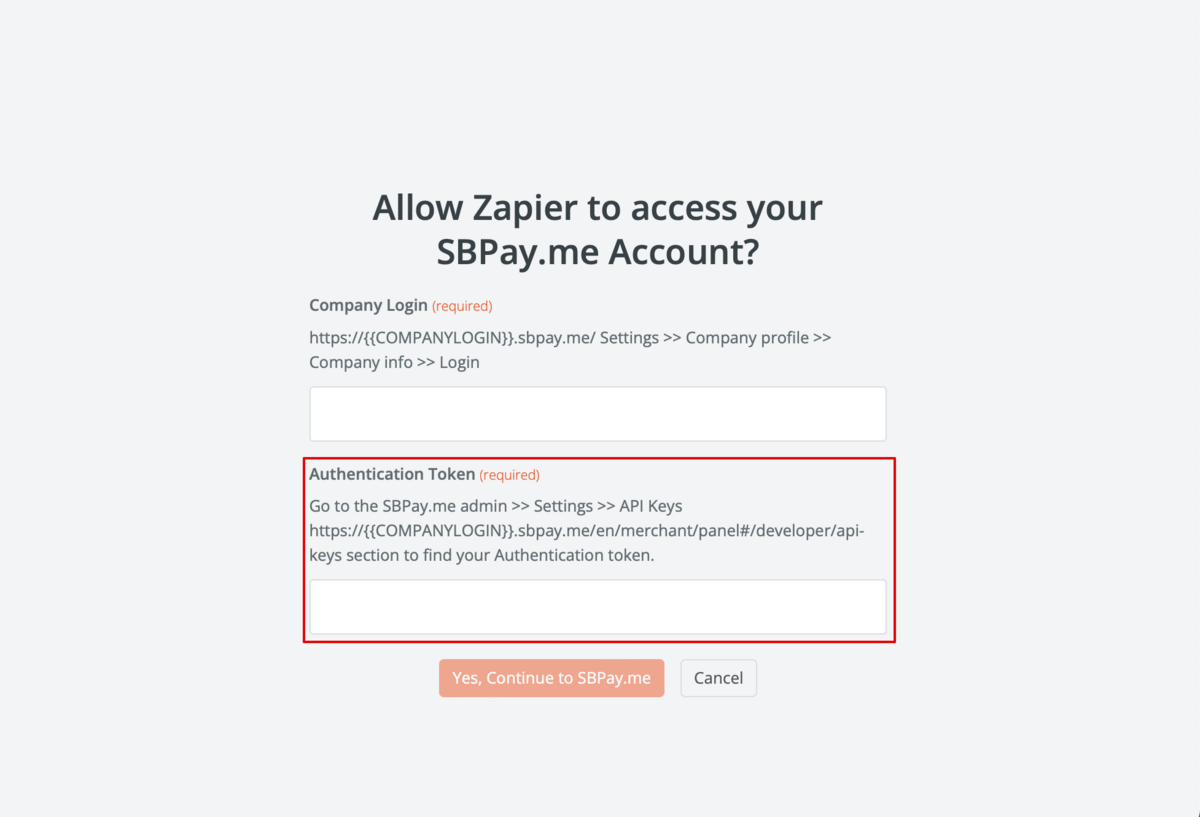
10. In the popup window that appears please enter your SBPay.me company login.
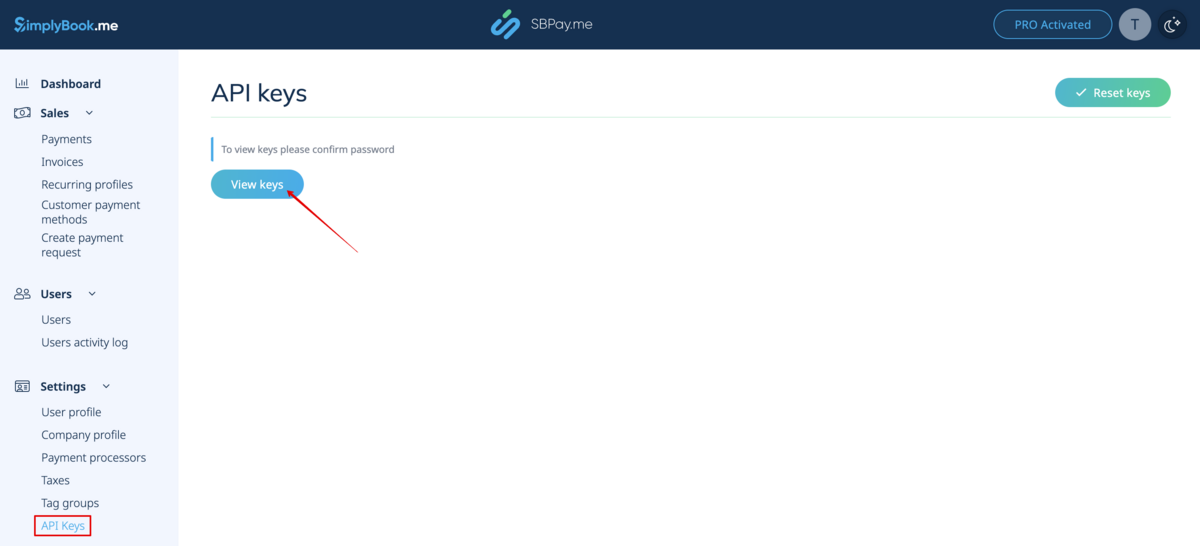
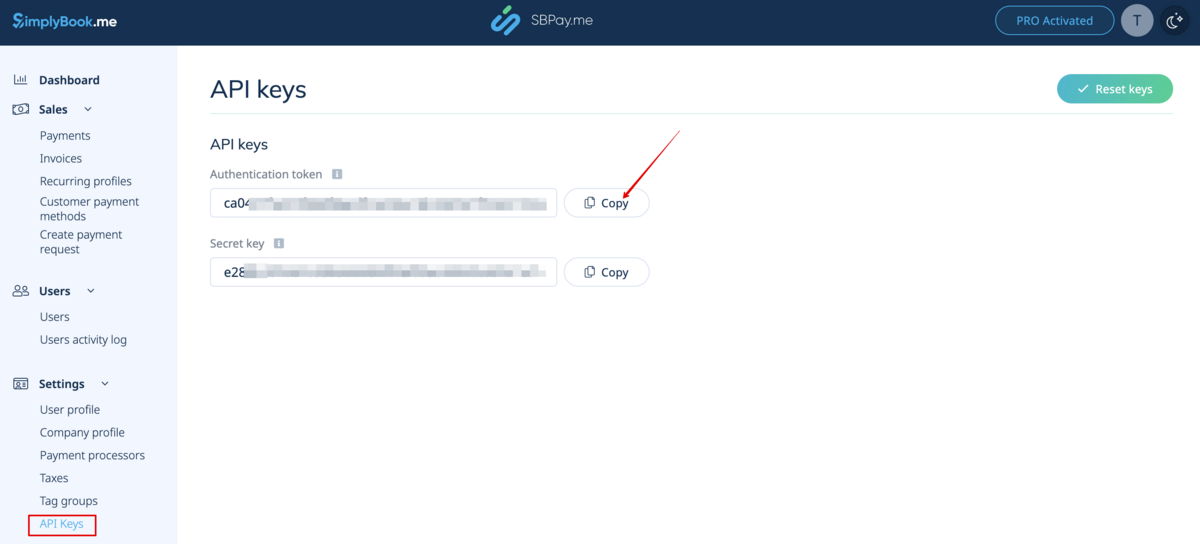
11. In the SBPay.me interface navigate to Settings -> API keys and click on "View keys".
12. Confirm the action by entering your password and you will get access to the keys.
13. Copy Authentication Token and paste it to the corresponding field on Zapier side.
14. Click Continue to test this step.
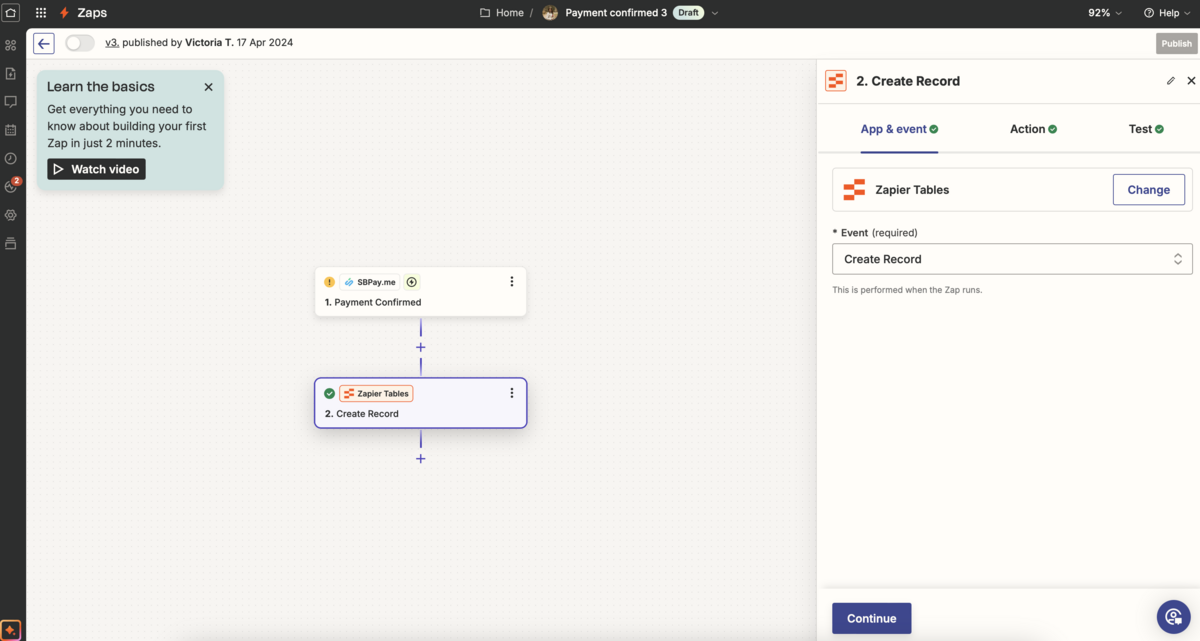
15. Proceed to adding the Action step and search for the app you wish to connect SBPay.me to.
For example:
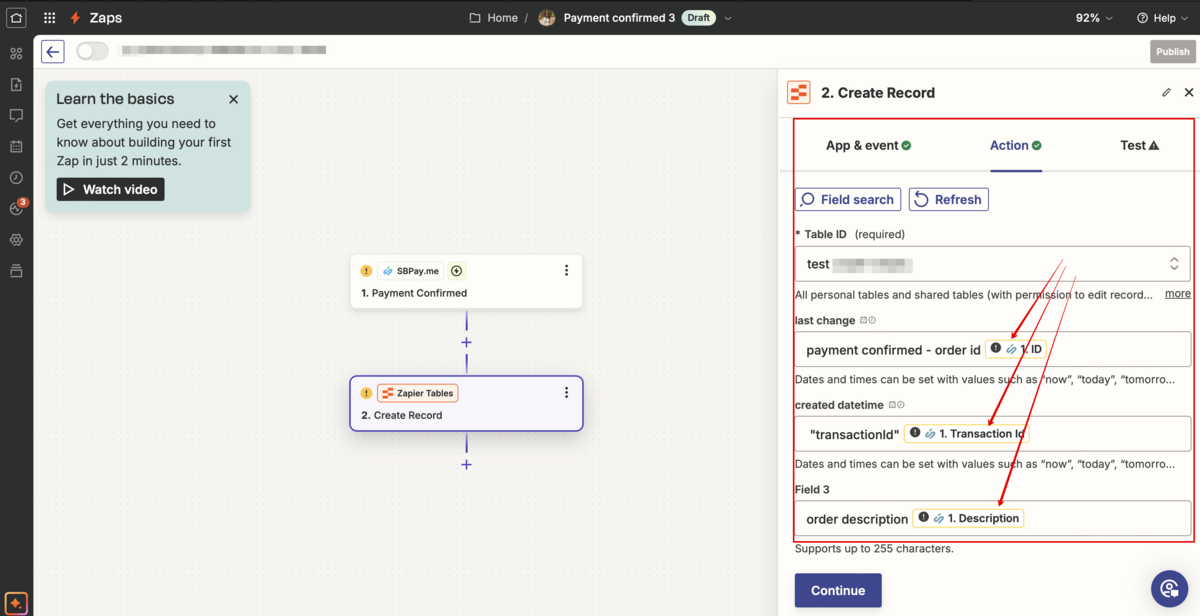
16. Connect this application account and setup the template using the available data mentioned above.
17. You can test this step operation as well if necessary or skip it.
18. Finish the setup, add Zap name and turn it on.
Synchronize old records
You can synchronize old records for the selected event and date range to trigger the action in Zapier.
Please follow the next steps:
1. Navigate to Custom features -> Zapier in your SBPay.me interface.
2. In Sync records for event please select the events type that you would like to sync and the date range in the next fields.
3. Click Synchronize records.

