Difference between revisions of "Squarespace"
From SimplyBook.me
| (3 intermediate revisions by the same user not shown) | |||
| Line 3: | Line 3: | ||
=iFrame widget= | =iFrame widget= | ||
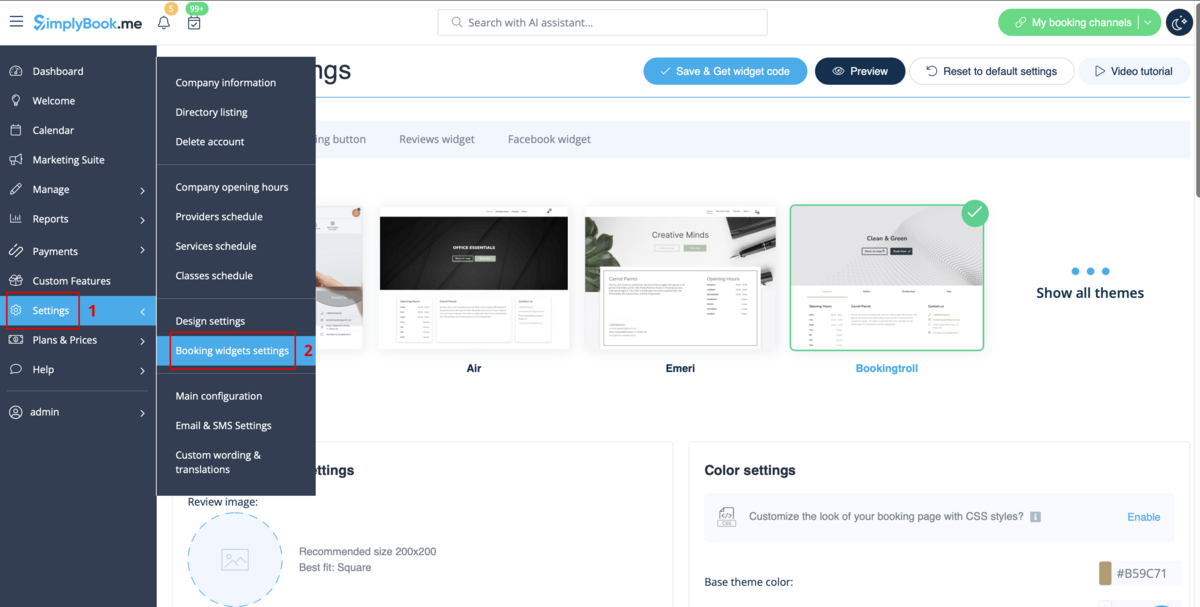
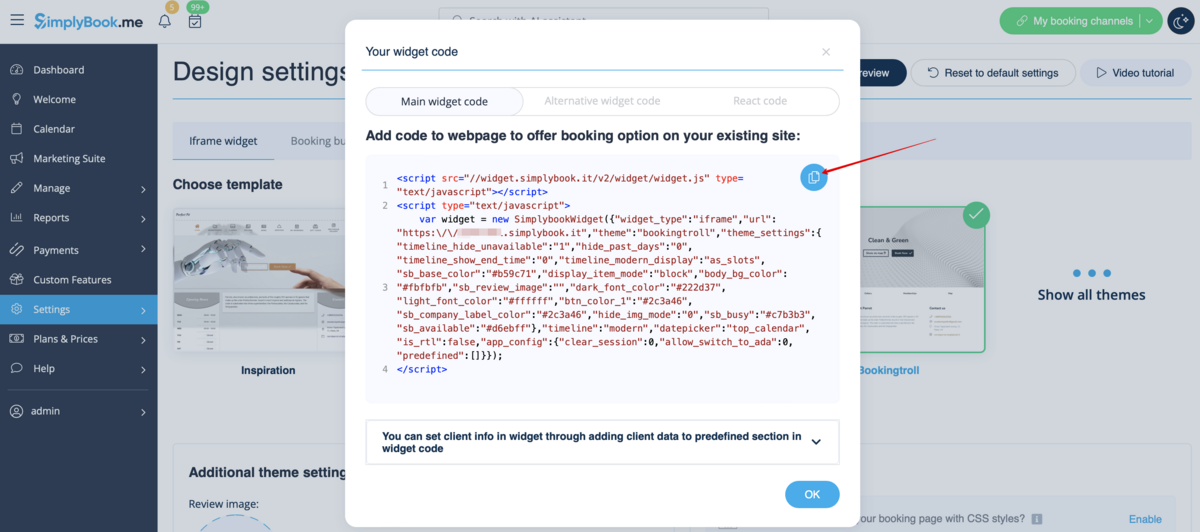
| − | :1. In your [https://simplybook.me/ Simplybook] admin page get the code in Settings// | + | :1. In your [https://simplybook.me/ Simplybook] admin page get the code in <span style="background-color:#d4f8e5; padding:5px; border-radius:5px;">Settings</span> -> <span style="background-color:#d4f8e5; padding:5px; border-radius:5px;">Booking widgets settings</span> -> <span style="background-color:#d4f8e5; padding:5px; border-radius:5px;">iFrame widget</span> |
| − | [[File: | + | [[File:Booking widget path redesigned.png|1200px | center|link=https://help.simplybook.me/images/6/68/Booking_widget_path_redesigned.png]] |
<br><br> | <br><br> | ||
| − | [[File: | + | [[File:Copy widget code redesigned.png|1200px | center|link=https://help.simplybook.me/images/b/b4/Copy_widget_code_redesigned.png]] |
<br><br> | <br><br> | ||
:2. On your Squarespace account, choose the page where are planning to insert your booking calendar. We recommend using a new page in Main Navigation designed specifically for online booking. | :2. On your Squarespace account, choose the page where are planning to insert your booking calendar. We recommend using a new page in Main Navigation designed specifically for online booking. | ||
| Line 12: | Line 12: | ||
[[File:Squarespace add new page.png | center]] | [[File:Squarespace add new page.png | center]] | ||
<br><br> | <br><br> | ||
| − | :3. Open the page editor. Click on "+" in the top right corner and select ''Code'' from the Block Menu. | + | :3. Open the page editor. Remove the default booking block. |
| + | <br><br> | ||
| + | :4. Click on "+" in the top right corner and select ''Code'' from the Block Menu. | ||
[[File:Squarespace add new block.png | center]] | [[File:Squarespace add new block.png | center]] | ||
<br><br> | <br><br> | ||
[[File:Squarespace select code block.png | center]] | [[File:Squarespace select code block.png | center]] | ||
<br><br> | <br><br> | ||
| − | : | + | :5. Insert the code received in [https://simplybook.me/ Simplybook] admin page, to the HTML code box and click "Apply". |
[[File:Squarespace add code.png | center]] | [[File:Squarespace add code.png | center]] | ||
<br><br> | <br><br> | ||
| − | : | + | :6. You may get a message that embedded scripts are disabled - it is done on Squarespace side due to security reasons but you can click on "Preview" to see if the widget is working. |
| − | but you can click on "Preview" to see if the widget is working. | ||
[[File:Squarespace preview.png | center]] | [[File:Squarespace preview.png | center]] | ||
<br><br> | <br><br> | ||
| − | : | + | :7. Or you can publish the website and access it as a client to check the look. |
[[File:Squarespace website look.png | center]] | [[File:Squarespace website look.png | center]] | ||
<br><br> | <br><br> | ||
=Booking button widget= | =Booking button widget= | ||
| − | :1. In your [https://simplybook.me/ Simplybook] admin page get the code in Settings// | + | :1. In your [https://simplybook.me/ Simplybook] admin page get the code in <span style="background-color:#d4f8e5; padding:5px; border-radius:5px;">Settings</span> -> <span style="background-color:#d4f8e5; padding:5px; border-radius:5px;">Booking widgets settings</span> -> <span style="background-color:#d4f8e5; padding:5px; border-radius:5px;">Booking button</span> |
| − | [[File:Booking | + | [[File:Booking widget path redesigned.png|1200px | center|link=https://help.simplybook.me/images/6/68/Booking_widget_path_redesigned.png]] |
<br><br> | <br><br> | ||
:2. In your Squarespace account go to the page you wish to add the code to, switch to editing mode and select to add "Code" block. | :2. In your Squarespace account go to the page you wish to add the code to, switch to editing mode and select to add "Code" block. | ||
Revision as of 10:48, 30 October 2024
iFrame widget
- 1. In your Simplybook admin page get the code in Settings -> Booking widgets settings -> iFrame widget
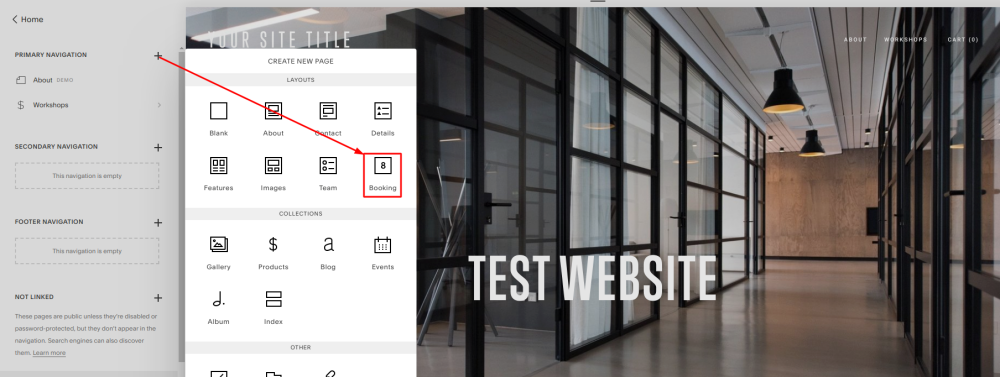
- 2. On your Squarespace account, choose the page where are planning to insert your booking calendar. We recommend using a new page in Main Navigation designed specifically for online booking.
- You can name it "Book Now", "Online Booking" or "Calendar."
- 3. Open the page editor. Remove the default booking block.
- 4. Click on "+" in the top right corner and select Code from the Block Menu.
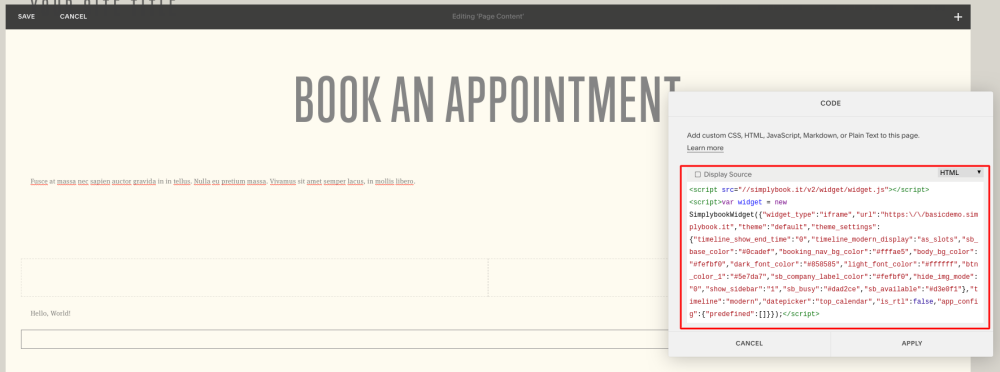
- 5. Insert the code received in Simplybook admin page, to the HTML code box and click "Apply".
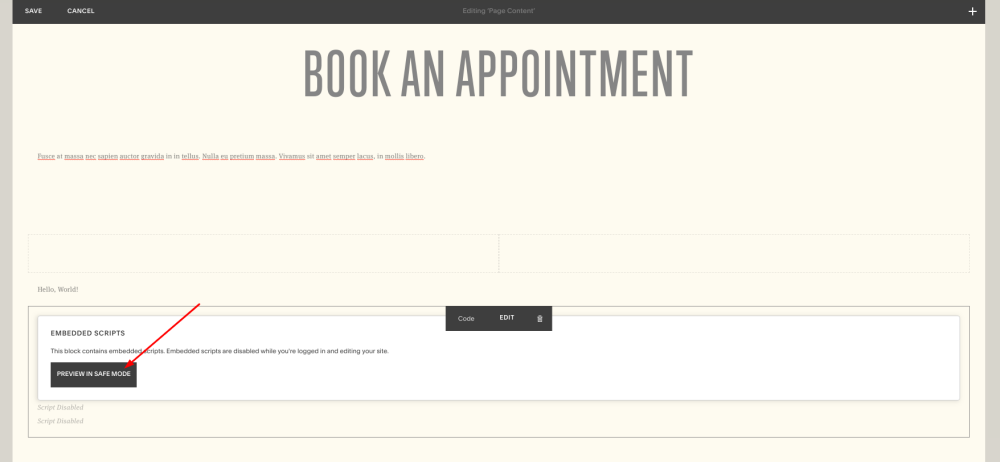
- 6. You may get a message that embedded scripts are disabled - it is done on Squarespace side due to security reasons but you can click on "Preview" to see if the widget is working.
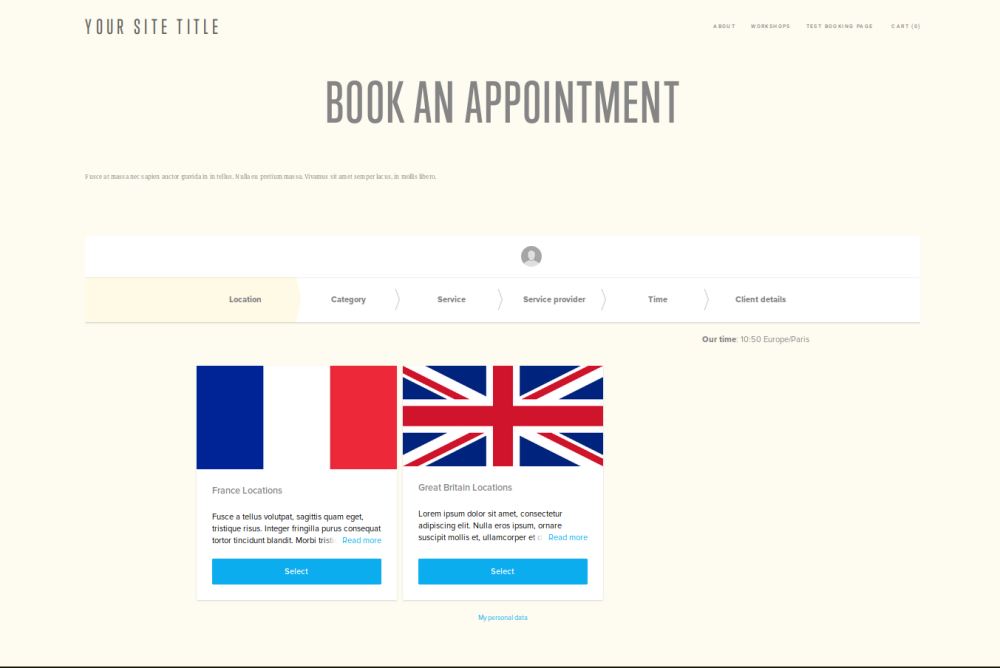
- 7. Or you can publish the website and access it as a client to check the look.
Booking button widget
- 1. In your Simplybook admin page get the code in Settings -> Booking widgets settings -> Booking button
- 2. In your Squarespace account go to the page you wish to add the code to, switch to editing mode and select to add "Code" block.
- 3. Insert the code received in Simplybook admin page, to your Squarespace page.
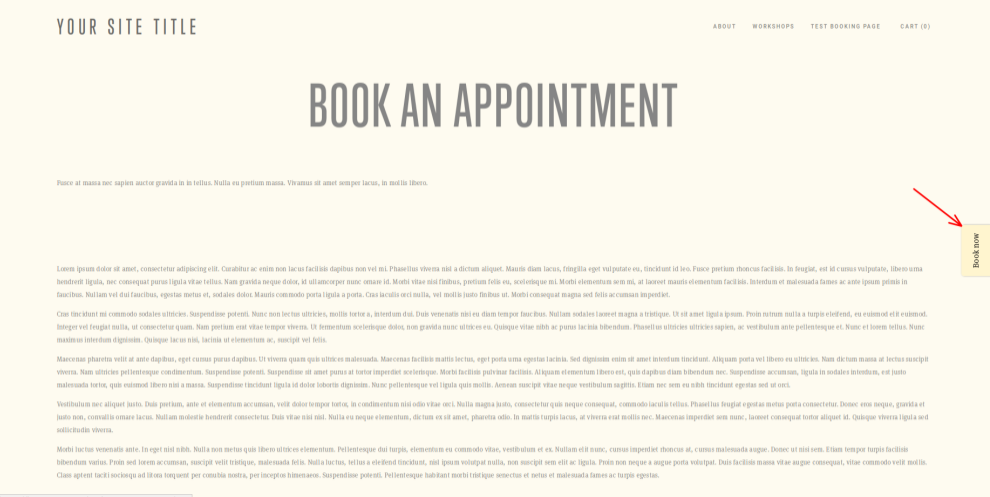
- 4. Save the page and check the look.
