Difference between revisions of "Getting started"
| Line 123: | Line 123: | ||
[[File:CustomTranslations750.png | center ]] | [[File:CustomTranslations750.png | center ]] | ||
<br/><br/>There, you can also change language of your booking page by clicking on the corresponding flag and pressing "Save custom translations". If your language is not in the list you can translate the system yourself. <br/> | <br/><br/>There, you can also change language of your booking page by clicking on the corresponding flag and pressing "Save custom translations". If your language is not in the list you can translate the system yourself. <br/> | ||
| − | [[File: | + | [[File:CustomTranslationsIn750.png | center ]] |
<br/> | <br/> | ||
</div> | </div> | ||
Revision as of 18:59, 18 March 2016
SimplyBook.me is an advanced online scheduling system that allows you to create booking page for your clients and manage your reservations from admin interface. Thousands of clients all over the world have chosen our booking software to make their business easy and comfortable to use (see our testimonials).
SimplyBook.me provides clients with numerous features adjusted to requirements of your business.
Our core features include:
- - Creating booking page with real-time availability of services and staff
- - Insights and statistics about your bookings
- - Ability to create multiple services, providers, categories and locations
- - Accepting payments online
- - Viewing statistics about your reservations, cancellations, workload and revenues
- - Sending email and sms notifications to clients and providers (staff)
- - Adjusting time zone settings if you have clients in different time zones
- - Creating multiple users related to providers
- - Creating individual schedules for staff
- - Creating schedules for specific dates only
- - Creating events
- and much more!
Admin interface is where you login and manage your bookings, settings, design etc. Clients have no access to that page. (Example: http://company.image.simplybook.me)
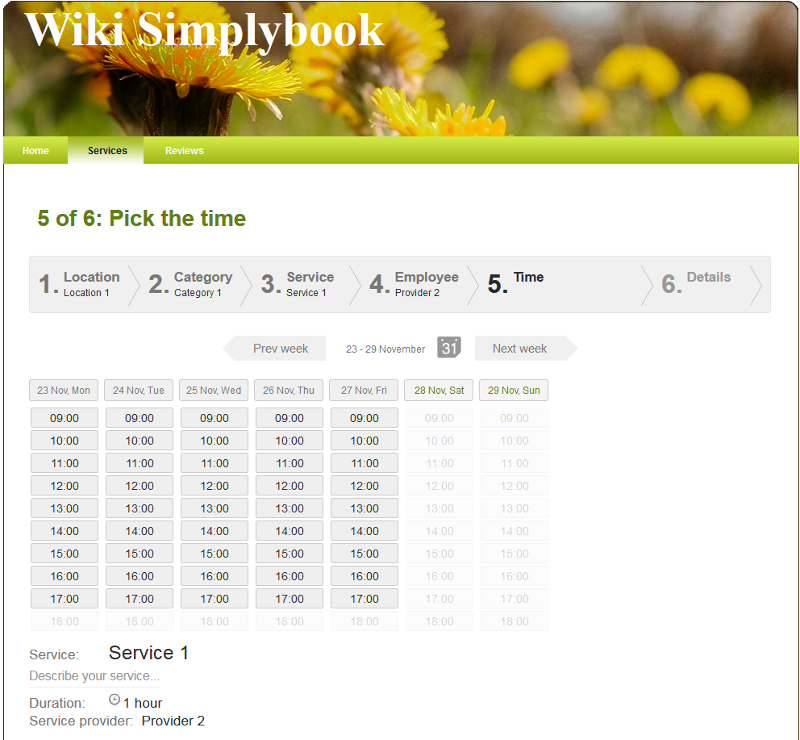
Booking Page is the interface for your clients. There, they can book your services and leave contact info. You can always access your booking page by clicking "My booking site" button in the upper right corner of your admin page. You will be transferred to the booking page and you can also send the url to your clients so that they can easily find your company. (Example: http://image.simplybook.me )
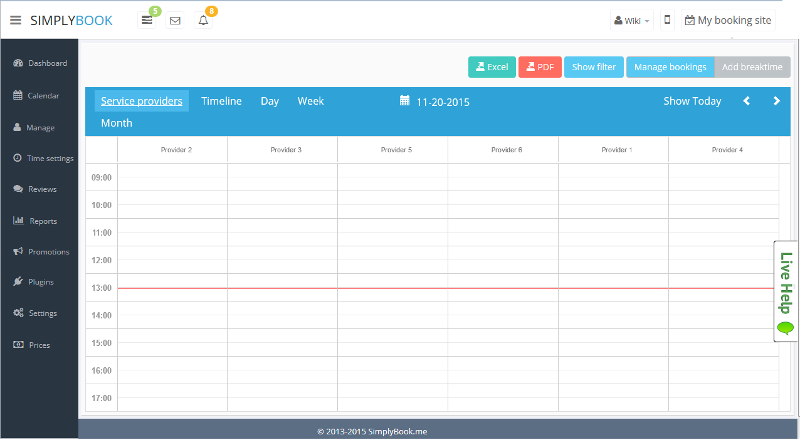
- 1. Upper bar. Three-line button shows/hides the full menu on the left. Latest news are marked as green notifications. Messages are marked with red and notifications in yellow.
- 2. The first tab you see is Dashboard. It contains statistics about your performance, your current subscription package, bookings, performers, clients activity, reviews, news and other data useful to check regularly and pay attention to. By analyzing the information you can make inferences about your business and figure out what can be done to improve it. If you need to know more about each section, just press the "i" sign.
- 3. Calendar is a section where you can manage (add,edit and delete) your bookings and quickly add break times.
- 4. Manage tab contains 4 sections:
- Services - add, delete and edit services + create events
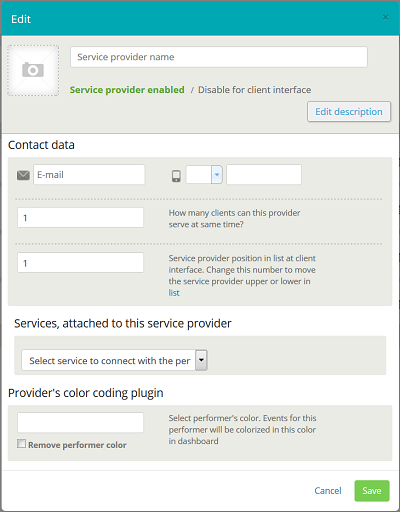
- Providers - add, delete and edit providers
- Clients - add, edit and delete clients
- Users - add, edit and delete users.
- 5. In the Time Settings you have the following sections:
- Company Opening hours - regular schedule for your company on a weekly basis
- Company Special days - here you can set up specific schedule or days off for your company, for example like national holidays.
- Service provider schedule - individual regular schedule for each of your staff members (if you have only 1 provider, his/her working time is the same as company's opening hours)
- Provider Special days - specific schedule for each of your staff, here you would for example enter as specific days when relevant staff takes his/her holiday (if you have only 1 provider (staff), his/her working time is the same as company's special days)
- 6. Reviews. Here you can see the reviews from your clients.
- 7. Promotions. To use this tab, you need to enable Simply Smart Promotions plugin in the plugin section and then you can use promotions to enhance your business.
- 8. Plugins. Plugins are used to enhance the system and customize it in line with your needs. Please see the list of all Plugins and their function here.
- 9. Settings. You can discover more about different types of settings by pressing the "i" signs above and to the right of each setting. the See all questions related to settings here.
- 10. Prices.
- Subscriptions. Here you can view different tariffs and purchase subscriptions.
- Additional items. Here you can purchase SMS credits, additional bookings and plugins.
- Affiliates. Referral program.
Setup tutorials collection
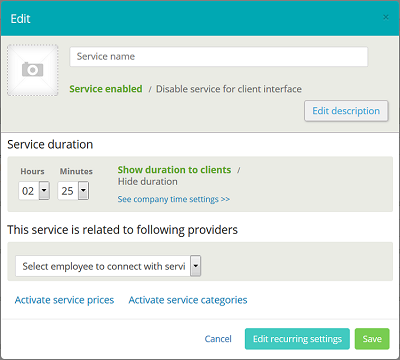
Insert the name of your service, set duration and write service description. You can also upload picture of a service and activate prices to accept payments online.
- Opening hours.
It is regular schedule you have on a weekly basis. If you are the only provider, you can set it in Time Settings // Company opening hours.
If you have several providers, you can set their regular schedule in Time settings // Service provider schedule.
For example, if you work Monday- Friday 9 a.m - 5 p.m you simply set schedule for those dates by clicking on the corresponding slots. To make day of the week working/of press "Make working day" / "Make day off" above the day of the week.
- Special days
Contrary to Opening hours, which is regular schedule, Special Days is schedule by date. If you do not have regular schedule or plan one-time event, you can use Special days to open/close only specific dates. To set specific schedule for company (Time settings // Company special days) or provider (Time settings // Provider special days) click on the date and insert the schedule you need or make it a day off. This feature can be used if you plan to open in a months and want to prevent bookings until then (make all days off before the opening date) or to insert national holidays in your schedule.
Note! Providers' working hours should be within opening hours of the company! If you can't open specific times for provider, please open those times for the company first and then for provider.
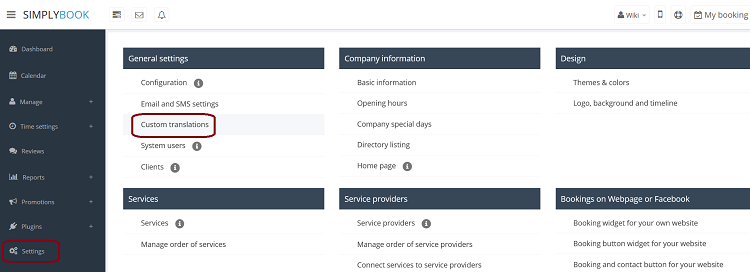
Adjust your terminology/language
There, you can also change language of your booking page by clicking on the corresponding flag and pressing "Save custom translations". If your language is not in the list you can translate the system yourself.
- Company name
Is the one you wrote in the url link for your account, this name is all lowercase without spaces. Ex: bestservice is the company name in url http://tbestservice.simplybook.me
- User name
By default is set as admin, but if you changed it, you can check it in Manage//users in the column "login".
- Password
If you forgot your password you can press "Forgot password" link and restoration code will be sent to email associated with user (can be checked in Manage//Users). Enter the code and proceed to your admin page.
- If you can't remember any of these information, please contact support and tell anything you remember and they will try to find you in our databases.
Please note! Unattended Free account without login for more than 3 months are deleted and cannot be restored.

