From SimplyBook.me
No edit summary |
Marked this version for translation |
||
| Line 2: | Line 2: | ||
<translate> | <translate> | ||
<!--T:1--> | |||
{{#seo: | {{#seo: | ||
|title=Custom Features - SimplyBook.me | |title=Custom Features - SimplyBook.me | ||
| Line 12: | Line 13: | ||
<!--T:2--> | |||
[[File:Resources icon.png |left]] | [[File:Resources icon.png |left]] | ||
<br><br>Connect equipment, rooms or anything else that is limited in quantity to a service. Different resources can be connected to the same service when needed. | <br><br>Connect equipment, rooms or anything else that is limited in quantity to a service. Different resources can be connected to the same service when needed. | ||
| Line 20: | Line 22: | ||
<!--T:3--> | |||
;How to use | ;How to use | ||
<!--T:4--> | |||
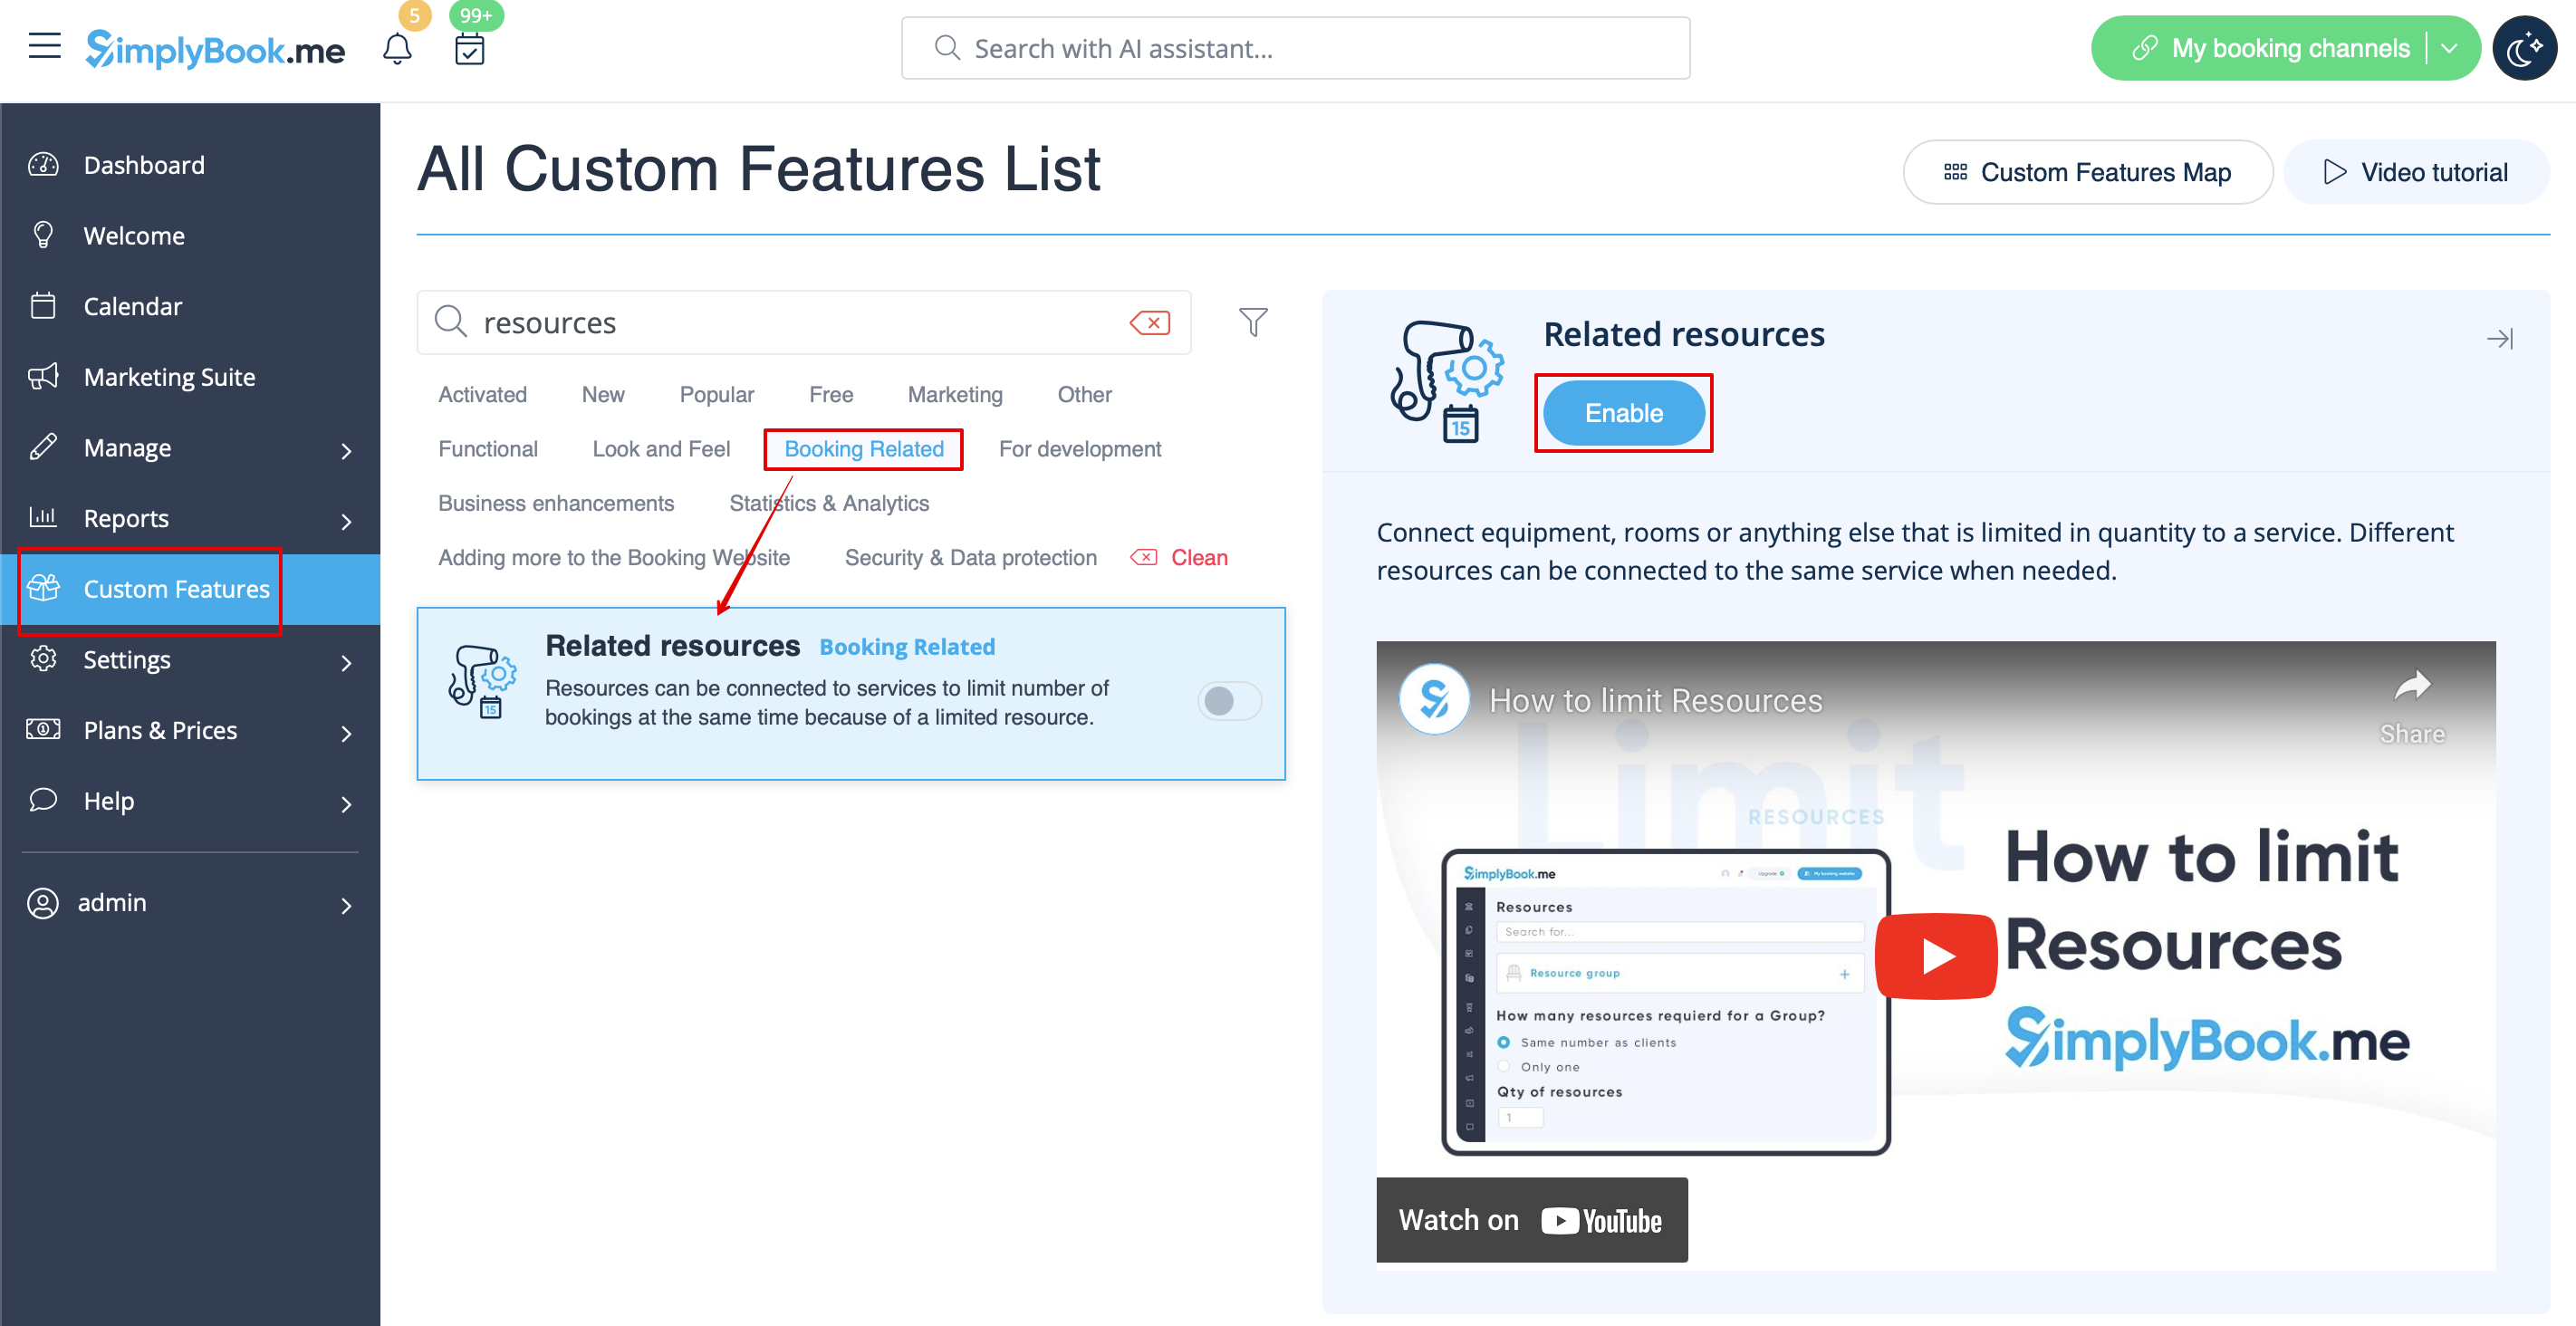
:1. Enable <span style="background-color:#d4f8e5; padding:5px; border-radius:5px;">Related Resources</span> feature on your <span style="background-color:#d4f8e5; padding:5px; border-radius:5px;">custom features</span> page. | :1. Enable <span style="background-color:#d4f8e5; padding:5px; border-radius:5px;">Related Resources</span> feature on your <span style="background-color:#d4f8e5; padding:5px; border-radius:5px;">custom features</span> page. | ||
[[File:Related resources enable path redesigned.png|1200px|border|center|link=https://help.simplybook.me/images/e/eb/Related_resources_enable_path_redesigned.png]] | [[File:Related resources enable path redesigned.png|1200px|border|center|link=https://help.simplybook.me/images/e/eb/Related_resources_enable_path_redesigned.png]] | ||
| Line 30: | Line 34: | ||
</translate> | </translate> | ||
<translate> | <translate> | ||
<!--T:5--> | |||
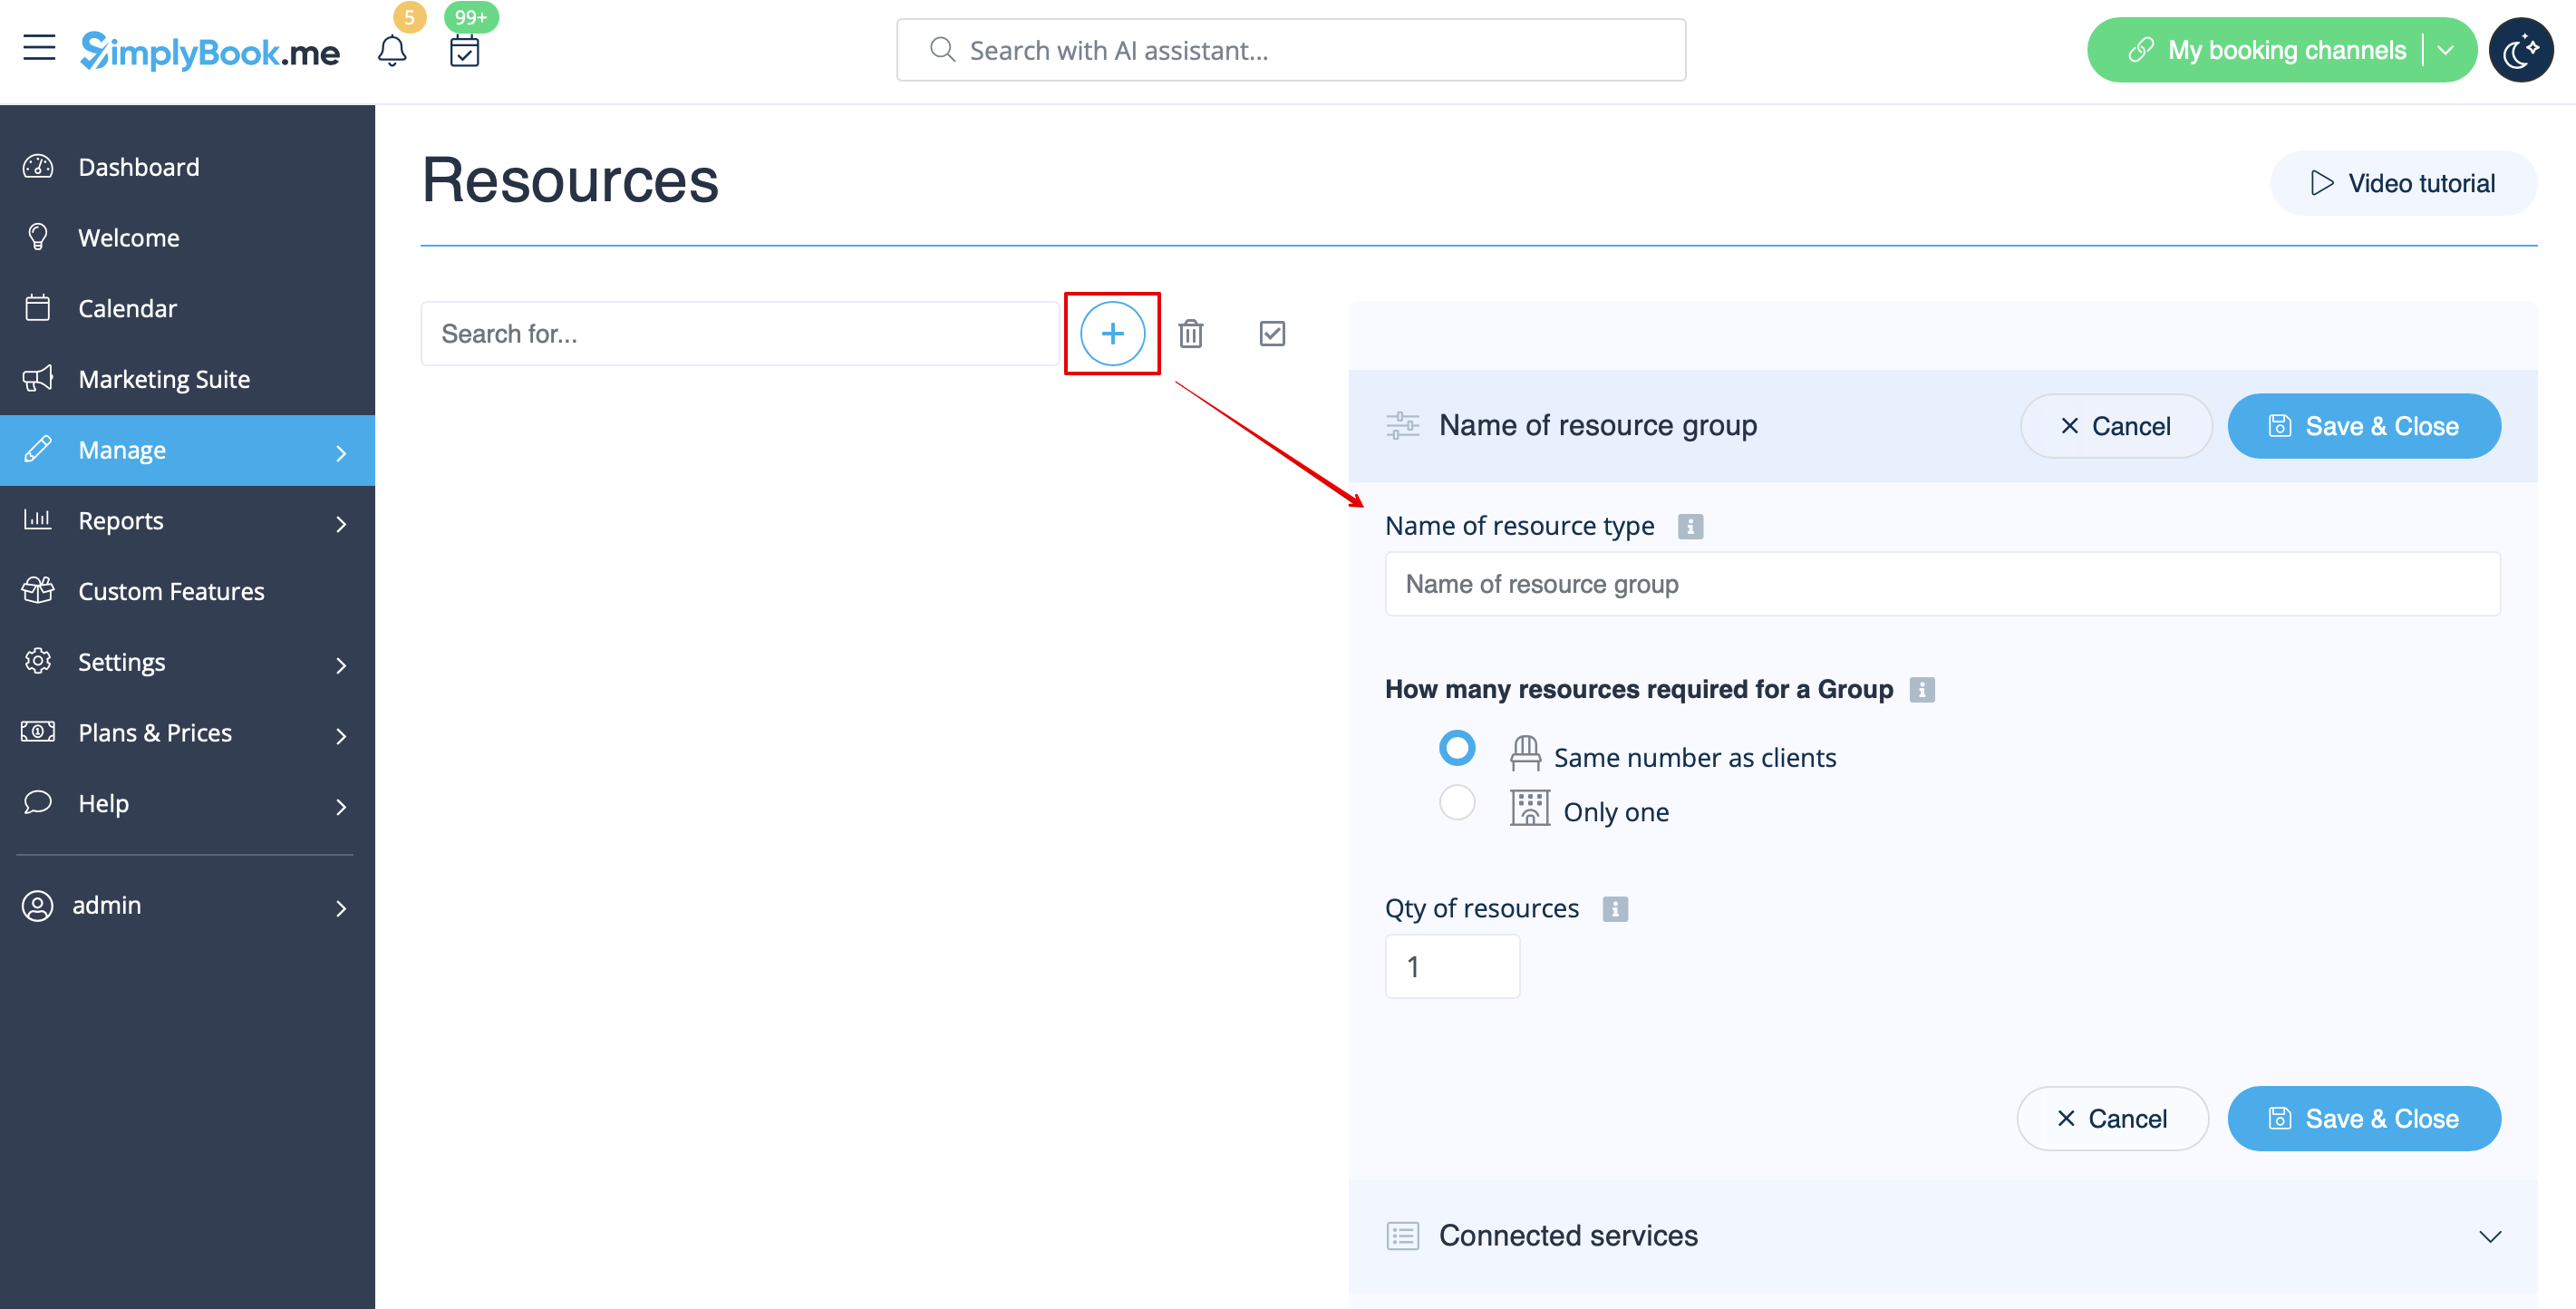
:3. Create resources group(s) depending on your needs using <span style="background-color:#d4f8e5; padding:5px; border-radius:5px;">+</span> icon there.<br> | :3. Create resources group(s) depending on your needs using <span style="background-color:#d4f8e5; padding:5px; border-radius:5px;">+</span> icon there.<br> | ||
<!--T:6--> | |||
:You can select between:<br> | :You can select between:<br> | ||
:*<span style="background-color:#fef3de; padding:5px; border-radius:5px;">Same number as clients</span> type - with this group all the resources you attach to a service will be required for each booking. If the number of resources is not enough for a certain timeslot, it will not be displayed on the booking site. This type may be useful when some limited equipment is required to perform the service.<br> | :*<span style="background-color:#fef3de; padding:5px; border-radius:5px;">Same number as clients</span> type - with this group all the resources you attach to a service will be required for each booking. If the number of resources is not enough for a certain timeslot, it will not be displayed on the booking site. This type may be useful when some limited equipment is required to perform the service.<br> | ||
| Line 40: | Line 46: | ||
</translate> | </translate> | ||
<translate> | <translate> | ||
<!--T:7--> | |||
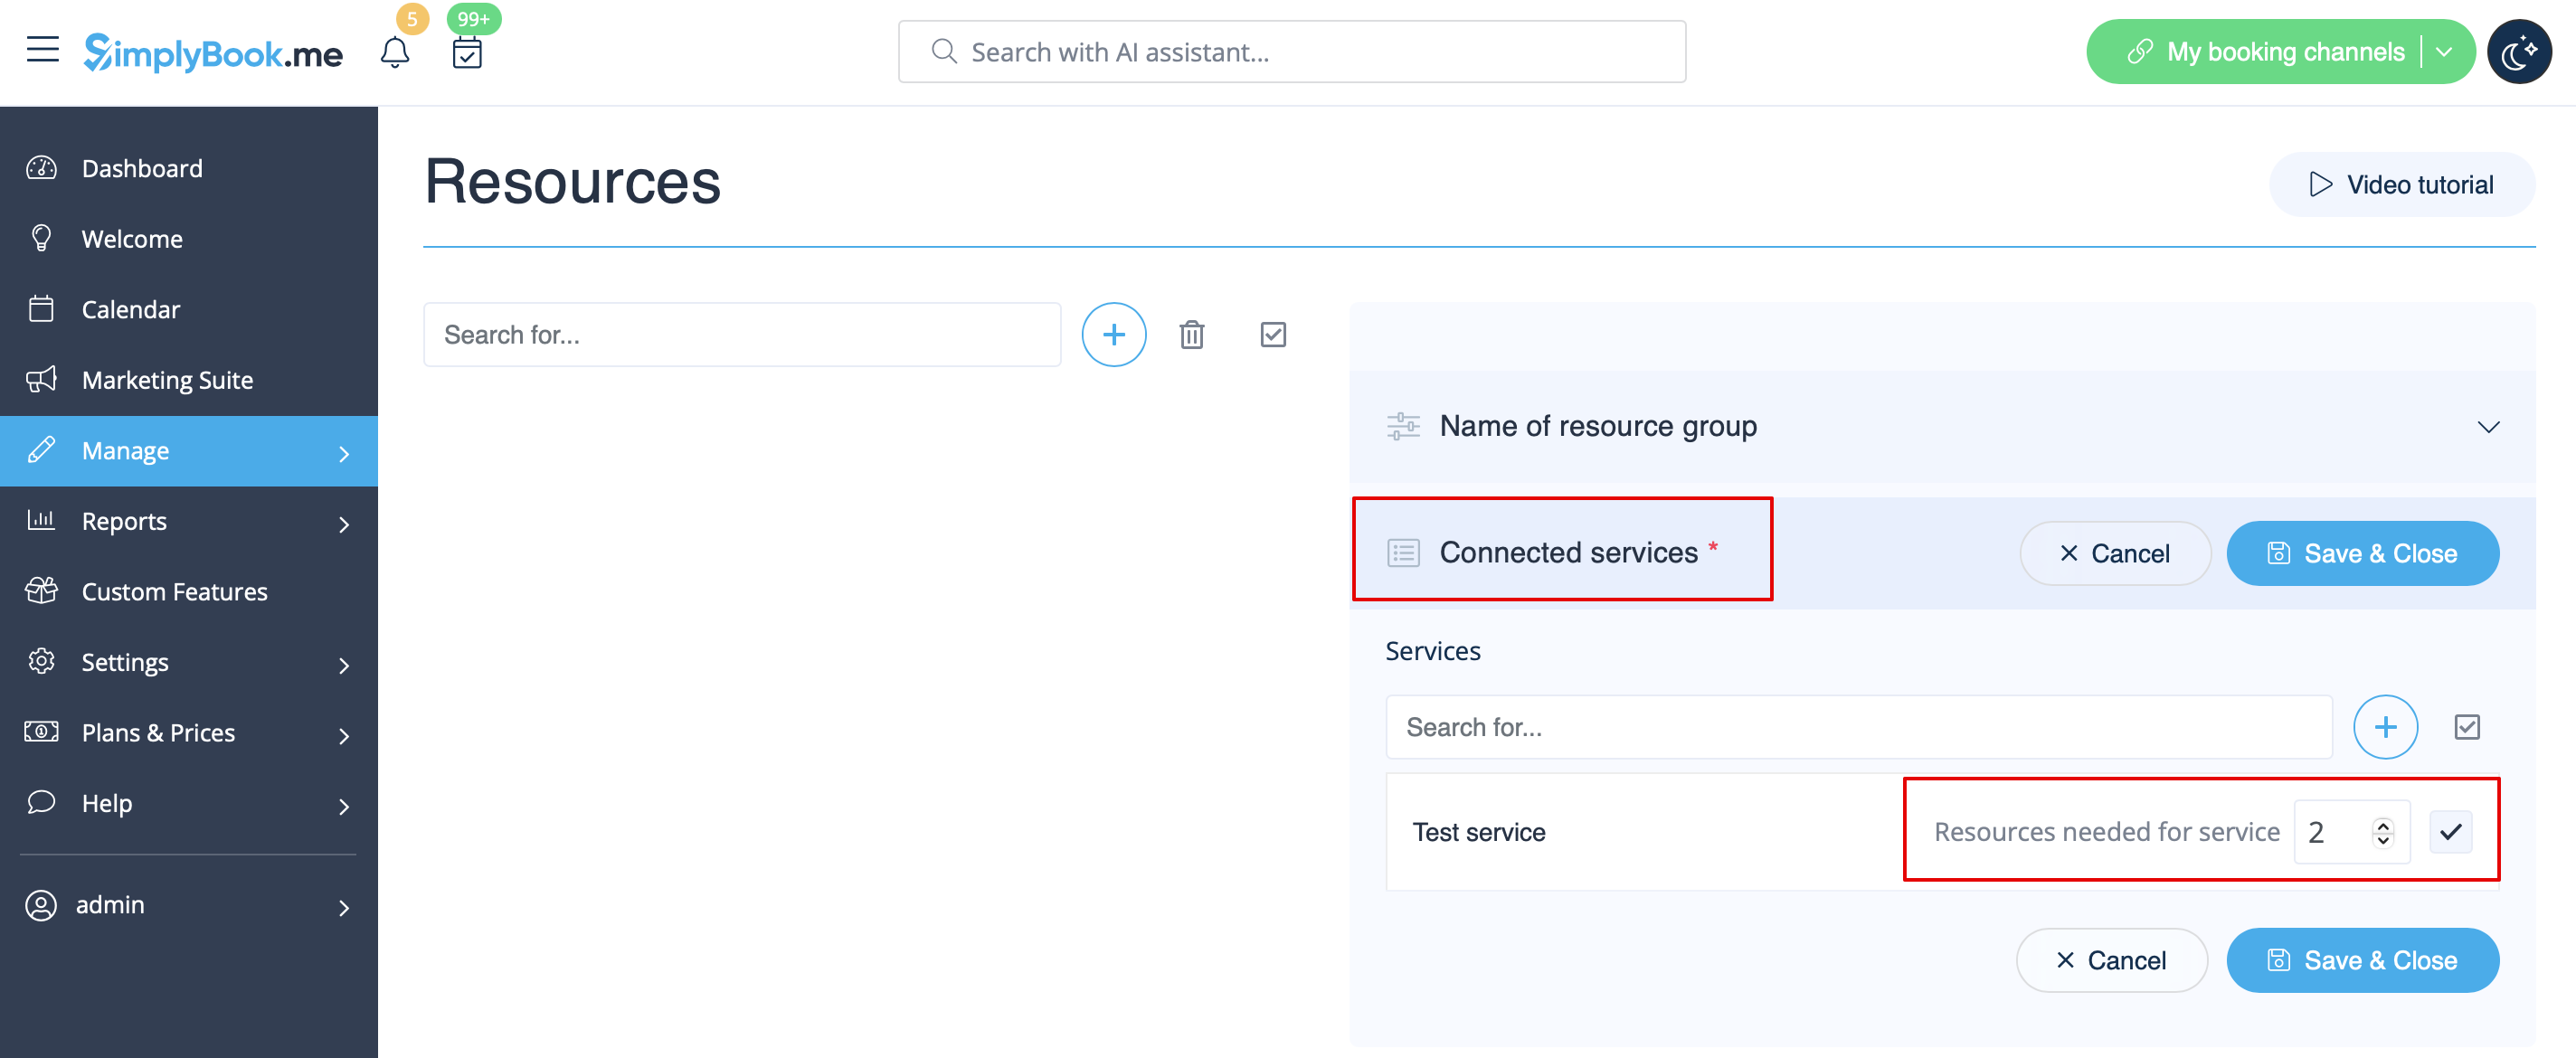
:4. It is important to <span style="background-color:#d4f8e5; padding:5px; border-radius:5px;">attach resources to services/classes</span> so that they will influence the booking process. Otherwise, the resources will not add any restrictions and will not be used. | :4. It is important to <span style="background-color:#d4f8e5; padding:5px; border-radius:5px;">attach resources to services/classes</span> so that they will influence the booking process. Otherwise, the resources will not add any restrictions and will not be used. | ||
[[File:Connect resource to service redesigned.png|1200px|border| center|link=https://help.simplybook.me/images/8/84/Connect_resource_to_service_redesigned.png]] | [[File:Connect resource to service redesigned.png|1200px|border| center|link=https://help.simplybook.me/images/8/84/Connect_resource_to_service_redesigned.png]] | ||
| Line 53: | Line 60: | ||
</translate> | </translate> | ||
<translate> | <translate> | ||
<!--T:8--> | |||
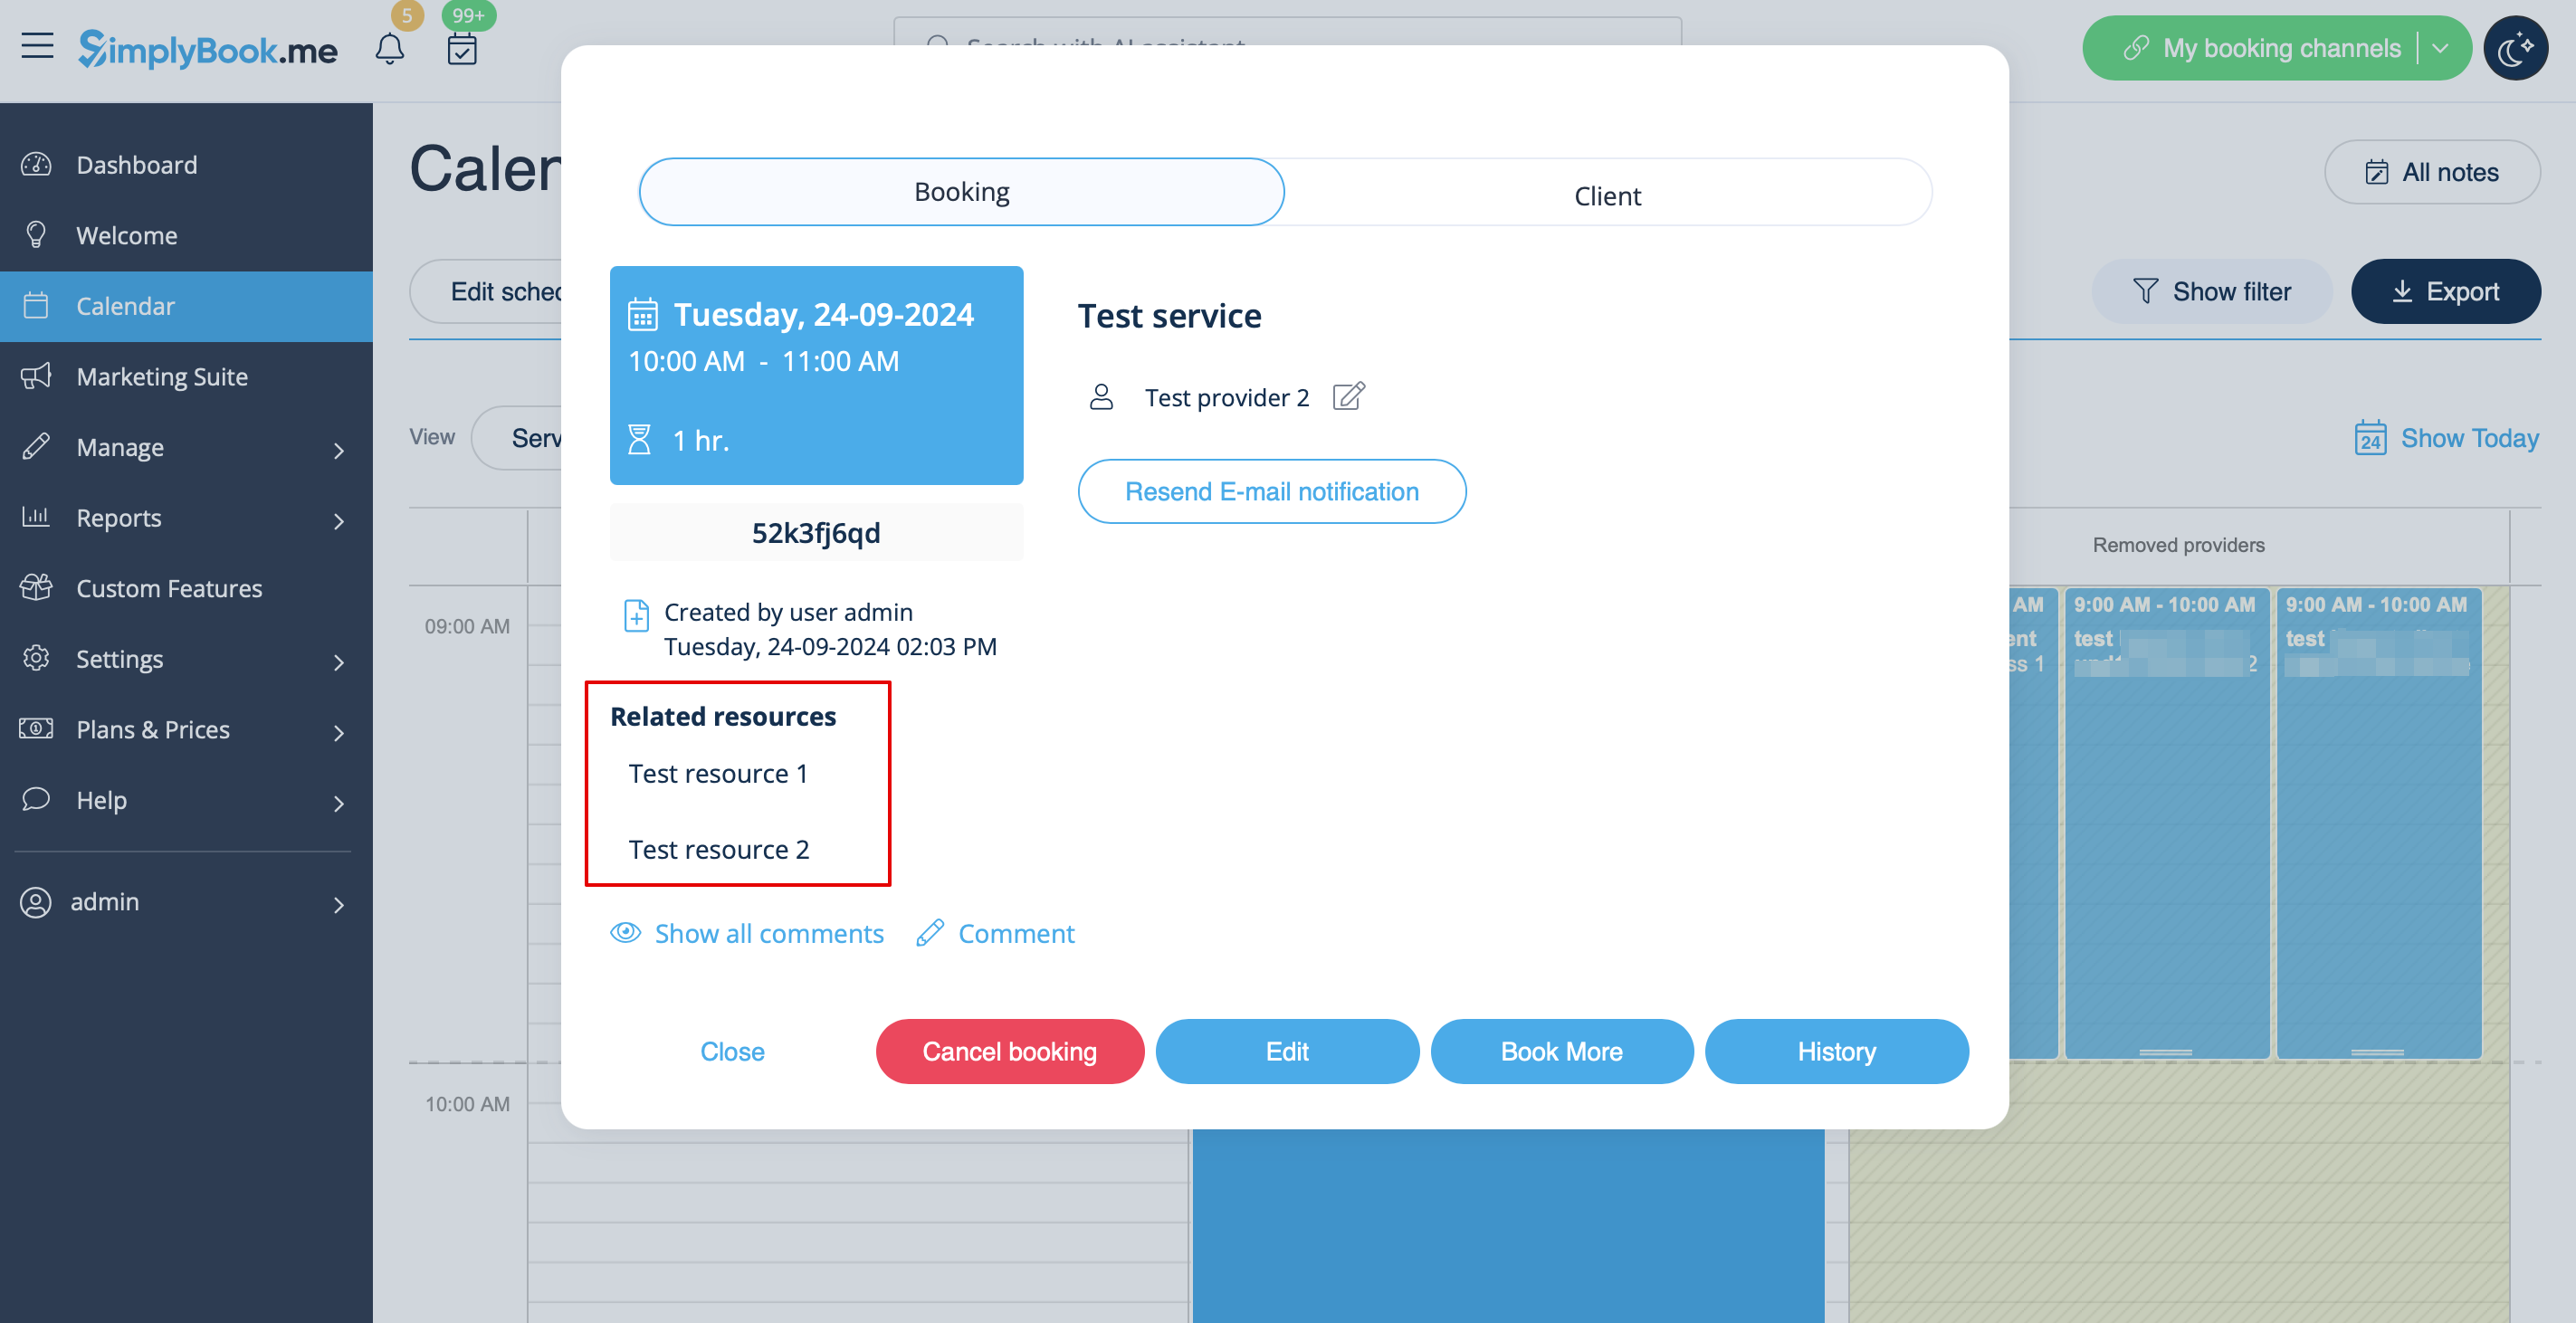
:7. The clients do not select the resource during the booking process, it is allocated by the system automatically depending on the service and provider selection.<br> | :7. The clients do not select the resource during the booking process, it is allocated by the system automatically depending on the service and provider selection.<br> | ||
:You can <span style="background-color:#d4f8e5; padding:5px; border-radius:5px;">view the resource used for the appointment</span> from the admin side in each booking or in exported .xls file from <span style="background-color:#d4f8e5; padding:5px; border-radius:5px;">Reports</span> -> <span style="background-color:#d4f8e5; padding:5px; border-radius:5px;">Booking details.</span> | :You can <span style="background-color:#d4f8e5; padding:5px; border-radius:5px;">view the resource used for the appointment</span> from the admin side in each booking or in exported .xls file from <span style="background-color:#d4f8e5; padding:5px; border-radius:5px;">Reports</span> -> <span style="background-color:#d4f8e5; padding:5px; border-radius:5px;">Booking details.</span> | ||
Latest revision as of 15:32, 19 May 2025
Connect equipment, rooms or anything else that is limited in quantity to a service. Different resources can be connected to the same service when needed.
- How to use
- 1. Enable Related Resources feature on your custom features page.
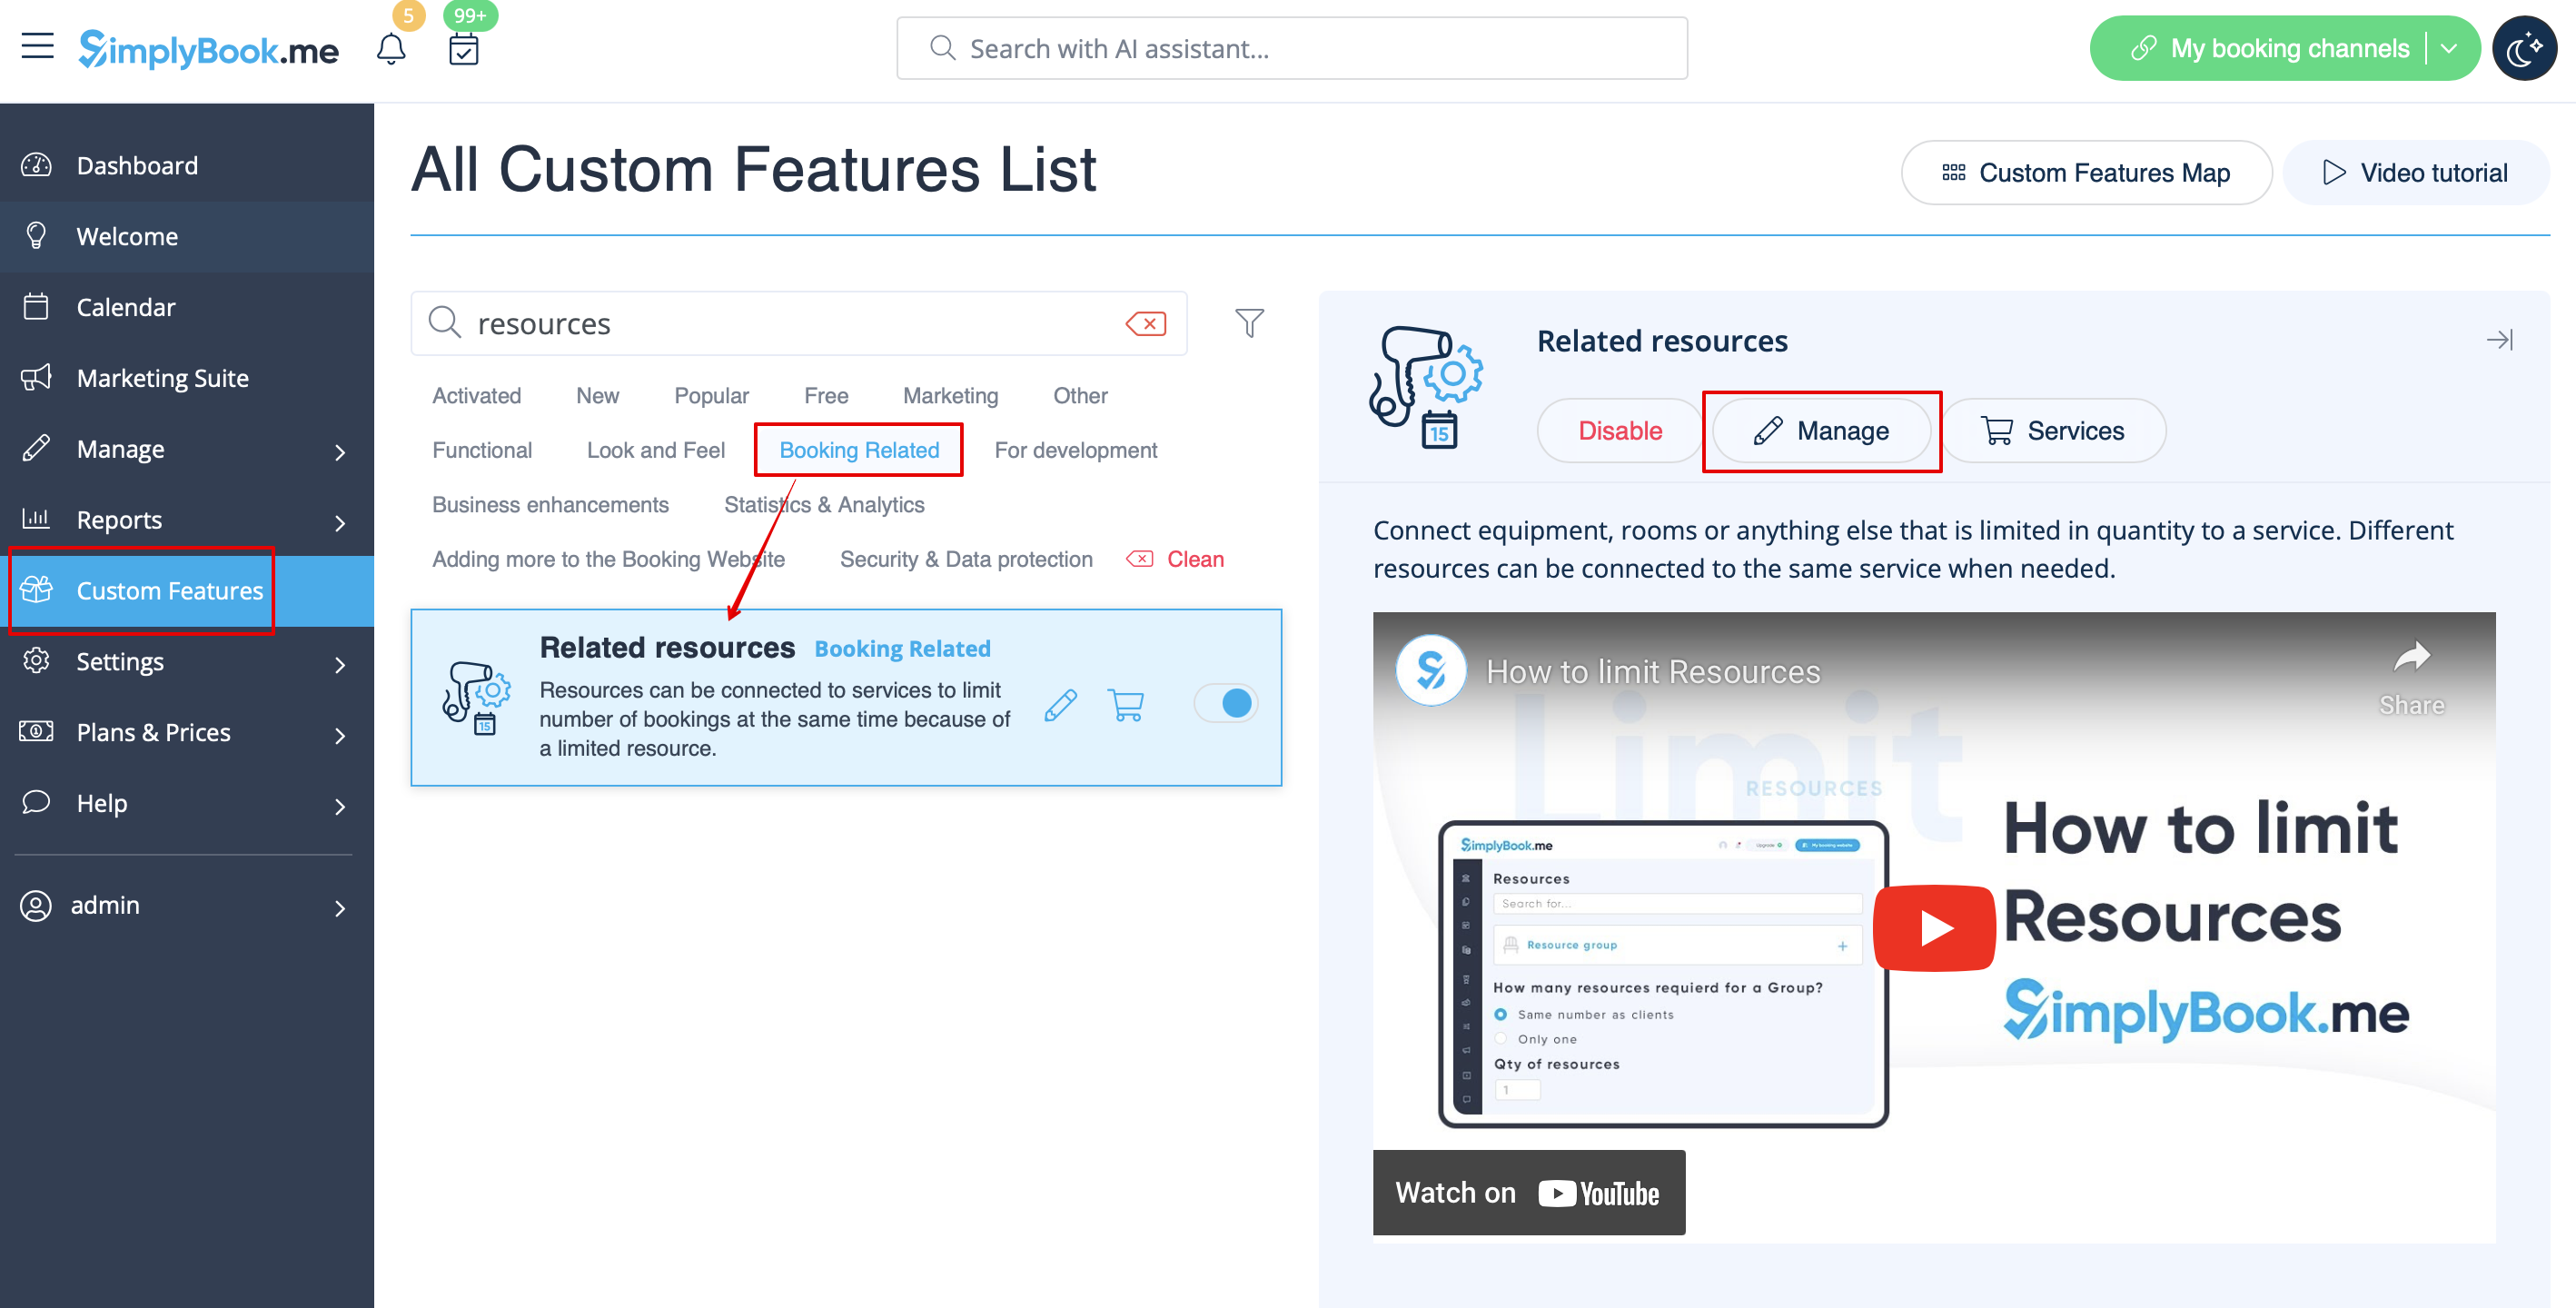
- 2. Select Manage option or navigate to Manage -> Related resources using left-side menu
- 3. Create resources group(s) depending on your needs using + icon there.
- You can select between:
- Same number as clients type - with this group all the resources you attach to a service will be required for each booking. If the number of resources is not enough for a certain timeslot, it will not be displayed on the booking site. This type may be useful when some limited equipment is required to perform the service.
- Only one type - with this group it is possible to accept multiple bookings per timeslot(it will depend on the number of clients set per provider and/or limit bookings feature settings). It can be used for a room reservation for classes as if, for example, you have one room but two classes so that one class should become unavailable if another one gets a booking. In this case, the clients will continue making bookings for this another class according to the number of spaces you have indicated for it.
- Please note! It is recommended to use Appointmet at fixed time feature with this resource type so that the timeslot will always correspond to the reserved room/resource, etc.
- Same number as clients type - with this group all the resources you attach to a service will be required for each booking. If the number of resources is not enough for a certain timeslot, it will not be displayed on the booking site. This type may be useful when some limited equipment is required to perform the service.
- 4. It is important to attach resources to services/classes so that they will influence the booking process. Otherwise, the resources will not add any restrictions and will not be used.
- 5. If you got more resources of a certain type you can add items to the particular resource group.

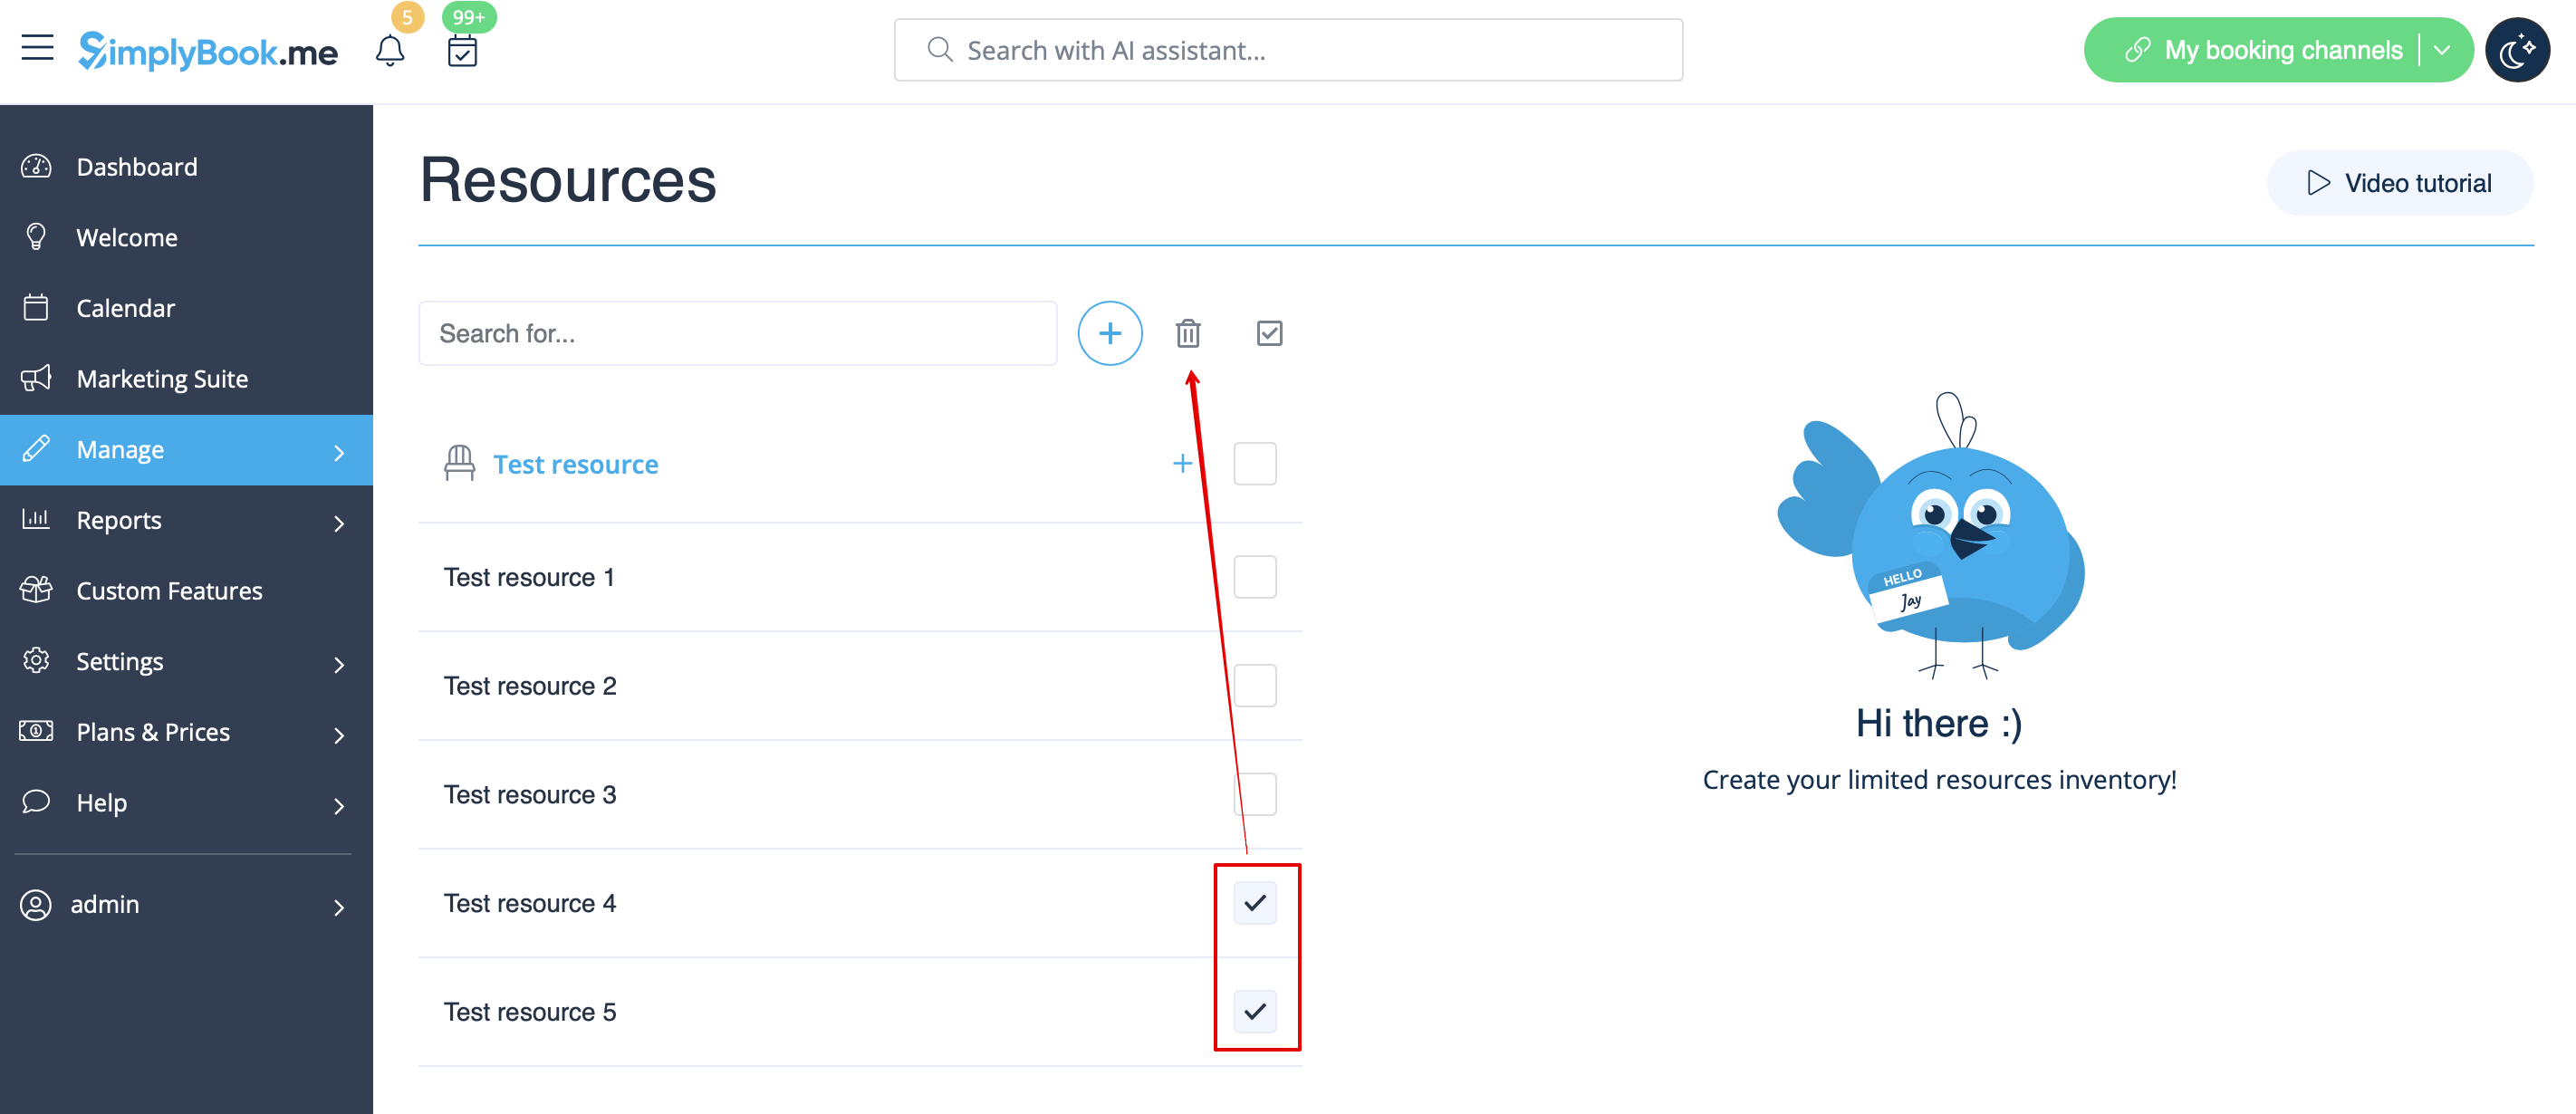
- 6. In case you have less items in your inventory than it was created initially you can remove unnecessary ones from the group using mass actions.
- If certain service was connected to resource that was deleted such service may become unavailable on the booking site.
- In this case you need to update its relations towards other resources present in the system.
- 7. The clients do not select the resource during the booking process, it is allocated by the system automatically depending on the service and provider selection.
- You can view the resource used for the appointment from the admin side in each booking or in exported .xls file from Reports -> Booking details.