Difference between revisions of "Medical test custom feature"
From SimplyBook.me
| Line 11: | Line 11: | ||
<br><br><br><br> | <br><br><br><br> | ||
| − | '''Please note!''' | + | <span style="background-color:#ffe9e9; padding:5px; border-radius:5px;">'''Please note!'''</span> |
| − | * When you enable Medical Test custom feature Tickets feature will be enabled as well; | + | * <span style="background-color:#ffe9e9; padding:5px; border-radius:5px;">When you enable Medical Test custom feature <span style="background-color:#cdeffc; padding:5px; border-radius:5px;">[[Tickets_custom_feature|Tickets]]</span> feature will be enabled as well;</span> |
| − | * This custom feature is available with certain subscriptions only. Please check your plan details to see if it is included. | + | * <span style="background-color:#ffe9e9; padding:5px; border-radius:5px;">This custom feature is available with certain subscriptions only. Please check <span style="background-color:#cdeffc; padding:5px; border-radius:5px;">[https://simplybook.me/en/pricing your plan details]</span> to see if it is included.</span> |
<br><br><br><br> | <br><br><br><br> | ||
;How to use | ;How to use | ||
| − | :1. Enable Medical test custom feature on your Custom features page, Other section(or use search there). | + | :1. Enable <span style="background-color:#d4f8e5; padding:5px; border-radius:5px;">Medical test</span> custom feature on your <span style="background-color:#d4f8e5; padding:5px; border-radius:5px;">Custom features</span> page, <span style="background-color:#d4f8e5; padding:5px; border-radius:5px;">Other</span> section(or use search there). |
[[File:Medical test enable path.png|border|center|1200px]] | [[File:Medical test enable path.png|border|center|1200px]] | ||
<br><br> | <br><br> | ||
:2. On the right side of the page select your preferences for results display.<br> | :2. On the right side of the page select your preferences for results display.<br> | ||
| − | :It is mandatory to either enable Client Login custom feature or "Attach results as PDF to email | + | :It is mandatory to either enable <span style="background-color:#cdeffc; padding:5px; border-radius:5px;">[[Client_Login_custom_feature|Client Login]]</span> custom feature or <span style="background-color:#d4f8e5; padding:5px; border-radius:5px;">Attach results as PDF to email</span> option. Otherwise the feature will not work. |
[[File:Medical test settings path.png|border|center|1200px]] | [[File:Medical test settings path.png|border|center|1200px]] | ||
<br><br> | <br><br> | ||
| − | :3. Select whether you would like your clients to be informed about certain test result and adjust the templates below. | + | :3. Select whether you would like your clients to be informed about certain <span style="background-color:#d4f8e5; padding:5px; border-radius:5px;">test result</span> and <span style="background-color:#d4f8e5; padding:5px; border-radius:5px;">adjust the templates</span> below. |
[[File:Medical test notifications preferences.png|border|center|1200px]] | [[File:Medical test notifications preferences.png|border|center|1200px]] | ||
<br><br> | <br><br> | ||
| − | :4. Navigate to "Results form | + | :4. Navigate to <span style="background-color:#d4f8e5; padding:5px; border-radius:5px;">Results form</span> near this custom feature or to <span style="background-color:#d4f8e5; padding:5px; border-radius:5px;">Custom features</span> -> <span style="background-color:#d4f8e5; padding:5px; border-radius:5px;">Medical test</span> in left-side menu to start working with the testing process.<br> |
<br><br> | <br><br> | ||
| − | :5. On this page you will see the ticket search form. Please use ticket or booking code to find the necessary appointment details.<br> | + | :5. On this page you will see the ticket search form. Please use <span style="background-color:#d4f8e5; padding:5px; border-radius:5px;">ticket or booking code</span> to find the necessary appointment details.<br> |
| − | :If you are using mobile browser and have allowed camera access you can also scan the client's ticket QR code.<br> | + | :If you are using mobile browser and have allowed camera access you can also <span style="background-color:#d4f8e5; padding:5px; border-radius:5px;">scan the client's ticket QR code.</span><br> |
| − | :If you have admin mobile application please use QR scanning function there. | + | :If you have <span style="background-color:#d4f8e5; padding:5px; border-radius:5px;">admin mobile application</span> please use <span style="background-color:#d4f8e5; padding:5px; border-radius:5px;">QR scanning</span> function there. |
[[File:Medical test ticket search.png|border|center|1200px]] | [[File:Medical test ticket search.png|border|center|1200px]] | ||
<br><br> | <br><br> | ||
| − | :6. After the client has come for the test, you have scanned his ticket, please validate it to check in and the next possibilities to appear. | + | :6. After the client has come for the test, you have scanned his ticket, please <span style="background-color:#d4f8e5; padding:5px; border-radius:5px;">validate it</span> to check in and the next possibilities to appear. |
[[File:Medical test process step 1.png|border|center|1200px]] | [[File:Medical test process step 1.png|border|center|1200px]] | ||
<br><br> | <br><br> | ||
| − | :7. As soon as the test materials are taken from the client please press on "Print label | + | :7. As soon as the test materials are taken from the client please press on <span style="background-color:#d4f8e5; padding:5px; border-radius:5px;">Print label,</span> print it(special printers are recommended) and stick to the test tube.<br> |
:The appointment will get "Work in progress - results not ready" status. | :The appointment will get "Work in progress - results not ready" status. | ||
[[File:Medical test process step 2.png|border|center|1200px]] | [[File:Medical test process step 2.png|border|center|1200px]] | ||
| Line 43: | Line 43: | ||
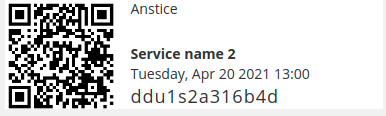
:[[File:Medical test printable label.png|border]] | :[[File:Medical test printable label.png|border]] | ||
<br><br> | <br><br> | ||
| − | :8. When you receive the results, open this interface again, scan the QR from the test tube label to find the appointment. | + | :8. When you receive the results, open this interface again, <span style="background-color:#d4f8e5; padding:5px; border-radius:5px;">scan the QR</span> from the test tube label to find the appointment. |
[[File:Medical test process step 3.png|border|center|1200px]] | [[File:Medical test process step 3.png|border|center|1200px]] | ||
<br><br> | <br><br> | ||
| − | :9. Select one of the three result options. | + | :9. Select one of the three <span style="background-color:#d4f8e5; padding:5px; border-radius:5px;">result options.</span> |
:As the result, the appointment status will be updated according to your selection.<br> | :As the result, the appointment status will be updated according to your selection.<br> | ||
:At this point the client will get the notification that the results are ready if you have it enabled in #3.<br> | :At this point the client will get the notification that the results are ready if you have it enabled in #3.<br> | ||
[[File:Medical test process step 4.png|border|center|1200px]] | [[File:Medical test process step 4.png|border|center|1200px]] | ||
<br><br> | <br><br> | ||
| − | :You can also print the test results if necessary.<br> | + | :You can also <span style="background-color:#d4f8e5; padding:5px; border-radius:5px;">print the test results</span> if necessary.<br> |
[[File:Medical test process printable result.png|border|center|350px]] | [[File:Medical test process printable result.png|border|center|350px]] | ||
<br><br> | <br><br> | ||
| − | :10. All the tickets with the medical test result statuses are available for viewing and export in Reports -> Tickets report | + | :10. All the tickets with the medical test result statuses are available for viewing and export in <span style="background-color:#d4f8e5; padding:5px; border-radius:5px;">Reports</span> -> <span style="background-color:#d4f8e5; padding:5px; border-radius:5px;">Tickets report.</span> |
[[File:Medical test tickets report results column.png|border|center|1200px]] | [[File:Medical test tickets report results column.png|border|center|1200px]] | ||
<br><br> | <br><br> | ||
Revision as of 10:29, 21 April 2021
The medical test feature allows you to easily check in persons for testing, and send them access to results after their test results are ready. On arrival, their ticket is scanned and they get an arrived status. This ticket can be printed and put on the persons test tube. When the results are ready, the ticket can be scanned for quick processing of results that will be sent to a person via email and/or SMS. The results can be added in a message, or person can be asked to log in to their account on booking website to get the results and a downloadable PDF form with company branding.
Please note!
- When you enable Medical Test custom feature Tickets feature will be enabled as well;
- This custom feature is available with certain subscriptions only. Please check your plan details to see if it is included.
- How to use
- 1. Enable Medical test custom feature on your Custom features page, Other section(or use search there).

- 2. On the right side of the page select your preferences for results display.
- It is mandatory to either enable Client Login custom feature or Attach results as PDF to email option. Otherwise the feature will not work.

- 3. Select whether you would like your clients to be informed about certain test result and adjust the templates below.

- 4. Navigate to Results form near this custom feature or to Custom features -> Medical test in left-side menu to start working with the testing process.
- 5. On this page you will see the ticket search form. Please use ticket or booking code to find the necessary appointment details.
- If you are using mobile browser and have allowed camera access you can also scan the client's ticket QR code.
- If you have admin mobile application please use QR scanning function there.

- 6. After the client has come for the test, you have scanned his ticket, please validate it to check in and the next possibilities to appear.

- 7. As soon as the test materials are taken from the client please press on Print label, print it(special printers are recommended) and stick to the test tube.
- The appointment will get "Work in progress - results not ready" status.

- Test tube label example:

- 8. When you receive the results, open this interface again, scan the QR from the test tube label to find the appointment.

- 9. Select one of the three result options.
- As the result, the appointment status will be updated according to your selection.
- At this point the client will get the notification that the results are ready if you have it enabled in #3.

- You can also print the test results if necessary.

- 10. All the tickets with the medical test result statuses are available for viewing and export in Reports -> Tickets report.
